Display bezel, Display panel, Removing the display panel – Dell Latitude C840 User Manual
Page 13
Display Bezel
1.
Use a scribe to pry out the four rubber screw covers located across the top of the bezel.
2.
Remove the four M2.5 x 4-mm screws located across the top of the bezel.
3.
Use a scribe at the indentations to pry out the two plastic screw covers located at the bottom of the bezel.
4.
Remove the two M2.5 x 4-mm screws located at the bottom of the bezel.
5.
Separate the bezel from the top cover.
The bezel is secured to the top cover with plastic tabs around the sides. Use a plastic scribe to help separate the bezel from the top cover.
Display Panel
Removing the Display Panel
1.
Remove the
2.
Detach the
from the strain relief and the graphics card.
3.
Remove the
.
4.
Remove the M2.5 x 4-mm screw that secures the plastic flex-cable mounting bracket to the top cover.
5.
Remove the six M2 x 3-mm screws (three on each side) from the right and left sides of the panel.
6.
Lift the display panel and flex cable out of the top cover.
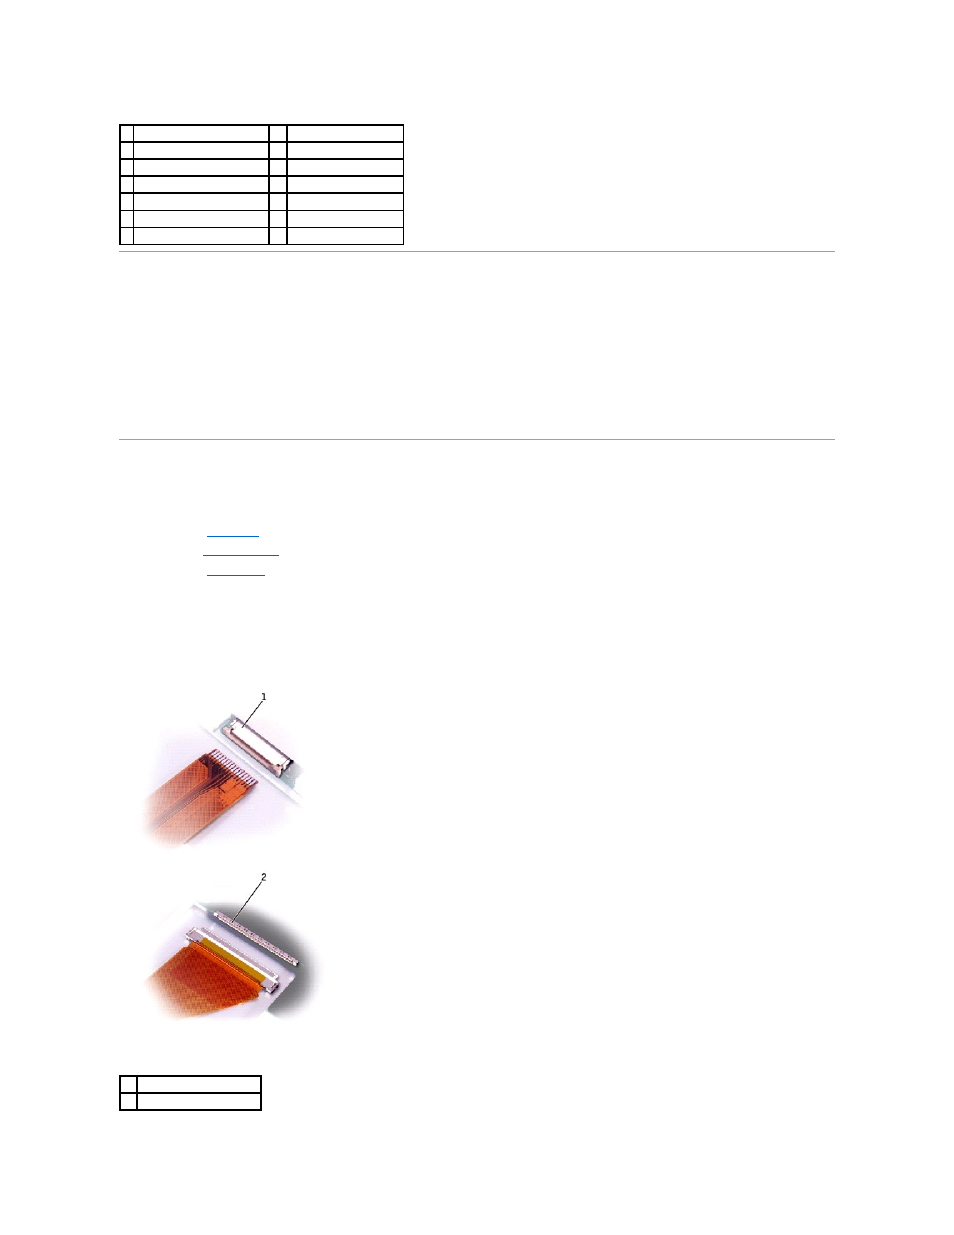
7.
Disconnect the flex cable from the two connectors (one ZIF and one standard connector) on the display panel.
1 M2.5 x 4-mm screws (6)
8
M2 x 3-mm screws (6)
2 rubber screw covers (4)
9
top cover
3 display bezel
10 hinge cover
4 plastic tabs (6)
11 display flex cable
5 M2.5 x 4-mm screw
12 display panel
6 flex-cable mounting bracket
13 plastic screw covers (2)
7 display latch
1
ZIF connector
2
standard connector