Adding a second cd or dvd drive – Dell Dimension 1100/B110 User Manual
Page 42
6. Connect the power cable to the system board (see
7. Connect the power and CD/DVD drive cables to the drive and to the system board
(see
8. If you are installing a drive that has its own controller card, install the controller card in a card slot.
9. Reattach the front panel (see
10. Replace the computer cover (see
).
NOTICE:
To connect a network cable, first plug the cable in to the network wall jack and then plug it into the
computer.
11. Connect your computer and devices to their electrical outlets, and turn them on.
See the documentation that came with the drive for instructions on installing any software required for drive operation.
12. Enter system setup (see
) and select the appropriate Drive option.
13. Verify that your computer works correctly by running Dell Diagnostics.
Adding a Second CD or DVD Drive
1. Ensure that the jumper setting on the new drive is set for "cable select" (see the documentation that came with the
drive for information).
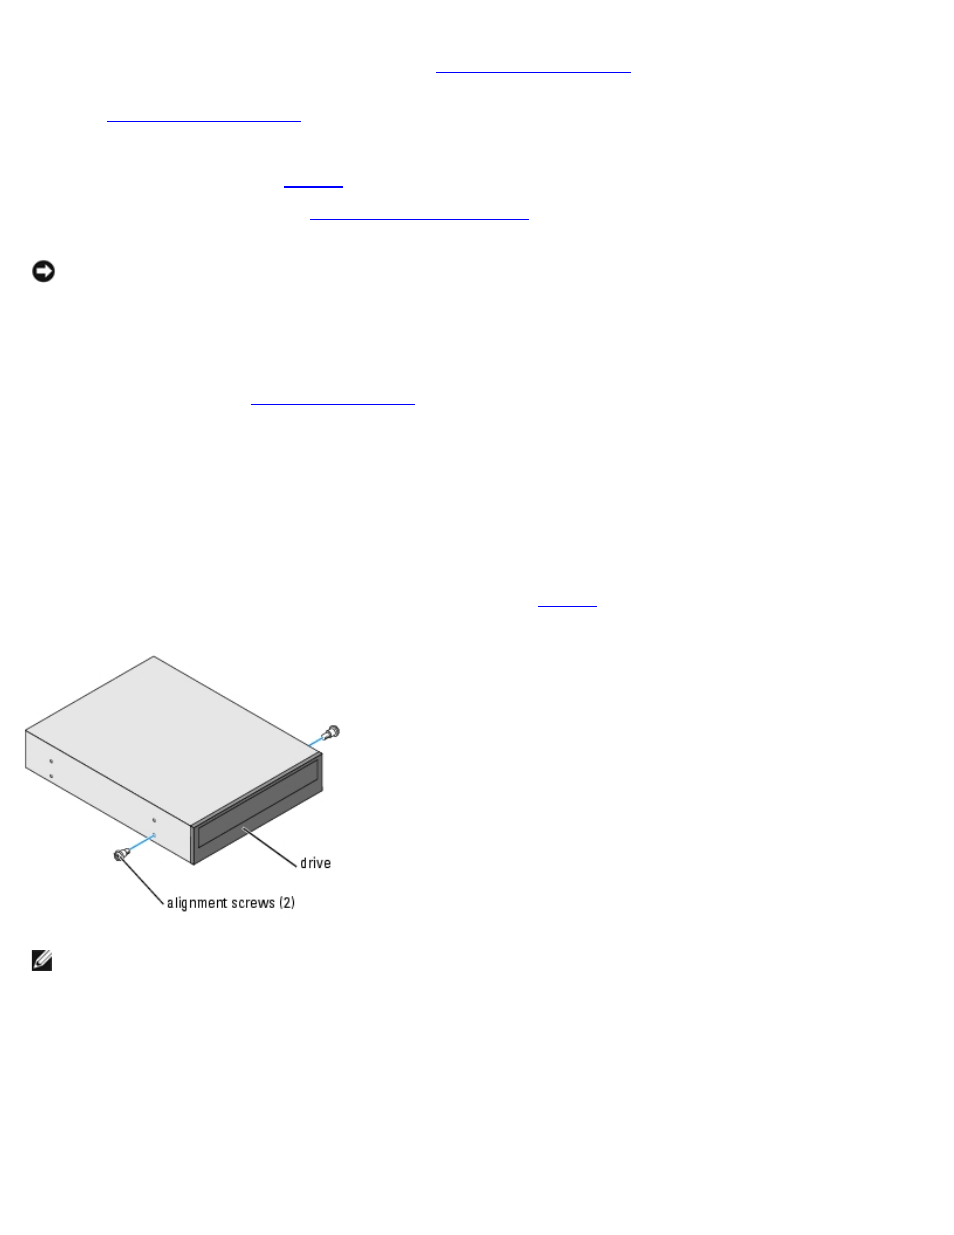
2. Remove two extra alignment screws, shown in the illustration on
, from the front of the computer and insert
them into the drive.
NOTE:
Some computers come with only two extra alignment screws; others come with four. You only need two
alignment screws for this procedure.
3. Gently slide the drive into place in the drive bay.