Step e - install ro faucet (cont.) – EcoPure ECOP30 User Manual
Page 15
15
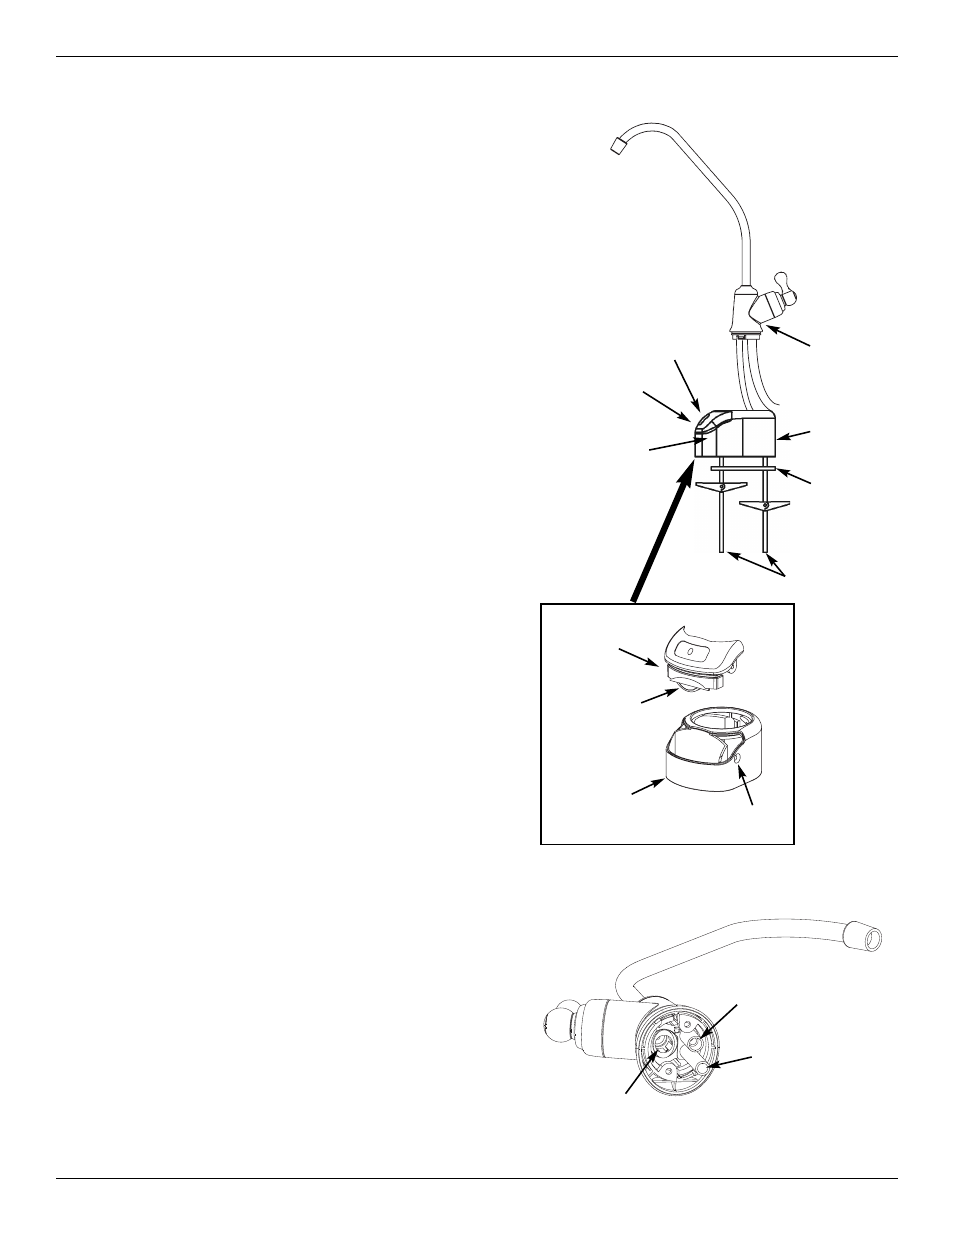
Step E - Install RO Faucet (cont.)
INSTALL REVERSE OSMOSIS FAUCET
1. Locate and organize your RO faucet install parts. Refer to
Fig. 16.
2. Mount faucet base to sink hole until the faucet base is flat
against the sink surface. The rubber gasket should be
between the sink surface and the faucet base.
3. Tighten the toggle bolts until the base is firmly mounted to
the sink surface. Do not overtighten.
4. Locate the faucet body. (The black and blue tubes are
already connected to the faucet.) Insert these tubes into
the sink hole until approximately one foot of tube length
and the faucet body are left above the counter surface.
Do not kink the tubes in the process. See Fig. 15.
NOTE: If you routed the red drain tubing directly to a
remote drain point (see page 9), disregard step 5 and
move on to step 6.
5. Locate the 1/4" red tubing. One end is connected to the
RO filter assembly. See Fig 24.
A. Route the loose end of the red tube through countertop
to faucet.
B. Cut the loose end of the red tube square and to length.
See Fig. 19 for tube cutting instructions.
NOTE: Tubing lengths should allow for the removal of
the assembly from the hanger washers for servicing. If
tubing lengths are shortened for neater appearance, it
may be necessary to keep the assembly on the hanger
washers for service.
C. Insert all the way onto the 1/4" faucet barb fitting on
faucet. See Figs. 17, 20 & 21.
D. Pull on the tubing to be sure it is held firmly in the fit-
ting.
6. Mount the faucet body onto the faucet ba
se, 1/4 turn.
FAUCET ELECTRONICS
Inside the faucet base is a battery operated 6 month timer.
An amber LED indicator is also located in the front of the
faucet base. This LED will flash continuously after 6 months
has passed. This indicates that it is time to replace the
battery, prefilter and postfilter.
INSTALL BATTERY
To install battery, complete the following steps.
1. Remove the screw on the right side of the faucet base.
2. Press the battery housing upward from the front faucet
base until it releases from the faucet base. See Fig. 16.
3. Install the battery (CR 2032 or equivalent). Place battery
into the holder with the positive (+) side facing the back of
the holder.
4. When the battery is installed the LED will flash six times
and turn off. This indicates the battery is fully charged.
After the six flashes, the timer enters the 6 month time
cycle.
NOTE: If the LED repeatedly flashes two times, the
battery needs to be replaced.
5. Re-install the battery housing and firmly tighten the mount-
ing screw. See Fig. 16.
FIG. 16
FIG. 17
BLUE TUBE
3/8” quick connect
fitting for the blue tube
BLACK TUBE
3/8” barb fitting
for the black tube
RED TUBE
1/4” barb fitting
for the red tube
Battery
Housing
Battery,
negative (–)
side facing
the front
Faucet
Base
Screw
Toggle Bolts
Rubber
Gasket
Faucet
Base
Screw holding
the battery
housing in place
Amber LED
Timer
Housing
Faucet
Body