Bio-Rad Precision Melt Analysis™ Software User Manual
Page 2
Melt Calibration
Before Precision Melt Analysis software can analyze data generated on
a CFX96, CFX96 Touch, CFX96 Touch Deep Well, CFX Connect, CFX384,
or CFX384 Touch real-time PCR detection system, a melt calibration must
be performed. The procedure requires running an experiment and then
importing the data into Precision Melt Analysis software to generate a melt
calibration file. The software is shipped with a calibration kit that includes
the following materials:
n
Melt calibration DNA standard
n
Melt calibration primers
n
Precision melt supermix (catalog #172-5110)
Additional Materials Required
In addition to the components provided in the melt calibration kit,
the following materials are required:
n
PCR-grade tubes
n
Nuclease-free water
n
Microseal
®
'B' adhesive seals, optically clear (catalog #MSB-1001)
n
Hard-Shell
®
thin-wall 384-well skirted PCR plates with clear shell
and white wells (catalog #HSP-3805) for use with a CFX384 or
CFX384 Touch system
n
Hard-Shell thin-wall 96-well skirted PCR plates with white shell and
clear wells (catalog #HSP-9601) or white wells (catalog #HSP-9655)
for use with a CFX96, CFX96 Touch, CFX96 Touch Deep Well, or
CFX Connect system
Preparing a Melt Calibration Plate
1. Add the required volume of each component to an appropriately
sized tube (Table 1).
2. Cap the tube and gently mix the reaction components by vortexing.
3. Briefly centrifuge the tube to remove air bubbles and collect
contents at the bottom of the tube.
4. Add the appropriate volume of the mixture into each well of a
reaction plate:
n
For a CFX96, CFX96 Touch, CFX96 Touch Deep Well, or
CFX Connect system, add 20 µl of the reaction mixture to each
well of a 96-well plate
n
For a CFX384 or CFX384 Touch system, add 10 µl of the reaction
mixture to each well of a 384-well plate
5. Seal the reaction plate with a Microseal 'B' adhesive seal. Centrifuge
the plate at 1000 x g for 2 min to move all the reaction components
to the bottom of the wells.
Performing a Melt Calibration Experiment
A melt calibration experiment is run on a CFX96, CFX96 Touch,
CFX96 Touch Deep Well, CFX Connect, CFX384, or CFX384 Touch real-
time PCR detection system and analyzed using CFX Manager
™
software.
To run a melt calibration to generate a melt calibration data file:
1. Turn on the CFX system.
2. Double click the CFX Manager software desktop icon to launch
the software.
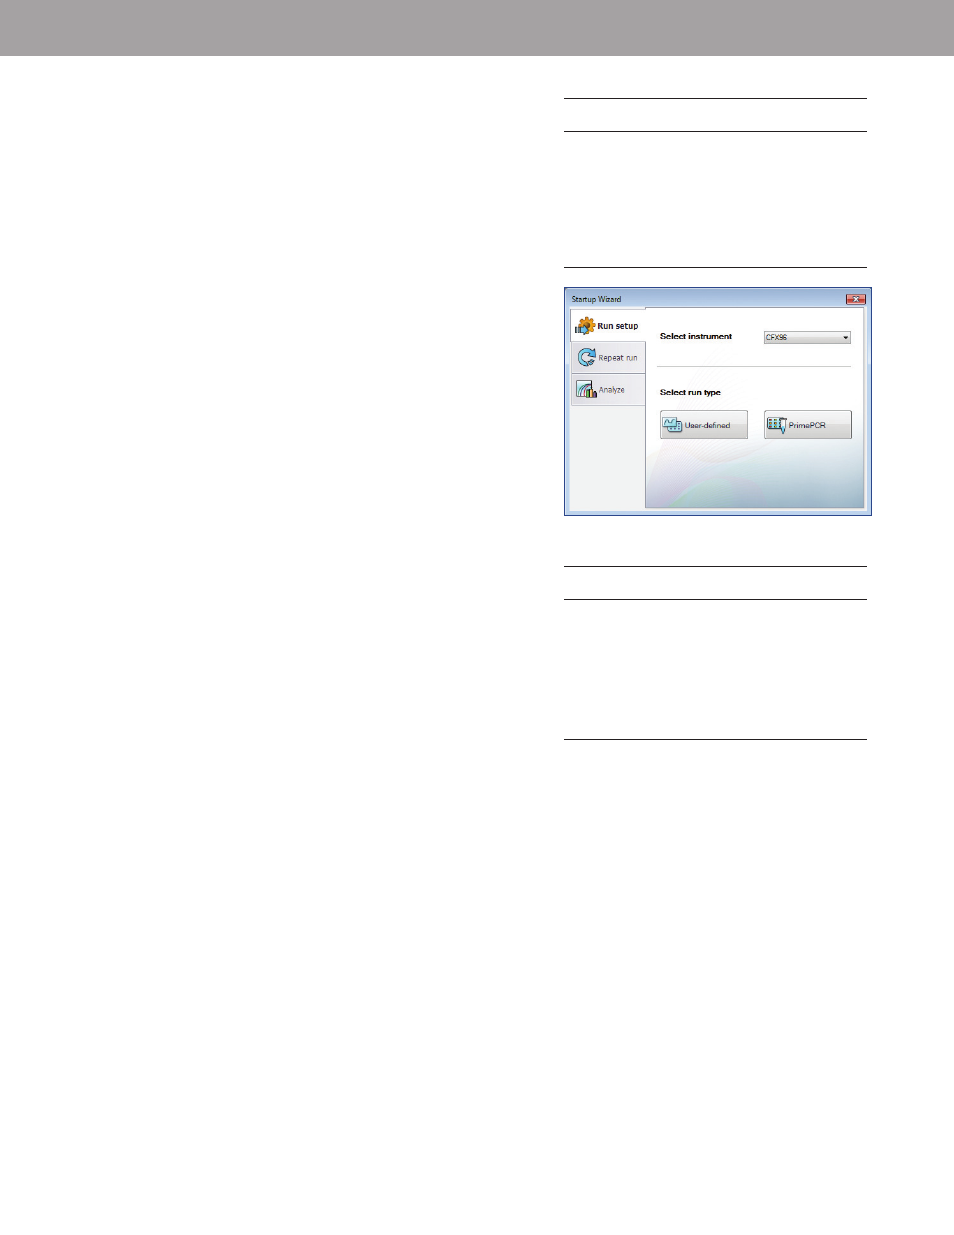
3. Select
User-defined from the Run setup tab of the Startup Wizard
(Figure 3) to launch the Run Setup window.
Table 1. Reaction setup for a melt calibration plate.
Volume for
Volume for
Component
CFX96 System
CFX384 System
Precision melt
1,200 µl
2,250 µl
supermix
Melt calibration
120 µl
450 µl
DNA standard
Melt calibration
14.4 µl
27 µl
primers
Nuclease-free water 1,065.6 µl
1,773 µl
Total
2,400 µl
4,500 µl
Table 2. Melt calibration PCR protocol.
Number
Cycling Step
Temperature Time
of Cycles
Enzyme activation
98°C
2 min
1
Denaturation
98°C
5 sec
35
Annealing/extension 55°C
10 sec
95°C
1 min
1
70°C
1 min
1
Melt curve
70–95°C
10 sec/step 1
(in 0.2°C
increments)
Fig. 3. Startup Wizard in CFX Manager software.