Using the radar – B&G Zeus Touch 12 User Manual
Page 48
| 47
Using the radar |
Zeus Touch Operator Manual
Using the radar
The radar panel can be set up as a full screen view or combined with other panels.
The radar image can also be displayed as an overlay to existing 2D chart views and 3D for
Navionics. Refer to “Charts” on page 14.
¼
Note:
Radar overlay requires data from heading sensor.
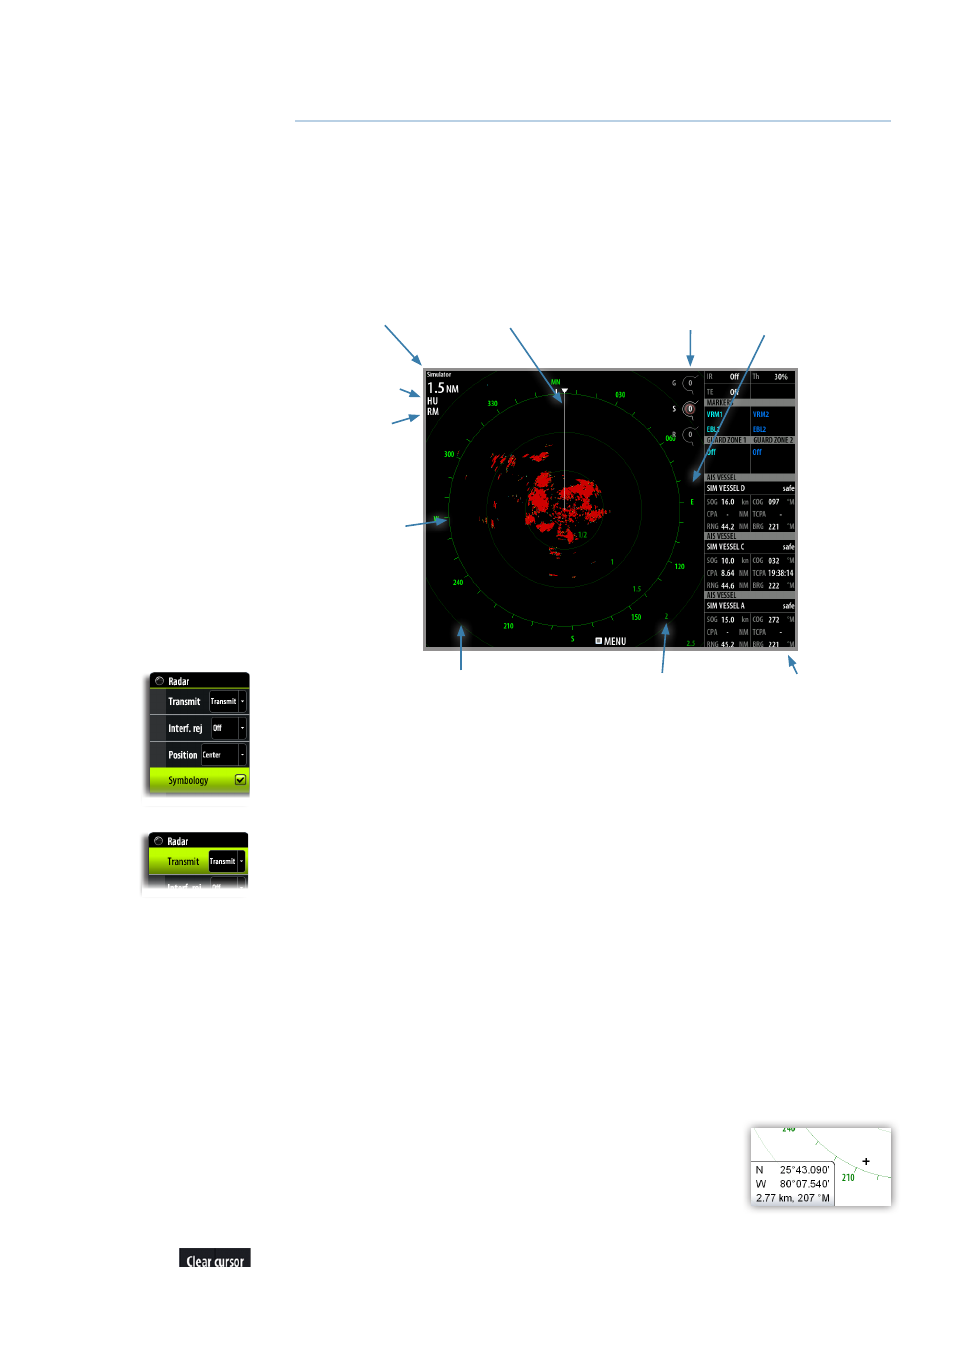
The radar panel
Range markers *
Range rings *
North Indicator *
Rotary controls
Range
Orientation
Motion
Data bar**
Heading line *
Compass *
* Optional radar symbology.
** Only available on Zeus Touch8 and Zeus Touch12.
Radar symbology can be turned ON/OFF collectively from the Radar menu, or individually as
described in “Radar settings panel” on page 54.
The radar operational modes
The radar’s operational modes are controlled from the Zeus Touch unit. The following modes
are available:
Off
The power to the radar scanner is turned off
Standby
The power to the radar scanner is on, but the radar is not transmitting.
Transmit
The scanner is on and transmitting. Detected targets will be drawn on the radar PPI (Plan
Position Indicator).
Using the cursor on the radar panel
The cursor is by default not shown on the radar image.
When you tap the radar panel the cursor and the cursor position
window will be activated.
The cursor can be used to measure a distance to a target, and to
select targets as described later in this section.
To remove the cursor and cursor elements from the panel, press the
Clear cursor
panel key
or the X key.
7