Step 3. run aegis formatter, Using the logon feature for windows – Apricorn Aegis Bio - USB 2.0 User Manual
Page 14
Value You Can Depend On
14
Step 3. Run Aegis Formatter
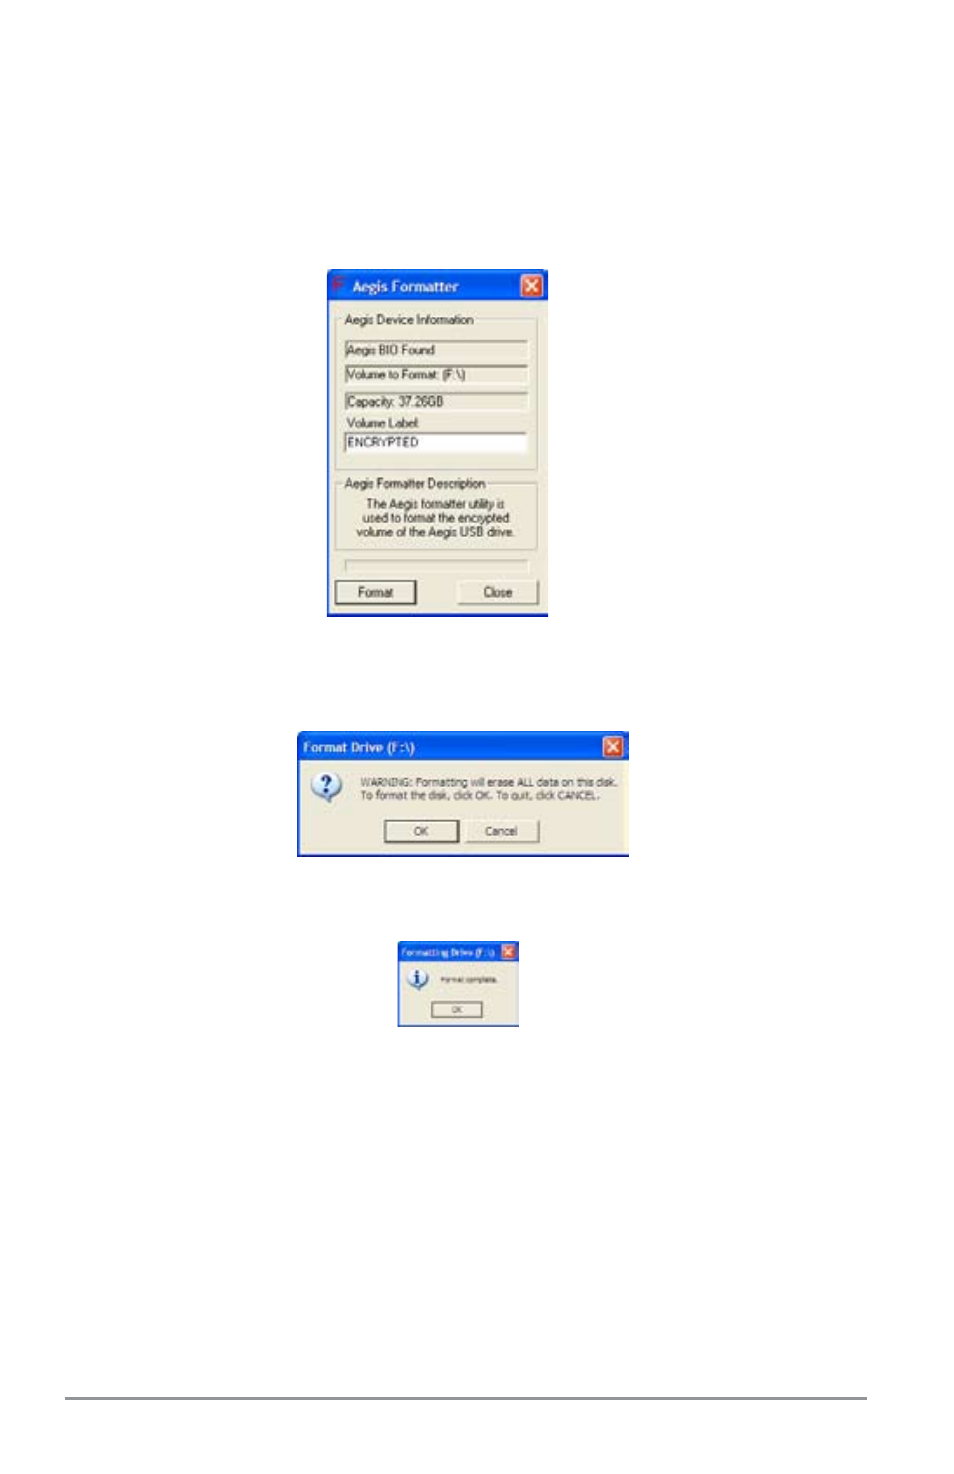
Before you can use the Aegis Bio, it has to be formatted in FAT32.
1.
This is done from the “Aegis Formatter” window. By default the volume
label is set to “ENCRYPTED”, you can change the volume label to give
your drive a user friendly name. Either accept or change the volume
label now and then click the “format” button.
A warning window will appear informing you that formatting your
2.
drive will erase all the contents of the drive. Since this is a new drive and
there is nothing on the drive to erase, press the “OK” button to format
the drive.
A “Format Complete” window will popup, click the “OK” button to
3.
close the window. Click the “Close” button on the “Aegis Formatter”
window to close the Aegis Formatter program.
Your Aegis Bio is now ready to use.
4.
Using the Logon Feature for Windows
The first time you Log on after installing the Logon feature for
Windows you will be prompted to swipe your finger and enter your
logon information. On a host system with Windows XP, you will see a
new banner with an Aegis Bio connection message. On host system
with Windows Vista, there will be a new fingerprint user icon with the
connection message below it.