Great Plains NTA 2000 export model Assembly Instructions User Manual
Page 6
148-679M
5/9/2007
Great Plains Mfg., Inc.
Small Seeds Option
6
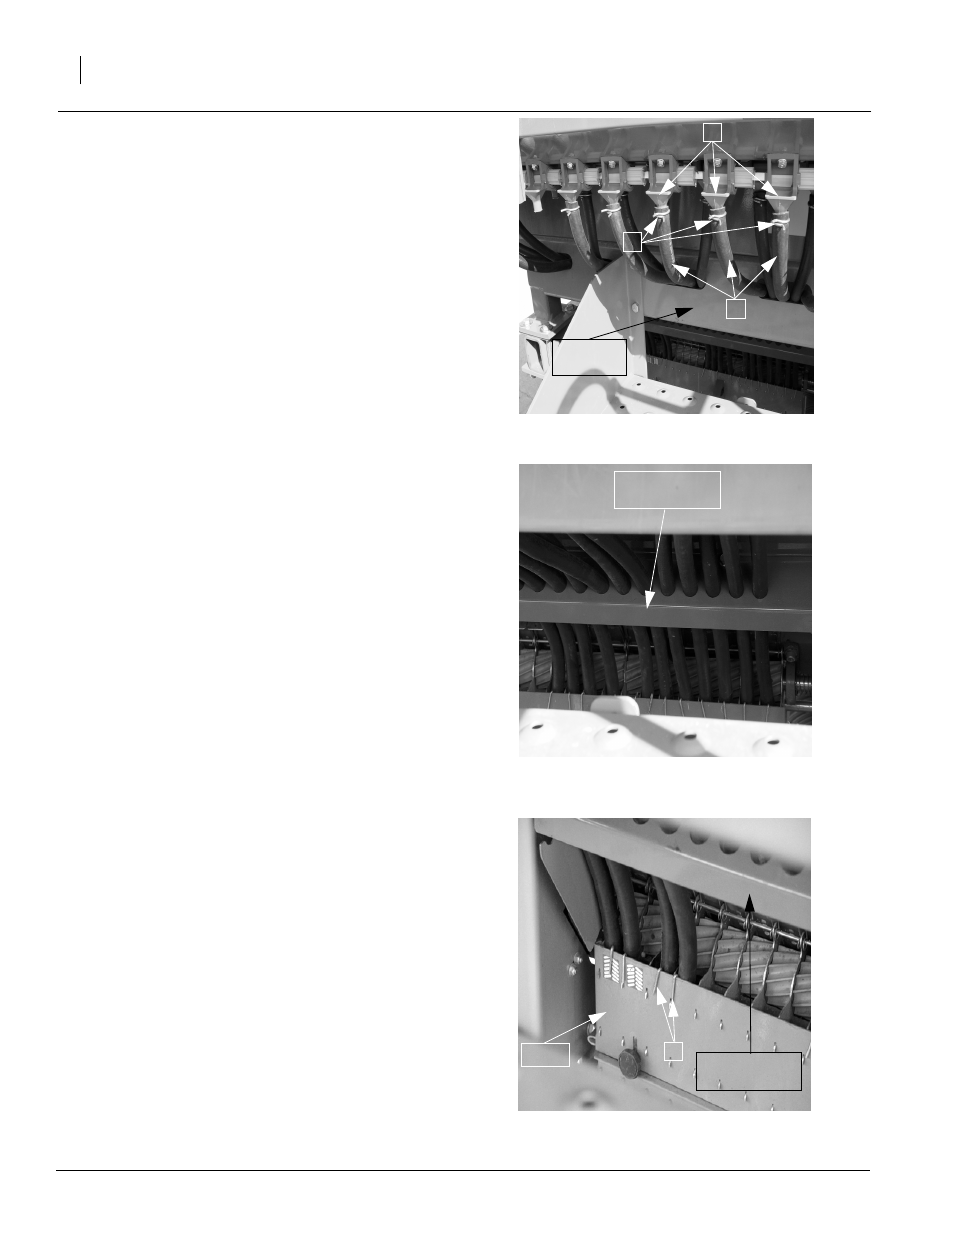
Refer to Figure 10
24. Route seed hose (b) through the slot in the
bin rest weldment.
Refer to Figure 11
25. Route the seed hose along the back of the
main seed hopper and through one of the
holes in the hose support bracket.
Refer to Figure 12
26. Attach a spring clip (a) to the end of the hose.
27. Slide the spring clip (a) over the edge of the
meter with the hose inside the meter. Select
the meter which is directly below the hole in
the support bracket.
Refer back to Figure 10
28. Pull seed hose up until it reaches the seed
cup (a). Choose a seed cup (a) closest to the
hole in the hose support bracket. Remove all
excess hose slack. Be careful not the pull the
hose out of the meter.
29. Cut the seed hose (b) and attach it to the seed
cup (a) using hose clamp (c).
30. Repeat steps 24 through 29 for the remaining
feed cups.
31. Plug any unused feed cups with feed cup
plugs.
Figure 12
Spring Clips
20207
Figure 10
Bin Rest Weldment
Figure 11
Hose Support Bracket
20218
20217
Bin Rest
Weldment
a
c
b
Hose Support
Bracket
a
Hose Support
Bracket
Meter