Assembly instructions – Great Plains Terra-Tine Row Cleaner User Manual
Page 9
5/2/2005
207-016M
7
Operating and Assembly Instructions
12. If a hydraulic leak develops, correct it
immediately. Escaping hydraulic oil can have
extremely high pressure. A stream of high
pressure oil may easily penetrate the skin as
with modern needle-less vaccination
equipment - but with the exception that
hydraulic fluid may cause blood poisoning. It
is imperative that the connections are tight
and that all lines and pipes are in good
condition. If an injury is caused by the
escaping hydraulic fluid, see doctor at once!
13. Use a piece of cardboard or wood to detect
leaks of hydraulic oil under pressure.
14. Be sure to relieve all hydraulic pressure before
disconnecting any lines or pipes between the
implement and the tractor hydraulic system.
Keep all guards and shields in place.
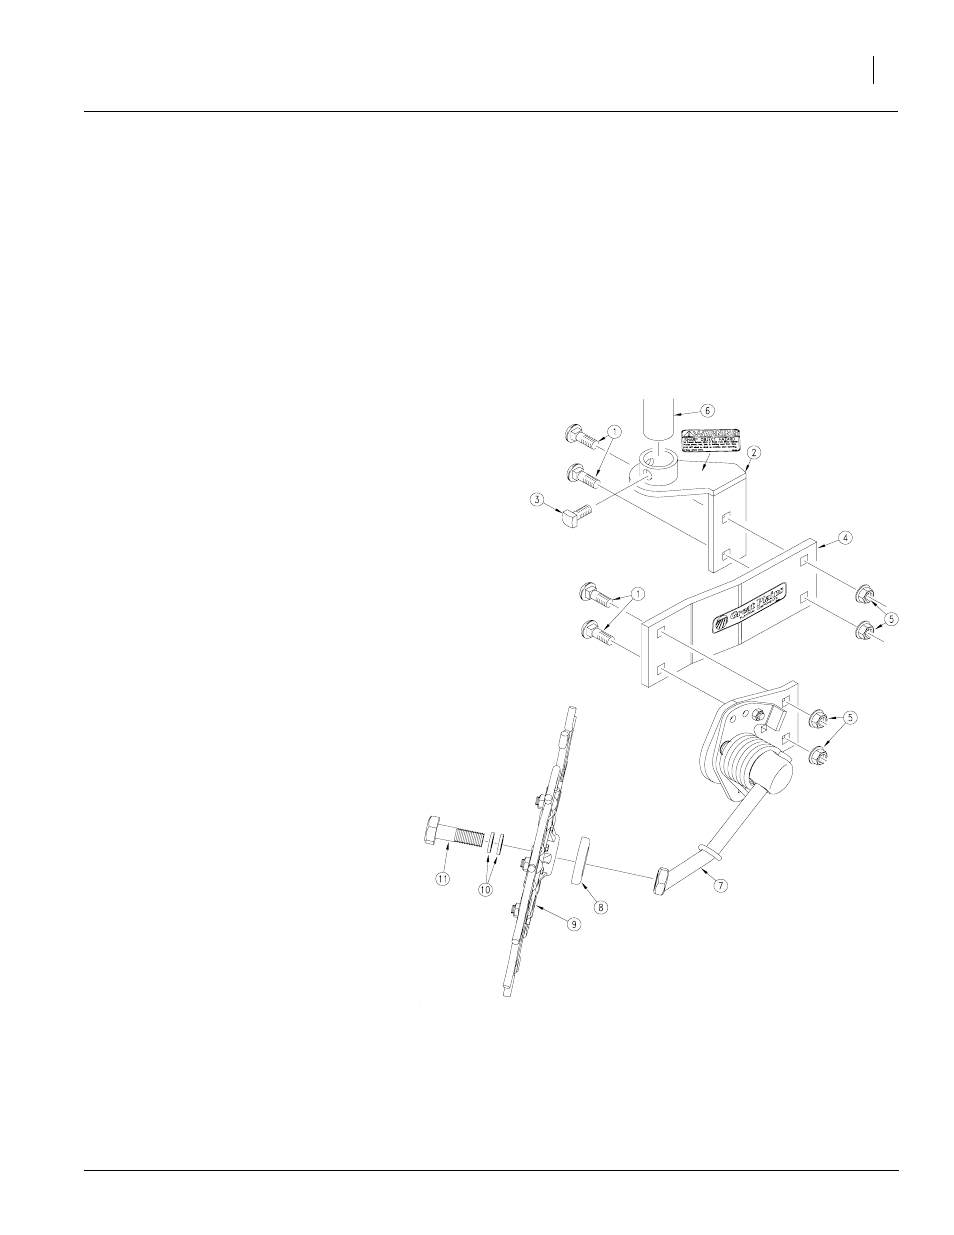
Assembly Instructions
Your Terra-Tine™ Row Cleaner comes to you
partially assembled. Follow the instructions below
for assembly and mounting.
Refer to Figure 1
1.
Mount the Terra-Tine™ wheel (9) to the pivot
arm assembly (7) using bolt (11), washers
(10) and dust cover (8).
2.
Place the shank mount (2) above the coulter
mount on the 1 1/2” vertical shaft (6) (pur-
chased separately). Position the set screw (3)
in the mount. Do not tighten at this time.
3.
(Optional) Bolt the Terra-Tine™ extension
arm (4) to the shank mount (2) using the
carriage bolts (1) and flange nuts (5).
4.
Using the carriage bolts (1) and the flanged
nuts (5), fasten the wheel and arm assembly
(7) to the extension arm (4) or shank mount
(2).
5.
Consult the “Adjustments” section to this
manual before tightening all hardware. When
the Terra-Tine™ wheel is in the desired
position, tighten all hardware.
Figure 1
Assembly
20113