Intake hitch, Pto sd - drive & shield – Wheatheart WHR 130 x 31-36ft Augers PTO-SD User Manual
Page 17
WHEATHEART - GHR130 & WHR130 GRAIN AUGERS
3. A
SSEMBLY
PTO-SD & EMD D
RIVE
M
ODELS
3.4. I
NTAKE
H
ITCH
16652 R1
17
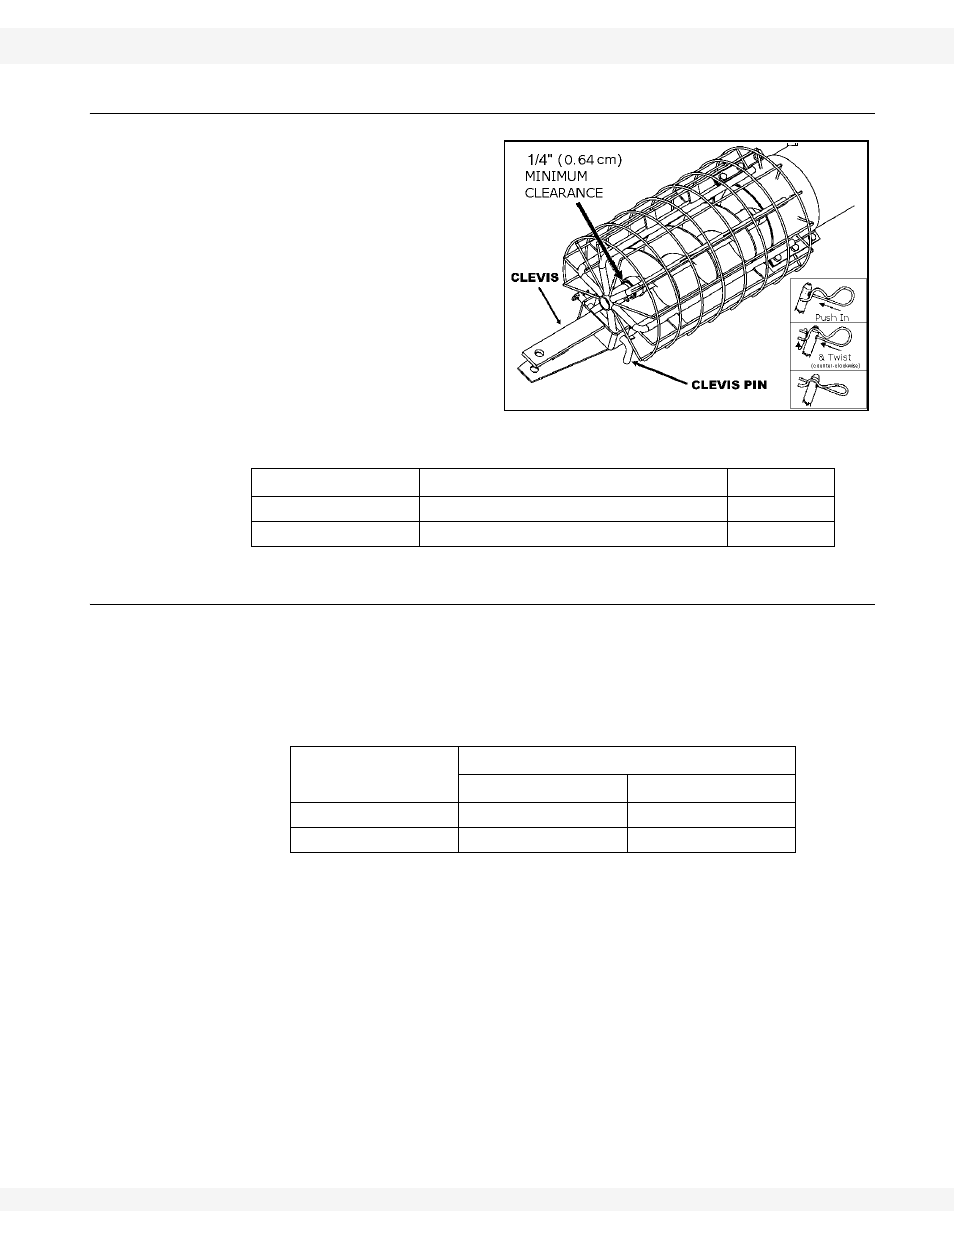
3.4. INTAKE HITCH
1. Clean dirt and paint from
lower flight stub and intake
bushing.
2. Attach intake hitch to lower
auger tube and tighten
securely.
3. Maintain 1/2” (1.27 cm)
clearance between bushing
and end of flight.
4. Attach clevis to intake hitch
with clevis pin and grip clip.
3.5. PTO SD - DRIVE & SHIELD
Upper sections of the driveshaft are factory installed. To install the lower section
follow the steps below.
1. Check Table below for correct sequence for your auger.
2. Clean dirt and paint from driveshaft ends, inside couplers, and PTO driveline
yoke.
3. Remove chain from chain coupler on gearbox, then attach chain coupler
sprocket to driveshaft with a 1/4" x 1-1/2" square key. Tighten set screws.
4. Place
gearbox
assembly
on auger tube, then reinstall chain-to-chain coupler
leaving minimum of 1/16" (1.6 mm) between coupler sprockets.
5. Secure gearbox assembly to auger tube with two half bands and four
7/16" x 1-1/4" bolts and locknuts. Tighten securely.
Important:
Fill gearbox half full only with EP90 lube oil before operating auger. Do not over
fill. Failure to heed will void warranty. It is easier to fill oil into gearbox when in flat
position.
6. Attach the chain coupler guard to gearbox base with two 3/8" x 3/4" bolts and
washer locknuts (Figure 3.6).
Part
Size
Amt.
Intake Hitch
7/16” x 1-1/4” bolt and locknut
8
Clevis Pin
3/4”
1
Figure 3.5
AUGER MODEL
LOWER DRIVESHAFT
LENGTH
DIAMETER
13” x 31'
6' 4"
1-1/4"
13” x 36'
11' 8"
1-1/4"