Connecting the power adapter, Inserting the label cassette – Dymo LabelPoint 350 Hardware Manual User Manual
Page 2
4
Connecting the Power Adapter
An optional AC power adapter can also be used to
power the labelmaker. Connecting the AC adapter
to the labelmaker disconnects the batteries as a
power source.
To connect the power adapter
1. Plug the power adapter into the power connector
on the top, left side of the labelmaker.
2. Plug the other end of the power adapter into a
power outlet.
Make sure the labelmaker power is turned off
before you disconnect the power adapter from the
main power source. Otherwise, your most recent
memory settings will be lost.
Inserting the Label Cassette
Your labelmaker comes with one label cassette.
Visit www.dymo.com for information about
purchasing additional label cassettes.
To insert the label cassette
1. Press and release the label cassette cover to
open the label compartment. See Figure 4.
Figure 4
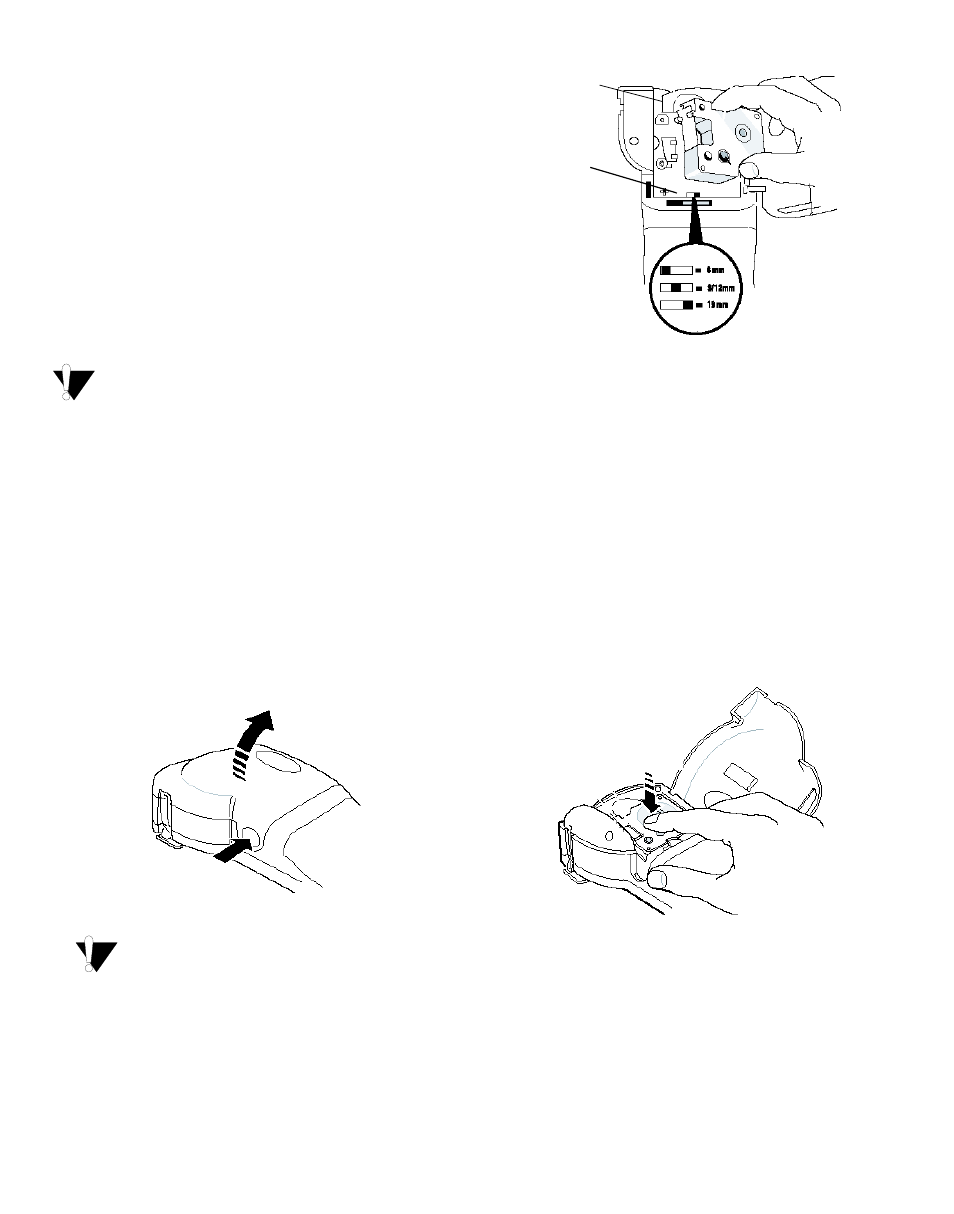
The first time you use the labelmaker,
remove the protective cardboard insert from
between the print head and pinch roller. See
Figure 5.
Figure 5
2. Set the cassette switch for the size of the label
cassette that you are inserting. See Figure 5.
A notch in the cassette fits over the switch when
the cassette is in the correct position.
3. Make sure the tape and ribbon are taut across
the mouth of the cassette and that the tape
passes between the guideposts. If necessary,
turn the spool clockwise to tighten the ribbon.
4. Insert the cassette with the tape and ribbon
positioned between the print head and pinch
roller. See Figure 6.
Figure 6
5. Press firmly until cassette clicks into place.
6. Close the label cassette cover and press
A
to
turn on the power.
Remove
Select tape
cassette size
cardboard insert
CLICK!