Viewing and deleting files – Wildview STC-TGL-X5IR User Manual
Page 5
www.wildviewcam.com
Toll Free 888‐304‐6125
17
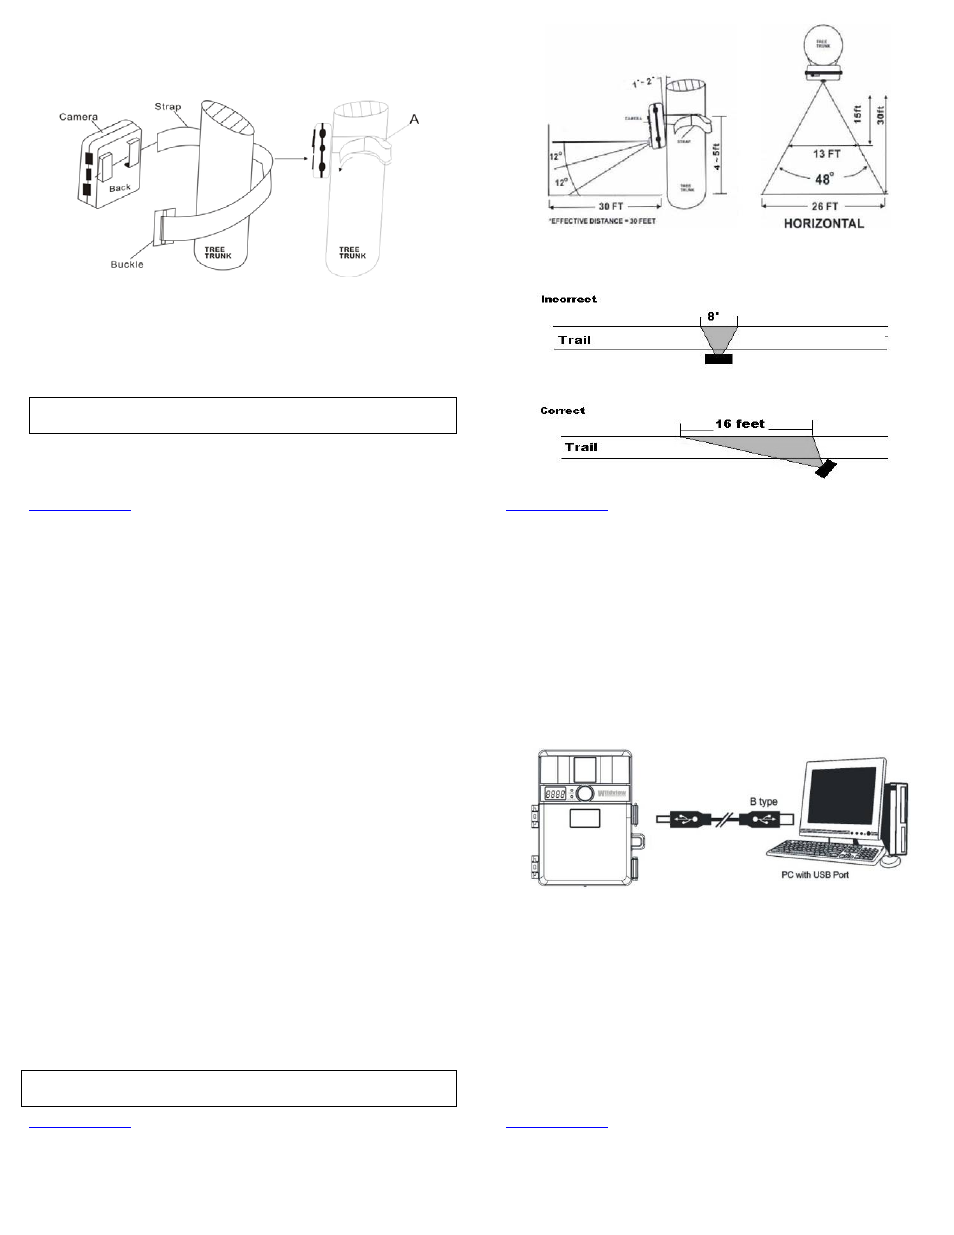
Mounting the camera with the supplied strap:
1. Insert the strap through the strap slots on the rear housing.
2. Wrap the strap around the mounting surface. Secure the strap and
tighten the buckle in order to secure the camera.
NOTE: In order to obtain proper weather resistance, please make sure that
both door latches are securely locked in place.
www.wildviewcam.com
Toll Free 888‐304‐6125
18
(Example: Mounting)
(Example: Trail Setup)
www.wildviewcam.com
Toll Free 888‐304‐6125
19
Testing the camera coverage area:
One of Wildview Scouting Camera’s features is the ability to test the coverage
area.
1. After mounting the camera, open front housing and slide the CAM toggle
switch to TEST position. The front LCD will display the word “tESt”.
2. Close the front housing.
3. Walk around to the front of the camera to see if you have mounted the
camera in the proper position. The green TEST light indicator on the front
will blink when you have intruded the coverage area.
4. Adjust the camera position as needed and repeat testing until the desired
coverage area is achieved.
5. When you have completed testing the coverage area, open the front
housing and slide the CAM toggle switch from TEST position to the ON
position.
¾ Caution: Do not move the switch from TEST directly to ON. Doing so
will cause the camera not to operate. Slide the switch to OFF. Wait
for the front LCD screen to turn off, then continue to slide the switch
to ON.
6. The front LCD counter will show “0000” and the green indicator light will
start blinking. The camera will enter count down mode for 1 minute,
giving you one minute to leave the coverage area. Then camera will be
armed and enter the PIR detection mode.
NOTE: Make sure you slide the power switch from TEST mode to ON mode
before you leave the field, otherwise the Camera will not take any pictures.
www.wildviewcam.com
Toll Free 888‐304‐6125
20
VIEWING AND DELETING FILES
Your Wildview Scouting Camera is a plug and play USB storage device for
users of Windows 2000 / ME / XP / Vista / Windows 7 operating systems.
This camera is not MAC compatible.
Viewing files from your computer download:
1. FIRST, slide the CAM toggle switch to the OFF position.
2. Plug the larger end of the USB cable into an available USB port on your
computer and plug the smaller end of USB cable into the camera.
3. The camera will automatically power itself on. Front LCD screen will show
“USb.”
4. At the same time, your computer will recognize the camera as a
Removable Storage device, and you can find it under MY COMPUTER.