Installing a valve on an actuator – VICI Two position Standard electric User Manual
Page 7
4.
INSTALLING A VALVE ON AN ACTUATOR
4.1 Preparing a Manual Valco Valve for Mounting on an Actuator
A manually switched 2 position valve has a handle or knob which must be re-
moved before the valve can be installed on the actuator. Sections 4.11 - 4.14
describe the procedures for various Valco valves.
4.11
Disassembly of a Manual W or UW Type Valve
1.
Rotate the knob counterclockwise so the valve is positioned properly for
later installation on the electric actuator.
2.
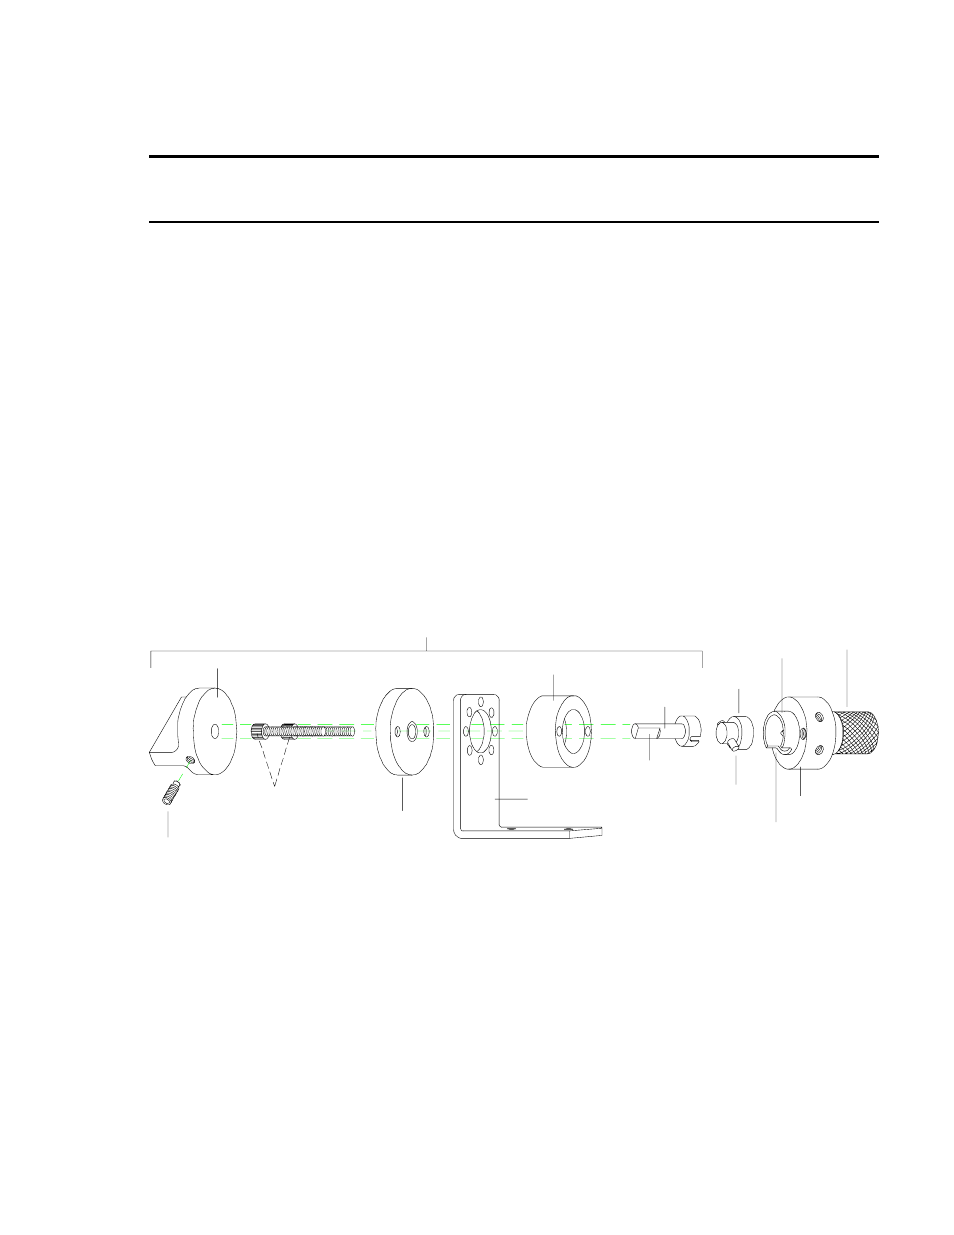
See Figure 4. Loosen the set-screw within the W valve knob and pull the
knob off of the manual drive shaft.
3.
Using a 9/64 hex driver, unscrew the two HWSC-SC8-16/socket head
screws (8-32 x 1") until the valve comes loose from the rest of the assembly.
Keep the driver with the valve.
4.
The rest of the assembly will slide easily apart, but you may wish to keep it
together for future use.
5.
Proceed to Section 4.2 for closemount assembly, or Section 4.3 if the valve
will go on a standoff before being installed on the actuator.
4.12
Removing the Handle or Knob from a Valve on a Standoff
1.
Rotate the knob counterclockwise so the valve is positioned properly for
later installation on the electric actuator.
2.
See Figure 5. Simply pull the handle or knob, with the manual handle
adapter and retainer, off of the standoff tube.
3.
Proceed to Section 4.3.
KNOB ASSEMBLY
WK/KNOB
HWSC-SC8-16
SCREWS
HWSC-SS8-5B/
SET-SCREW
WSB/SHAFT
BEARING
PLATE
STANDARD
ANGLE
BRACKET
WSH/SHAFT HOUSING
FLAT
FACE
WDS/MANUAL
DRIVE
SHAFT
PRE-LOAD
ASSEMBLY
WD/DRIVER
COLLAR
ROTOR
PIN
CUTOUT
VALVE
BODY
Figure 4: W or UW type valve with knob assembly
5