4 assembly of drive unit oil bath lubrication, Lubrication, Assembly of drive unit oil bath lubrication – Richter RMI Series User Manual
Page 20: Series rmi
Series RMI
Page 20
9470-050-en
Revision 00
TM 7978
Edition 08/2010
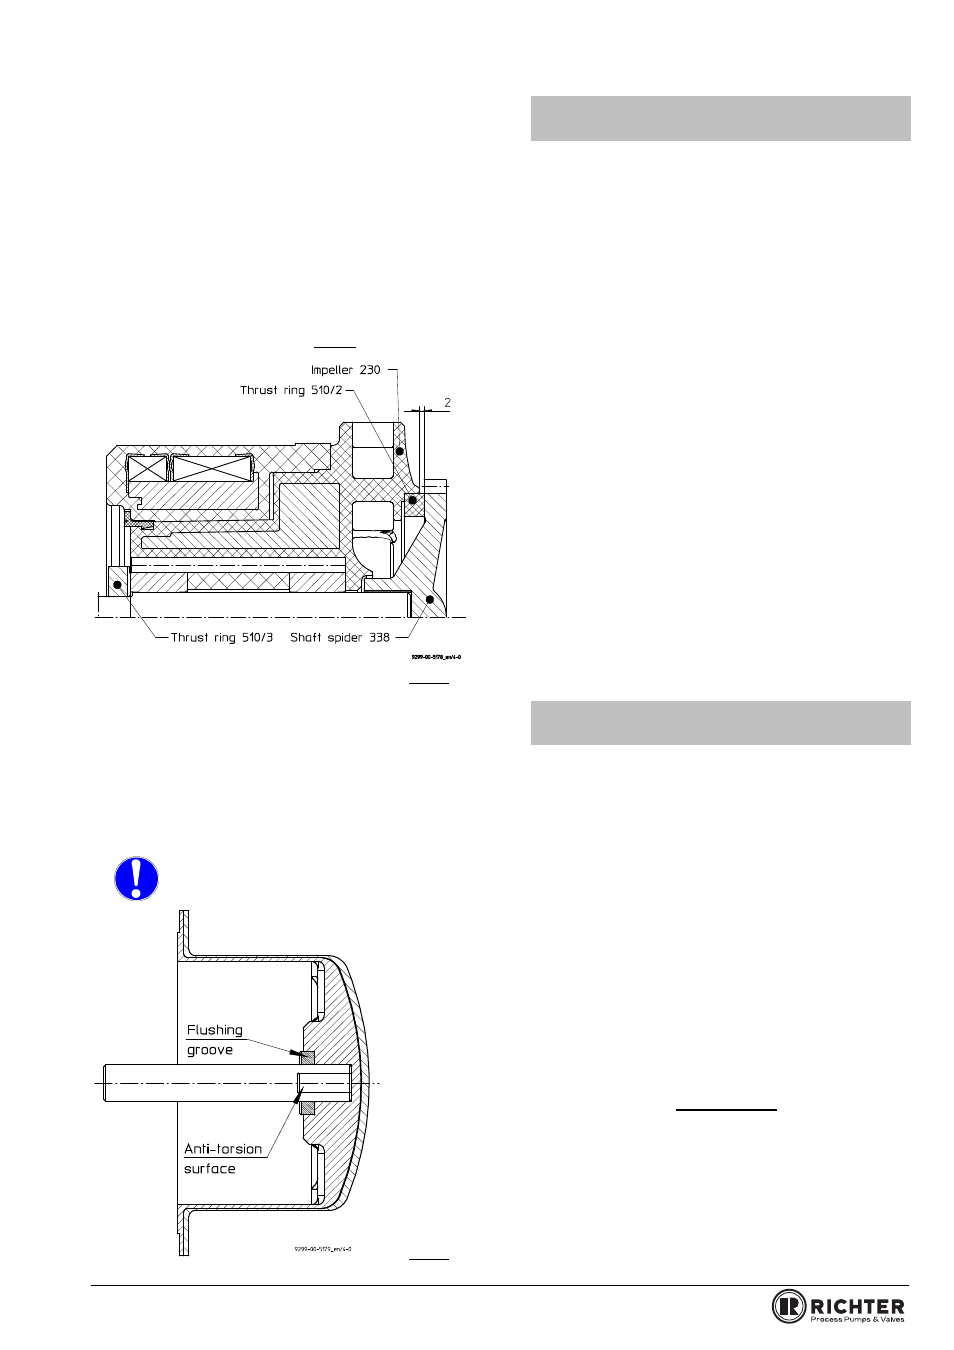
Press the bearing bush 545/1 into the impeller
230 together with the anti-torsion insert 566/2.
Make sure that the anti-torsion insert 566/2 is
approx. 2 mm shorter than the plain bearing.
Insert distance ring 504/1 and then the bearing
bush 545/2.
Carefully press the thrust ring 510/2 into the
impeller 230 right to the stop. When doing so, pay
attention to the correct position of the anti-torsion
insert grooves in relation to the carrier webs in the
impeller 230.
Check whether the thrust ring protrudes about 2
mm out of the impeller. See Fig. 7.
Fig. 7
Join can 159 and can insert 158. To simplify
assembly, the can insert 159 may be cooled if
necessary.
Insert thrust ring 510/3 into the can insert 158.
While doing so, make sure that the flushing
grooves are facing outwards.
Press shaft 222 into the can insert 158.
CAUTION: Align shaft in relation to the
flat pivot point in the thrust ring (risk of
the silicon carbide breaking)
Fig. 8
7.8.3 Assembly of drive unit
long life grease lubrication
Press radial ball bearings 321/1 and 321/2 onto
the drive shaft.
Insert keys 940/1 into the drive shaft.
Push pre-assembled drive shaft into the bearing
pedestal 330.
Insert wavy spring washer 953/1 into the bearing
pedestal 330.
Secure rear bearing cover 361 to the bearing
pedestal 330 with hex. socket screws 914/6.
Tightening torque group 1.1 + 1.2 = 17Nm
Tightening torque group 1.3
= 20Nm
Check fit of drive magnet assembly 858 / drive
shaft 213.
Put 1 drop of adhesive onto the thread of the
drive shaft, e.g. Loctite 243 or equivalent.
Only one drop of the adhesive should be applied.
Otherwise, the next dismantling process will be
more difficult or no longer possible without
causing damage.
Mount drive magnet assembly 858 with the flat
pivot point aligned with the drive shaft 213.
Tighten hex. socket screw 914/5 with toothed
lock washer 936/1.
Tightening torque group 1.1 + 1.2 = 17Nm
Tightening torque group 1.3
= 20Nm
7.8.4 Assembly of drive unit
oil bath lubrication
Press radial ball bearings 321/1 and 321/2 onto
the drive shaft.
Insert keys 940/1 into the drive shaft.
Insert rotary shaft seal 421/2 into the bearing
pedestal 330
Push pre-assembled drive shaft into the bearing
pedestal 330.
Insert wavy spring washer 953/1 into the bearing
pedestal 330.
Insert rotary shaft seal 421/1 into the rear bearing
cover 361.
Secure rear bearing cover 361 with cover gasket
403 to the bearing pedestal 330 with hex. socket
screws 914/6.
Tightening torque group 1.1 + 1.2 = 17Nm
Tightening torque group 1.3
= 20Nm
To proceed, see Chapter 7.8.3.