Assembly, Installation – RCBS Bullet Feeder - Rifle User Manual
Page 5
- 5 -
ASSEMBLY
Note: Reference the part schematics on pages 13-15 for
more information.
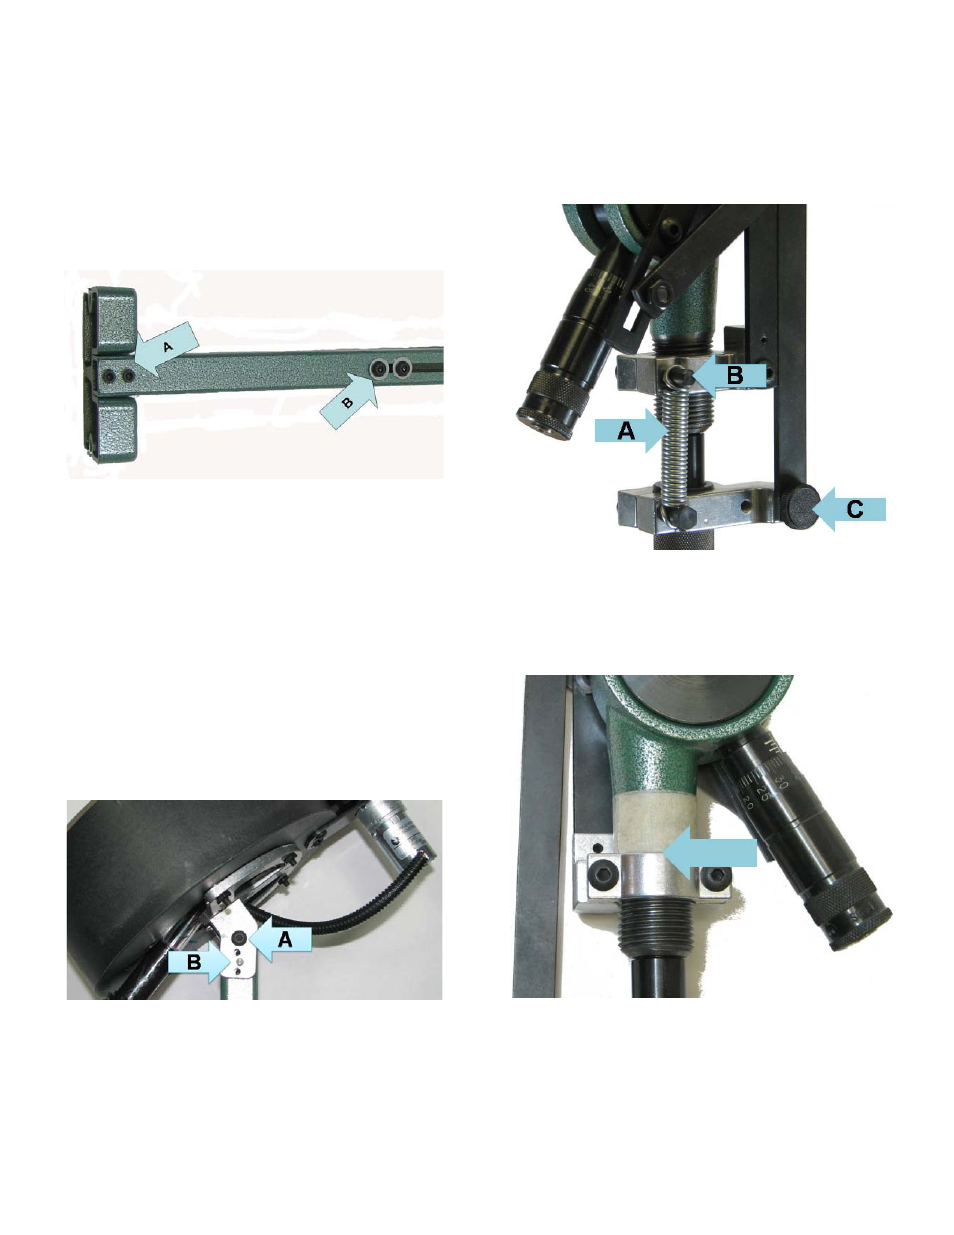
Attach the Lower Support Tube to the Support Foot
using two 10-24x1½ SHCS (A) (see Photo 1).
Attach the Upper Support Tube to the Lower Support
Tube using two ¼-28x1½ BHCS and ¼ Flat Washers(B)
(see Photo 1 and page 13). The Support height is
adjustable depending on the type of press that you will
use with the Bullet Feeder.
Photo 1
Note: Keep the packaging foam inside the Bowl
Assembly throughout the installation process.
Attach the Collator Bowl Assembly to the top of the
Support Assembly with the ¼-28x2” BHCS
and a ¼-28
Hex Nut (A) (see Photo 2). Tighten this just enough so
that the Bowl Assembly will still pivot. Install the Bracket
Pin into the middle adjustment position (B) (see Photo
2). This position orients the Bowl at 35 degrees and
works for most types of bullets. Depending on how level
your reloading bench is or the type of bullet that you are
using, you may need to change the angle position from
the middle 35° to 40° or 45°. A steeper or shallower
angle is achieved by moving the Bracket Pin to one of
the other positions. See Troubleshooting section for
more information.
Photo 2
INSTALLATION
Note: Reference the part schematics on pages 13-15 for
more information.
Disconnect the Return Spring (A), unscrew the Top
Spring Anchor (B) and unscrew the Linkage Knob (C)
from the Case Activated Powder Measure System (see
Photo 3). Remove the powder measure assembly and
drain the hopper of all smokeless powder.
Photo 3
Mark the position of the Upper Bracket with a piece of
masking or electrical tape or some other means (see
arrow in Photo 4). This is critical to setting the parts back
into the correct place.
Photo 4
Remove the front Button Head Cap Screw (A) from the
upper front portion of the Case Activated Linkage