Primer strip color id chart – RCBS APS Priming Tool User Manual
Page 8
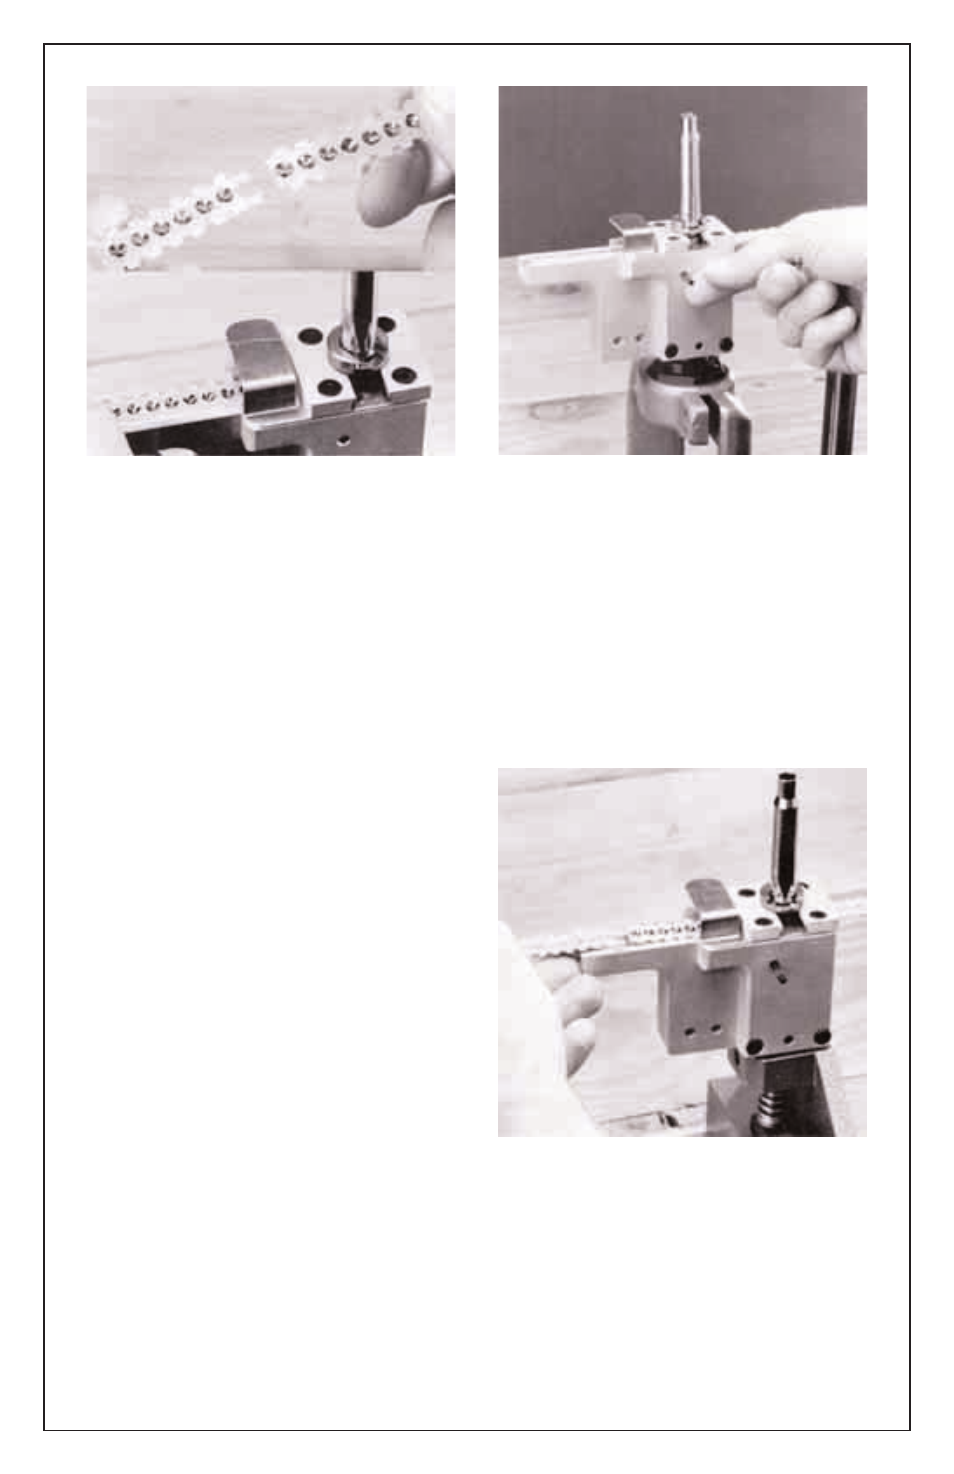
Insert a case into the shell holder and
lower the handle slowly and carefully.
The press handle should go all the
way to the bottom with very little resis-
tance. Remember you have the
mechanical advantage of compound
leverage. More than enough lever-
age to crush primers, bend the
primer plug and bend the rim of
the case – so don’t force it! If the
handle stops part way down, insert
the cam lock pin. The cam lock pin will
stop the strip from advancing while
making this adjustment. See photo
#14. Then lift the handle back up and
turn the adjustment rod in the shell
holder depth adjustment assembly
down a little and try again. When the
handle travels easily to the bottom
of its stroke, check the primer seating
depth. For high primers, back the
adjustment rod out a little. If the primer
cup is flattened (crushed), turn the
adjustment rod down a little further
until you get the correct seating depth.
When the proper priming seating
depth is achieved (flush – .004 deep)
with the handle all the way down,
remove the cam lock pin. Then raise
the handle and tighten the 1/4-28
lock nut.
You’re now ready to prime cases.
Remember, the primer strips are
designed to connect to each other.
So for continuous primer feeding,
just connect another strip onto the
end of the strip in the tool when there
is at least one inch of the ramp avail-
able to support the new strip. See
photo #15. The strip can be removed
at any point in the process by push-
ing or pulling the strip through the
right-hand side of the tool.
PRIMER STRIP COLOR ID
CHART
APS Primer Strips are color-coded to
prevent confusion and misidentifica-
tion. To minimize the number of colored
primer strips, we not only used the
8
Photo #14
Photo #15
Photo #13