Kenco Engineering Weld Pad Flat Glass Level Gauge User Manual
Page 3
Page 3
ASSEMBLY INSTRUCTIONS
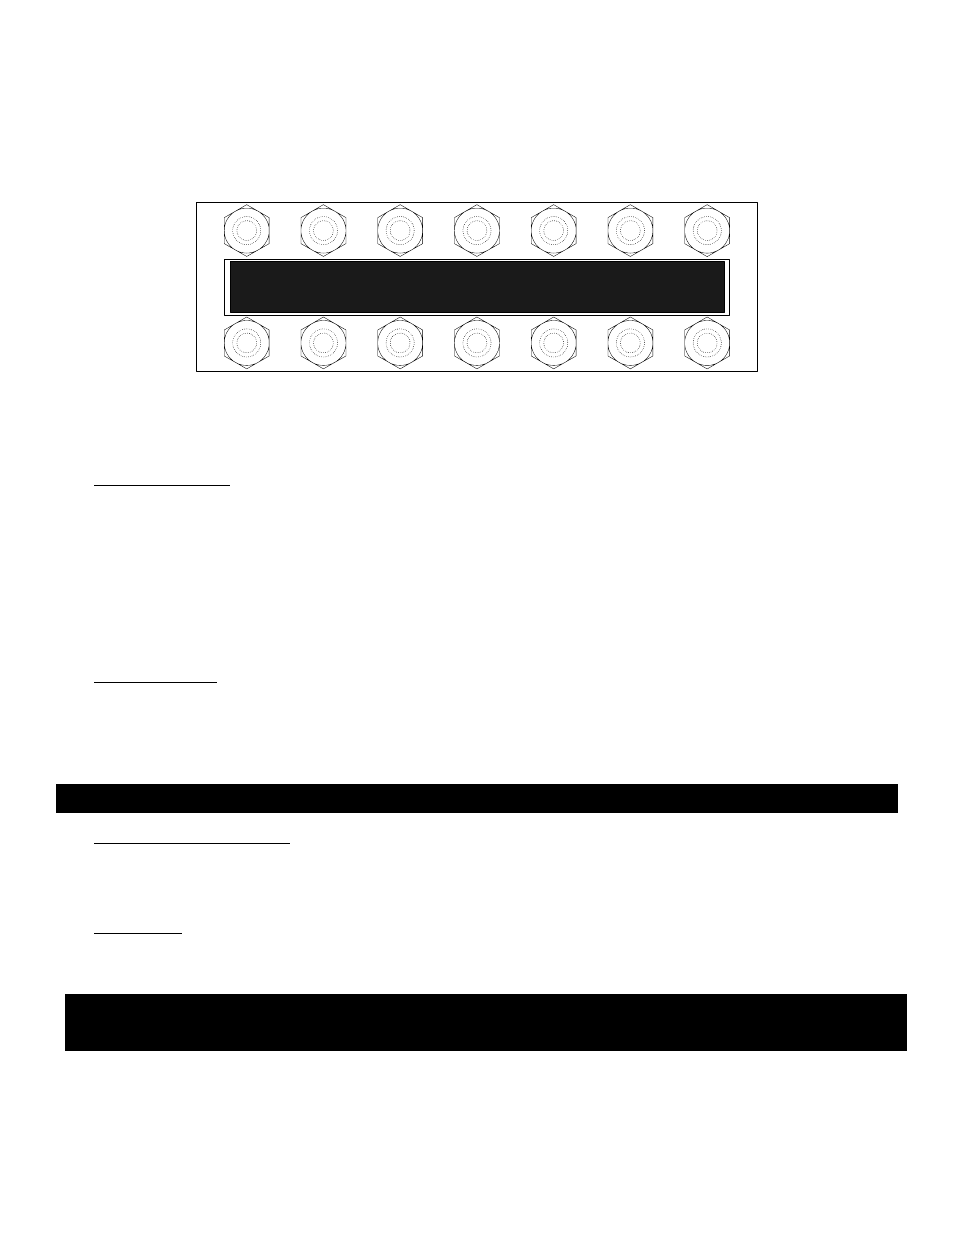
Assemble the gauge in accordance with the drawings in the “GAUGE CONSTRUCTION” section. Tighten the center
screws to 5ft./lbs. and then, working toward the alternate ends (see drawing below), tighten the remaining bolts. The
torque wrench can then be set to 10ft./lbs. and the same procedure followed. A final setting of 25ft./lbs. is generally
sufficient to prevent leakage at the maximum pressure to which the vessel will be subjected.
MAINTENANCE
The following is a step-by-step procedure for maintaining your Kenco Weld Pad Flat Glass Gauges:
A. Inspection
of
Glass:
Look at the glass regularly for any signs of clouding or scratching. In new processes, the glass should be inspected
daily until the need for replacement becomes apparent. This will help establish the routine inspection / maintenance
cycle.
To examine for scratches, shine a very bright concentrated light (e.g. MagLight) at a 45° angle. Anything that
glistens brightly should be inspected closely. Any scratch which catches your fingernail, any star-shaped or
crescent-shaped mark which glistens is cause for replacement. If inner (process side) surface appears cloudy or
roughened and will not respond to cleaning procedures (next section), this could be an indicator of chemical attack
and, if severe, is cause for replacement.
B.
Cleaning of Glass
Keep glass clean using commercial glass cleaners (e.g. Windex, Bon-Ami). If these don’t seem to work, a dilute
solution of Hydrochloric (muriatic) acid can be used. Observe safety rules when handling these dangerous
chemicals. Cleaning should be done without removing the glass. This may require recirculation of cleaning
materials if the process side of the glass is not accessible. Never use harsh abrasives, wire brushes, metal
scrapers, or other things which could scrape the glass.
C.
Receiving and Storing Glass
Upon receiving replacement glass inserts, inspect containers and glass inserts for shipping damage. Keep glass in
original box until ready for use. If glass is to be inspected, unwrap and re-wrap carefully, avoiding bumping or sliding
polished face across any other object (including table tops).
D. Disassembly
Prior to any disassembly of the gauge, first be sure that the gauge is relieved of all internal pressure, and that the
gauge is at ambient temperature. Loosen end screws first, working from opposite ends toward the center.
CAUTION – DO NOT attempt to clean the glass while the gauge is in operation.
CAUTION – Failure to relieve pressure may result in a sudden release of internal pressure, which can cause
physical injury, and/or glass breakage..
12
14
5
9
6
10
1
3
7
11
13
2
4
8