41 general information, 2 connectors and controls, 1 unpacking and inventorying – HK Audio LUCAS NANO 300 User Manual
Page 4: 2 unfastening transport latches, 3 easy click connector
Lucas Nano 300 1.0
4
1 General Information
1.1 Unpacking and Inventorying
Remove all the component parts of LUCAS NANO 300 from the carton
and make sure you have received all items.
LUCAS NANO 300 consists of a subwoofer and two satellites.
A protective cover and a mains cable are also included.
1.2 Unfastening Transport Latches
Latches secure the LUCAS NANO 300 satellites to the subwoofer to
protect them during transport. Here’s how to undo them:
• Standing at the back of the system, turn the locking knobs on both
sides backward to unlock the satellites. Remove the two LUCAS
NANO 300 satellites from their cradle.
• Always make sure these knobs engage to lock the speakers down for
transport.
1.3 Easy Click Connector
• This mechanical and electric coupler connects the modules.
Easy Click is very easy to disconnect: Simply push the top satellite back
and lift the enclosure to remove it.
To connect a satellite, set it on the top panel and push it forward.
2 Connectors and Controls
Out
Link In/Out
Sub
Mode
Setup
Balance
A: Rec Out
B: CH 2 Thru
Bal.
Speaker Out
to Satellite
Speaker Out
to Satellite
Connect a 2nd
LUCAS NANO
L
R
L
R
L
R
L
R
Stereo
L
R
A
B
Mute
3 O O
n a n o
L u c a s
1
2
3
1
2
3
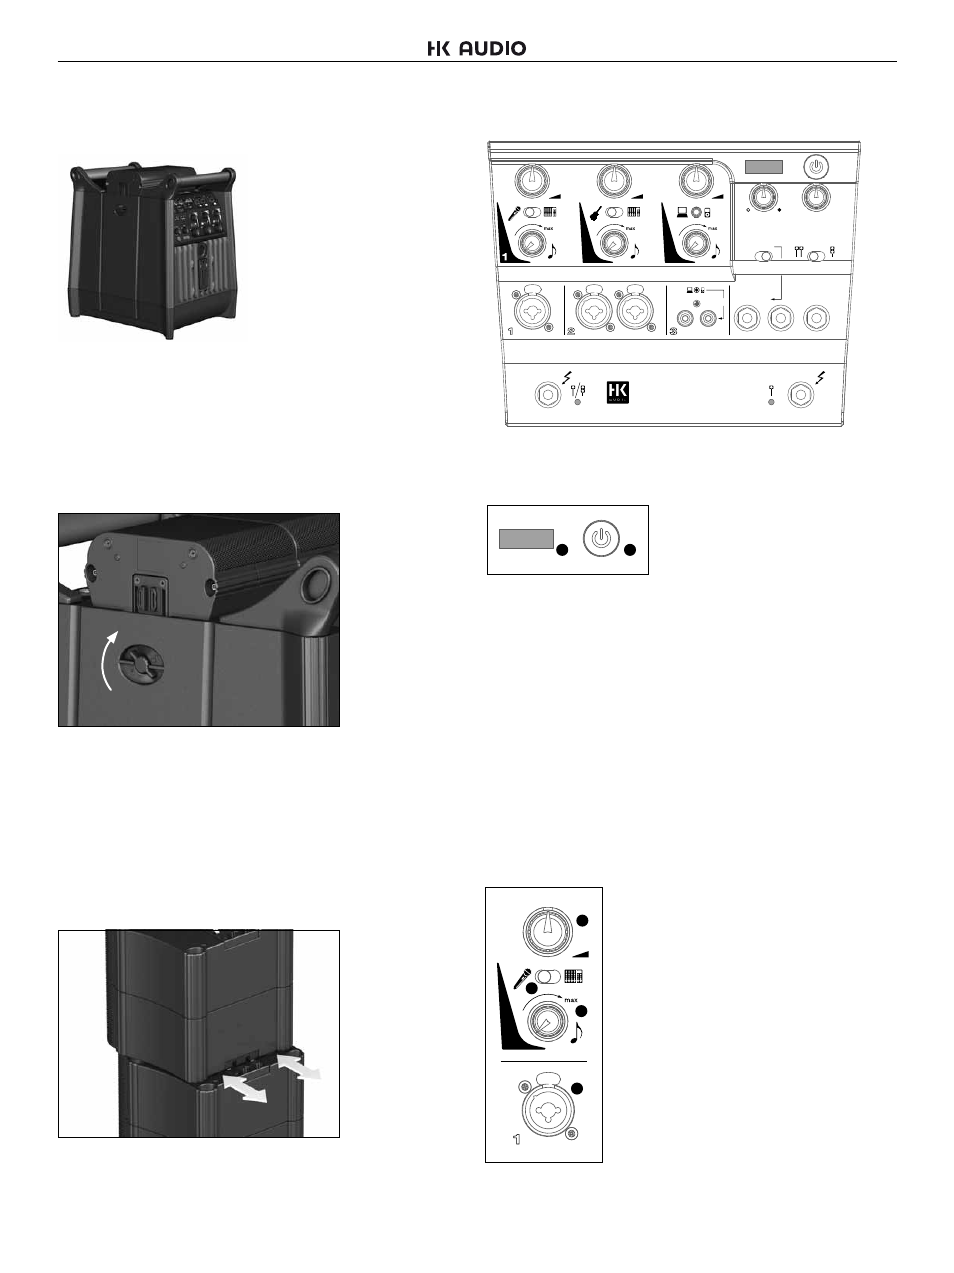
2.1 Power/Status Section
1
2
1 Power
This switches LUCAS NANO 300 on and off.
2 Status Indicator
Dual-color LED (green = power on, red =limit/error). The LED briefly
flashes red to tell you the limiter is responding to signal peaks.
Caution! If the Status LED stays red while the system is fully
operational, it is being overloaded. Turn down the signal level! If you
are not feeding a signal into the system and the Status LED stays
red, there has been malfunction.
Note: LUCAS NANO 300 performs a system check after the system is
powered up or the Setup switch is engaged. The Status LED lights up
red for about five seconds during this time. It will light up green if there
is no error and the system is getting mains power.
2.2 Input Section 1
3 Volume
This rotary knob adjusts the volume for this input.
Twist it counterclockwise to the far left to turn the
signal level all the way down and clockwise to the
far right to turn the level all the way up.
4 Mic/Line
This switch adjusts the input sensitivity or gain
of Input 1 for use with a dynamic microphone
or a line signal. At the same time, it configures
the integrated filter for Voice (microphones) and
Contour (line signal) applications.
1
1
3
4
6
5