Landing gear installation tail installation – E-flite Apprentice S 15e RTF with SAFE User Manual
Page 5
EN
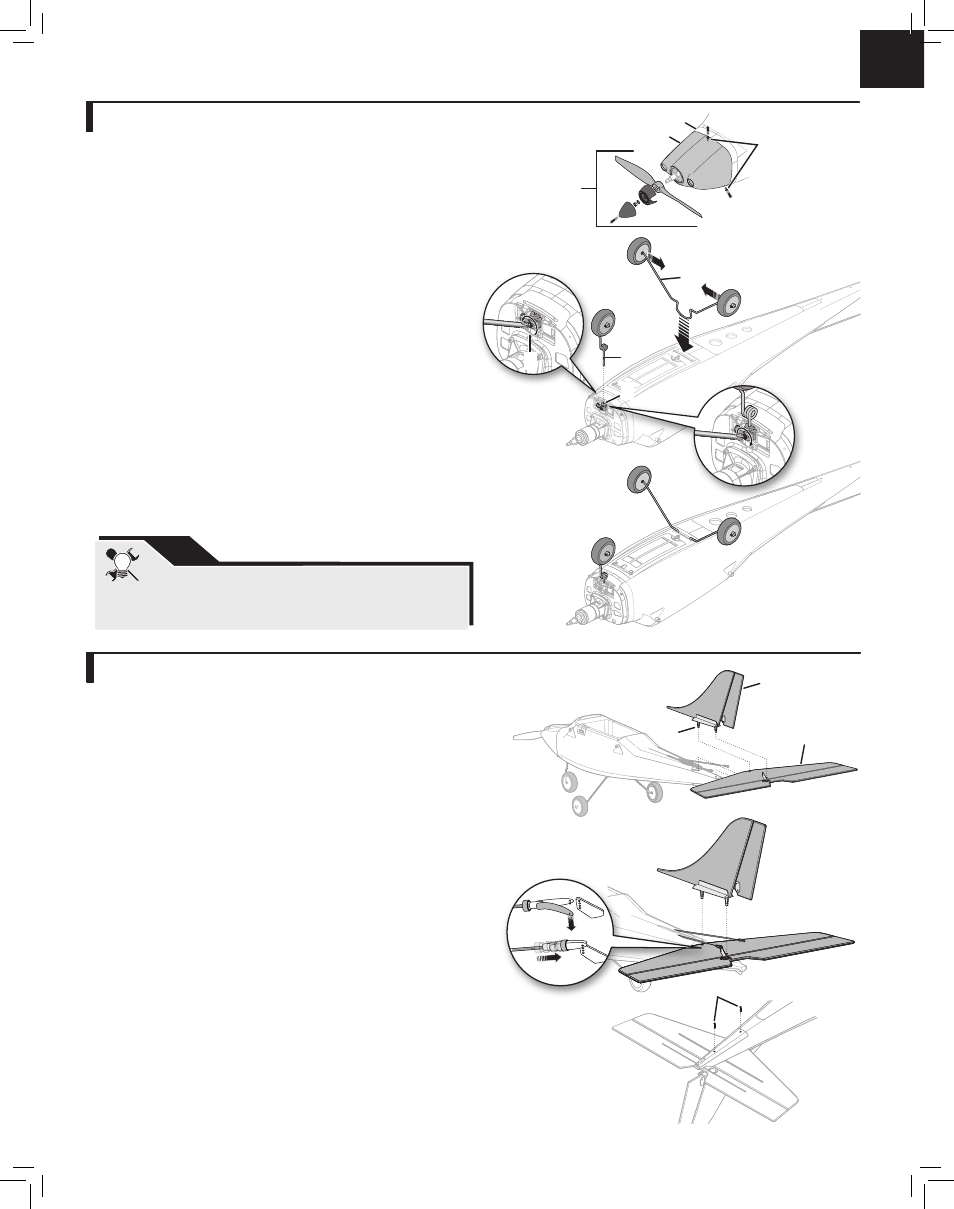
1. Remove the spinner, nut, washer, spinner back plate and propeller
assembly (
A). Remove 3 screws (B) and the cowling (C) from the
fuselage (
D). Tools are required to loosen the nut and screws.
2. Turn the model so you can see the bottom of the fuselage.
3. Under the fuselage, loosen the screw (E) in the nose gear steering arm
and insert the strut (
F) (flat spot facing to the front) fully in the mount (G).
4. Fully tighten the screw onto the flat spot of the strut.
5. Push together the main landing gear struts (H) and insert the top loop into
the slot in the fuselage as shown.
6. Reinstall the cowling, propeller and spinner.
Disassemble in reverse order.
Landing Gear Installation
Tail Installation
Carefully support the aircraft while installing or removing screws.
TIP
1. Install the horizontal tail (A) on the fuselage under the linkages as shown.
2. Carefully insert the 2 pins (B) of the vertical fin (C) through the horizontal
tail holes into the fuselage holes.
3. Under the fuselage, install the 2 screws (D) into the fuselage and the
vertical fin pins. Tighten the screws, but do not break the plastic.
4. Connect the respective clevises in the outermost holes in the rudder
and elevator control horns. Refer to the clevis adjustment instructions to
center the rudder and elevators.
Disassemble in reverse order.
A
E
G
F
H
A
D
B
C
B
C
D
5