Construction, Typical installation – Watts WattsBox User Manual
Page 2
2
Construction
1. Minimum 18 gauge aluminum or fiberglass construction.
2. Structural unicellular insulation.
3. Stainless steel hasps or handle to accept customer
supplied lock.
4. Relief ports at enclosure grade level.
5. Designed to protect to -30°F.
6. Minimum R of 8.
7. Adjustable internal anchors.
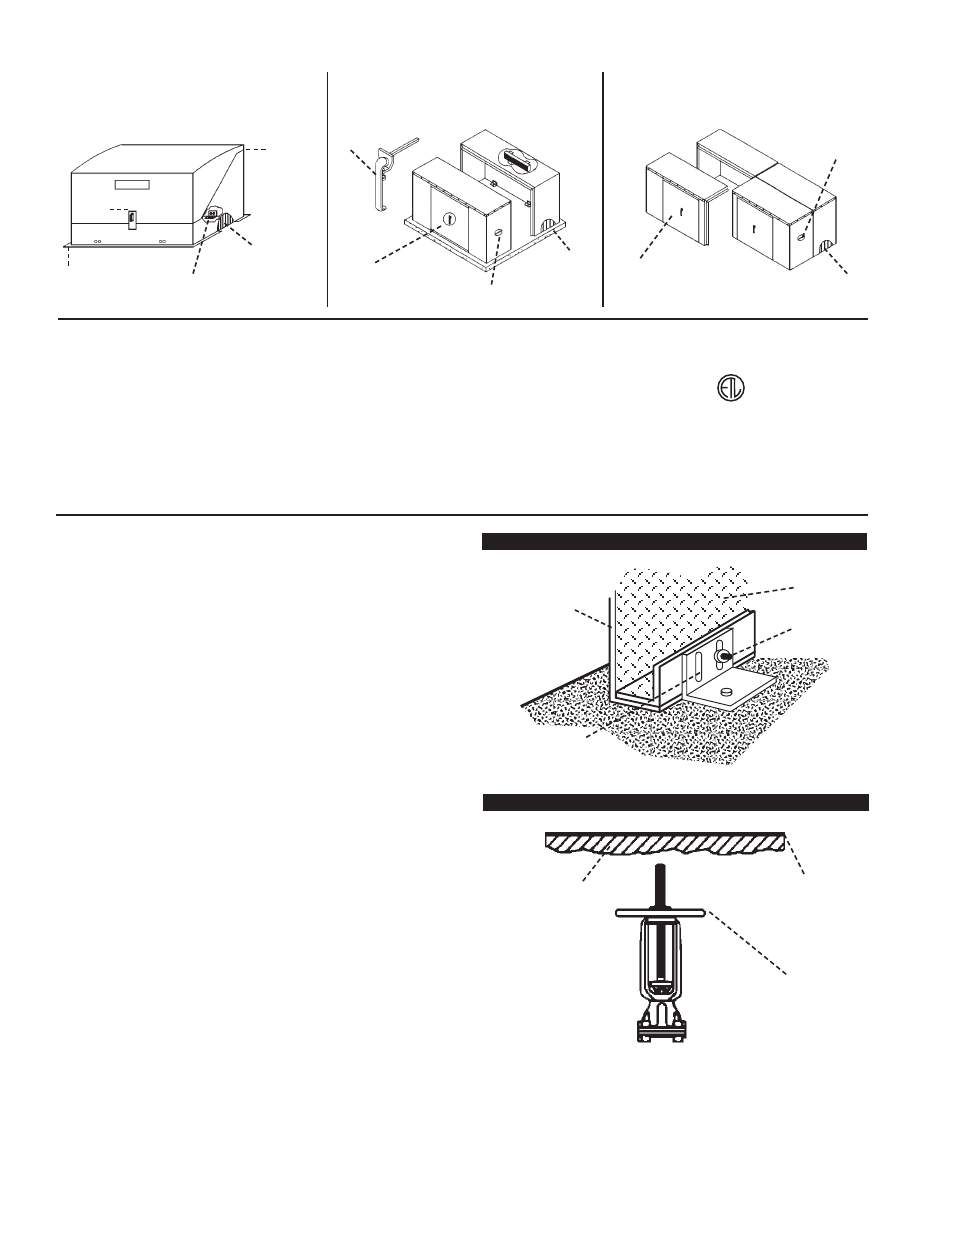
Typical Installation
1. Enclosure supplied with “anchor angles” at grade.
a. Recommended installation: on concrete slab
b. “Anchor angles” anchored to grade with mechanical
fasteners (interior or exterior)
2. NRS (non-rising stem) valve handles enclosed
inside enclosure
3. OSY (outside stem and yoke) valve handles concealed inside
enclosure roof.
4. Door and construction hardware are lockable to prevent theft,
vandalism or unauthorized entry.
Heater Notes
1. 30W through 90W are heating cables, UL listed,
CSA certified.
2. 1000W+ are wall mounted air heaters, listed.
3. All circuits are 120 volt, single phase.
4. Service to WattsBox must be installed in accordance
with the National Electric code and local ordinances,
and protected with a G.F.I.
Cutaway View of WattsBox Wall and Anchor
OSY Valve Enclosed — Side View
Insulation
Nylock Nut
Slotted Anchors
Allow for Vertical
Adjustment
Foam Insulation
Inside the
Enclosure
Top of
Enclosure
OSY Valve
Stem and Handle
(open positions)
WattsBox
Exterior Wall
®
Fiberglass WattsBox
Models WB-75, WB-N3
Two Piece Aluminum WattsBox
Models WB-N4, WB-E8
Four Piece Aluminum WattsBox
Models WB-N10, WB-E10
Hinged
Lid
Drain port
(typical each end)
Adjustable Internal
Anchor (TYP)
Drop Handle for
Padlock
Heater
Drain port
(TYP each end)
Drain port
(TYP each end)
Access Opening with
Locking Handle
Access Opening with
Locking Handle
Side Handle
Side Handle
Lip
Hasp