Operating instructions, Checking for gas leaks, Operation - propane & natural gas grills – Broilmaster P4XF-1 User Manual
Page 47: Using matches to light the grill, Air shutter adjustment for r3b series only
B101623-2-0112
Page 47
Operating Instructions
Before each use, inspect all hoses. If it is evident there is
excessive abrasion or wear, or the hose is cut, it must be
replaced prior to using your Broilmaster grill. Call your local Broil-
master dealer for a replacement.
Using the Ignitor
Caution: If a burner fails to light after 5 seconds, turn the burner
OFF for 5 minutes, to allow the gas to clear, then try again.
Note: Each burner must be lit individually.
1. Turn knob on the grill CLOCKWISE to the OFF position.
2. Turn ON gas at the source.
3. With the grill lid open, push and turn the burner control knob
COUNTERCLOCKWISE to Hi.
4. Push and hold the ignitor button until the burner lights (approxi-
mately 5 seconds).
5. If a burner does not light, turn OFF all gas and refer to the
Troubleshooting section of this manual.
6. Repeat steps 3 through 5 for other burner.
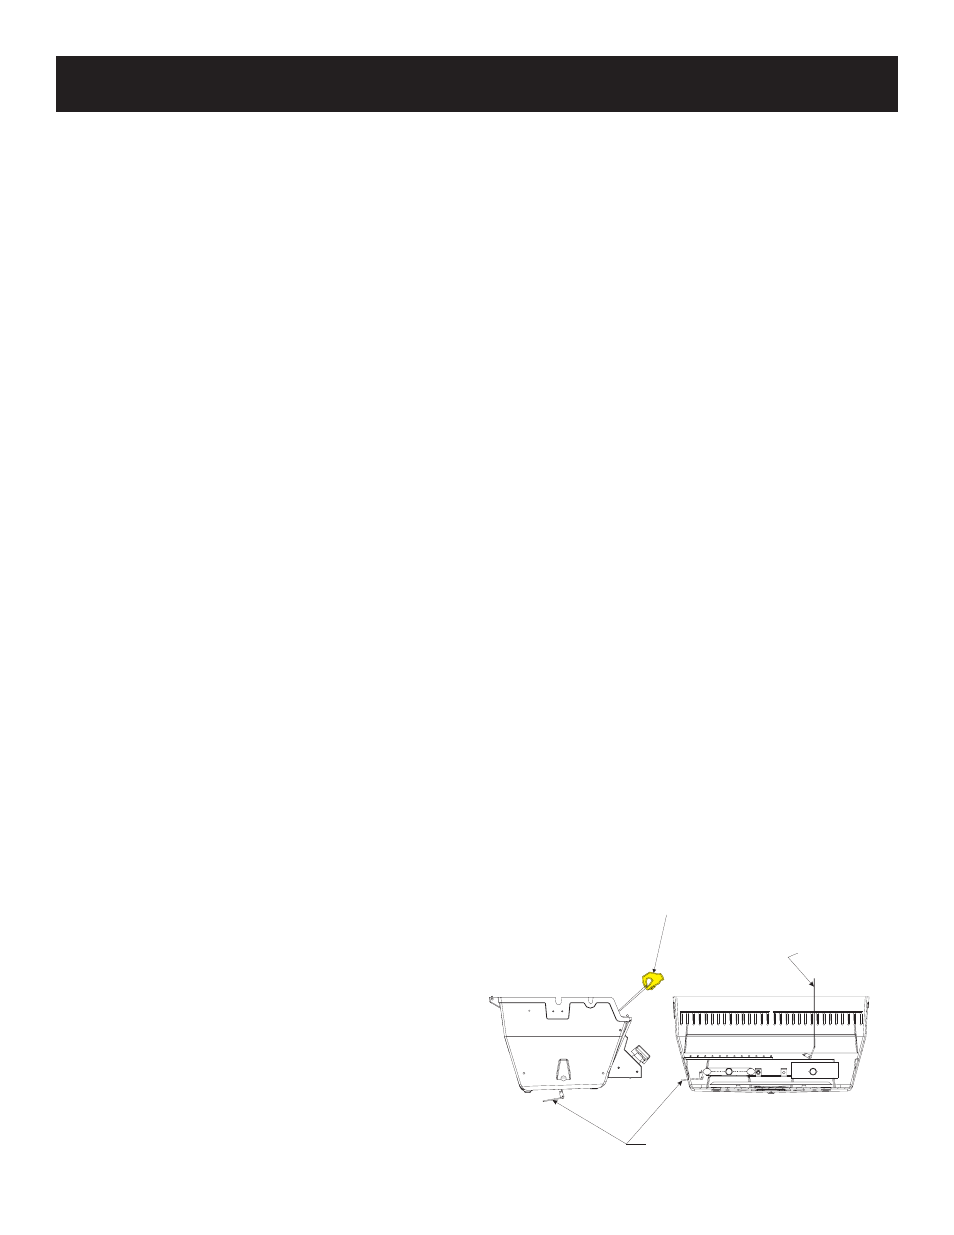
Using Matches to Light the Grill
Caution: If a burner fails to light after 5 seconds, turn the burner
OFF for 5 minutes, to allow the gas to clear, then try again.
Note: Each burner must be lit individually.
1. Turn knob on the grill CLOCKWISE to the OFF position.
2. Turn ON gas at the source.
3. Open the grill lid.
4. For Blue Flame grills, insert a burning long wooden match
through the lighter hole on the left side of the grill. For Infrared
grills, insert the lighting stick with a long wooden match attached
through the cooking grid to ignite the infrared burner from the
top.
See Figure 38.
5. Turn the burner control knob COUNTERCLOCKWISE to HI.
6. If a burner does not light, turn OFF all gas and refer to the
Troubleshooting section of this manual.
7. Repeat steps 3 through 6 for other burner.
Checking for Gas Leaks
Check for gas leaks every time you connect your Broilmaster
pro-
pane gas grill to a Propane gas cylinder, when a connected cylinder
has not been used recently, or when either a natural or propane grill
is being used for the first time.
Caution: Do not use an open flame when checking for leaks.
Checking for leaks with an open flame may lead to a fire or
explosion, resulting in property damage or personal injury.
To check for gas leaks:
1. Use dish washing liquid and a little water to make a soapy solu-
tion.
2. Turn OFF the knob on the control panel.
3. Turn ON the gas at the supply or cylinder. A hissing sound
indicates a leak. Turn OFF the gas and repair the leak.
4. Apply the soapy water solution to all gas connections.
5. Look for bubbles. Bubbles indicate a leak.
6. If there are bubbles turn OFF the gas and repair the leak.
7. Turn the gas back ON and repeat the above procedures until
all leaks are repaired.
Air Shutter Adjustment For R3B Series
Only
The burner (venturi) tube air shutter is preset at the factory so
that after five minutes the burner flames are blue with well defined
cones. If, after five minutes the flame is yellow, or there is a gap
between the burner and the flame, adjust the burner (venturi) tube
air shutter as follows:
1. Turn gas OFF and let the burner cool.
2. Beneath the control panel you can access the air shutter(s)
which are located on the end of the burner tubes.
3. Loosen shutter set screw
4. Close the air shutter to the minimum opening.
5. Light the burner, wait five minutes and then carefully open the
air shutter until the flame is blue and well defined.
6. Retighten the set screw.
Figure 39
LIGHTING STICK
R734
KEEP HAND AWAY FROM
TOP OF GRILL WHEN LIGHTING
INFRARED BURNER
MATCH LIGHT HOLE
BLUE FLAME BURNER
OPERATION - PROPANE & NATURAL GAS GRILLS