Gas conversion to natural gas – Broilmaster P4XF-1 User Manual
Page 42
B101623-2-0112
Page 42
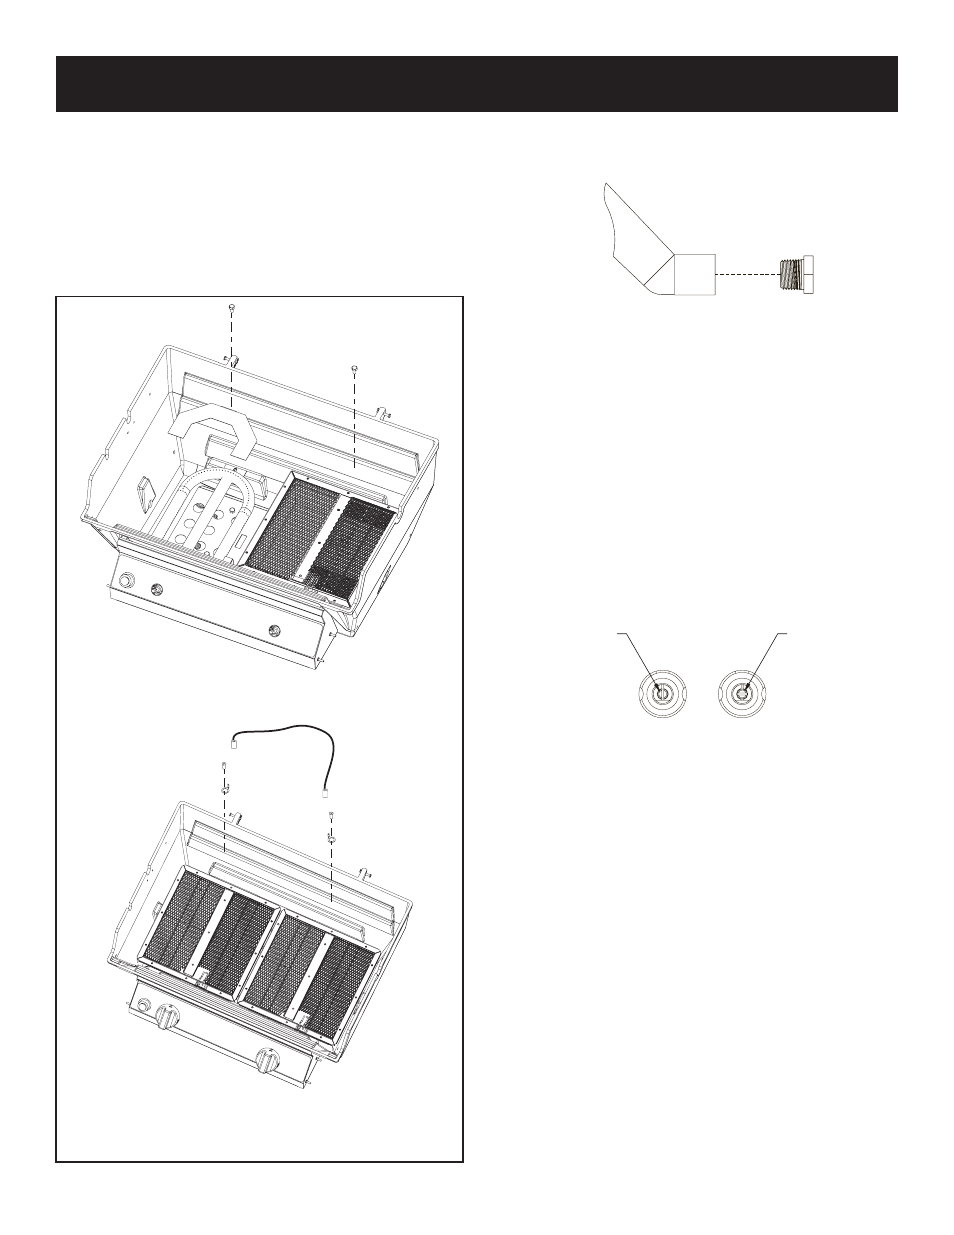
1. R3B Grills: Remove cooking grids, briquets and briquet rack
from grill.
2. Blue Flame Burner: Remove blue flame burner shield and
blue flame burner from grill (one (1) 1/4-20 x 3/4 phillips screw
for burner).
See Figure 36. Infrared Burner: Remove ignitor
wire, lugs and infrared burner from grill (one (1) 1/4-20 x 3/4
phillips screw for each burner).
See Figure 36.
3. Remove LP burner orifices marked 1.25 mm for R3B. Re-
move LP burner orifice marked 1.3 mm for R3.
See Figure
37.
4. Install natural gas burner orifice marked 49 into each orifice
fitting. Apply pipe compound to threads on orifices prior to in-
stallation.
5. Blue Flame Burner: Place burner shield and burners into
grill and insert burner tubes over orifice fittings. Secure
each burner with one (1) 1/4-20 x 3/4 phillips screw from
Step
2.
Infrared Burner: Place infrared burners, ignitor, and lugs into
grill and insert burner tubes over orifice fittings. Secure each
burner with one (1) 1/4-20 x 3/4 phillips screw from step 2.
6. Grasp valve knobs and remove from valves.
7. The low input adjustment screws are located inside the two
valve stems. Use a small screwdriver to turn each adjustment
screw clockwise 1/4 turn (90 degrees). When valves are in
the "OFF" position, the slot in the adjustment screw should be
vertical.
See Figure 38.
8. Remove the hose and regulator from the gas connection on
grill with adjustable wrench.
9. Connect the grill to the natural gas supply.
Attention: Before lighting your grill check all gas con-
nections including the adjustment screws in valve stems
for gas leaks with a soapy water mixture.
Caution: Do not use the grill if a gas leak is detected until gas
leak is corrected. If a gas leak can not be stopped, do not use
grill. You must contact a qualified repair person.
10. Push valve knobs onto valves.
11. Apply the completed conversion label adjacent to the rating
plate label on the grill.
Figure 37
LPG
NAT
ADJUSTMENT SCREW
ADJUSTMENT SCREW
Figure 38
R3B
R3
Figure 36
GAS CONVERSION TO NATURAL GAS