Non-airgap faucet installation, Standard faucet installation, Gather and identify the faucet pieces – Watts PWDWUV3 User Manual
Page 3
3
STEP 3
Standard Faucet Installation
4
Non-Airgap Faucet Installation
5
6
7
8
9
10
11
13
12
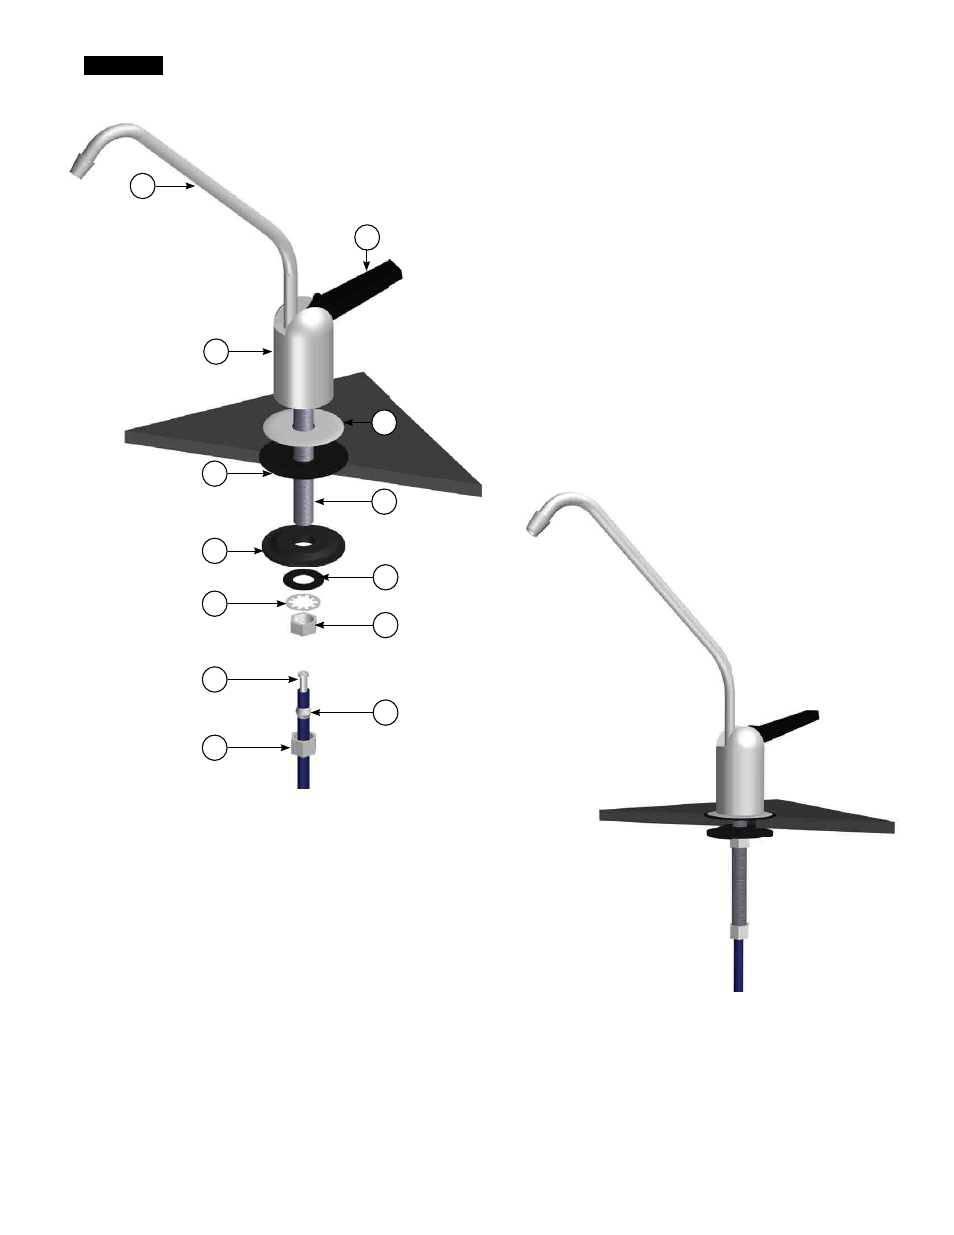
1. Long Reach Spout
2. Handle
3. Faucet Body
4. Escutcheon Plate
5. Black Rubber Washer
6. Stem Bolt
7. Black Locating Washer
8. Small Black Washer
9. Star Washer
10. Lock Nut
11. Tube Insert
12. Delrin Sleeve
13. Compression Nut
3
1
2
Figure A: List of Parts and Assembly in Exploded View
Figure B: Complete Assembly
Gather and identify the faucet pieces.
Step A - Place the escutcheon chrome plate and the black rubber
washer on the faucet shank . (Parts found in faucet parts
bag) .
Step B - Insert the faucet shank through the hole in sink and let it
rest on the sink top .
Step C - From the underside of the sink, slide on the location wash-
er, star washer and Lock nut onto the stem bolt . Check for
orientation the tighten lock nut securely .
Step D - Locate the Blue tube from the Filters . Measure the tube
from the unit over to the faucet and cut it to the desired
length . Remove a the compression nut, plastic sleeve and
tube insert from the parts bag . To assemble, place the
compression nut on the tube first, then the sleeve (small
tapered end of the sleeve must point to the end of tube)
and then insert the tube insert all the way into the end of
the tube .
Step E - Push the assembled blue tube into the faucet until it stops
. Slide compression nut and plastic sleeve down until you
can thread nut onto the faucet . Use a wrench to securely
tighten the compression nut while continuing to push the
tube into the faucet