B3 lateral alignment using bendix, Acom, Diagnostics (continued) – Bendix Commercial Vehicle Systems WINGMAN ADVANCED FLR20 SENSOR User Manual
Page 38
38
Appendix B
Appendix B
Bendix
®
FLR20
™
Radar Alignment
B3 LATERAL ALIGNMENT USING BENDIX
®
ACOM
®
DIAGNOSTICS (CONTINUED)
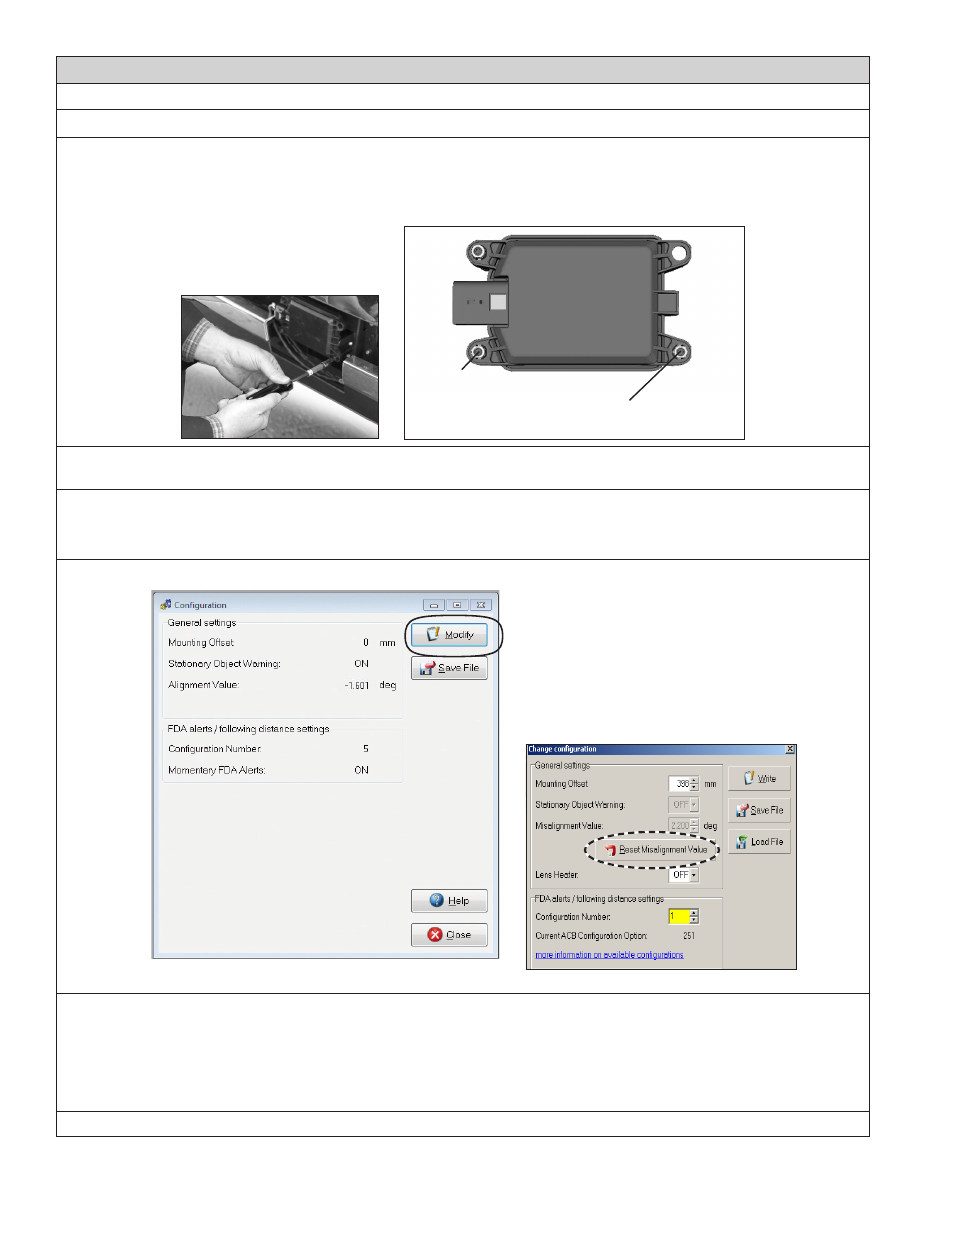
B3.4 See the image below to see the lateral alignment adjustment screw location.
Use Table in B3.3 to find the number of full turns of the stand-off adjustment screw required to bring the radar
sensor back into alignment. A Torx T-20 screwdriver with a mark or other indicator may help track the number
of turns.
Use a Torx T-20 screwdriver here to
adjust for the
lateral alignment
IMPORTANT:
Do not adjust
this stand-off!!
B3.5 After making the adjustment, clear the Bendix
®
Wingman
®
Advanced
™
system Diagnostic Trouble Code (DTC)
using the procedure in Section 4.4: Clearing Diagnostic Trouble Codes (DTCs).
B3.6 Then follow steps
B3.7-12 to reset the alignment value stored in the system.
B3.7
Procedure to Reset the Alignment Value. Select Wingman Advanced on the starter screen, and then select
“Start with ECU.” Select “Config” on the Wingman Advanced Status window.
B3.8 Select “Modify” on the Configuration Status window.
BENDIX
®
ACOM
®
DIAGNOSTICS: CONFIGURATION AND CHANGE CONFIGURATION SCREENS
B3.9 Select “Reset Alignment Value” in the Change Configuration box. (See Appendix H for more details.)
B3.10 Close the ACom Diagnostics program and any open windows.
B3.11 Cycle the vehicle ignition.
B3.12 After the vehicle has been driven at least 20 miles at above 35 mph in multi-lane urban traffic, re-check the
alignment value using ACom Diagnostics.
Call the Bendix Tech Team at 1-800-AIR-BRAKE (1-800-247-2725, option 2) for troubleshooting assistance.