Connecting the ronin and powering up – Atomos Ronin User Manual
Page 8
Atomos Ronin – User Manual Edition 1: June 2013 6
Batteries
The Ronin is a battery powered device, and has a special feature to
ensure that you never have to interrupt a recording to change a battery.
Like all batteries, you will need to take care of them. Make sure that you
don’t short circuit the connections because this can result in very high
currents that can damage the cells and could pose a fire hazard.
Charge new batteries before using them. The Ronin internal charger can
charge two batteries simultaneously.
Before any type of disposal the battery should be discharged
completely. Tape the contacts with electrical tape and package so as to
prevent contacts accidentally coming together at any time. Incineration
must be performed by an approved and permitted waste treatment
facility that handles lithium ion batteries. If you are not sure if your
waste facility can handle lithium ion batteries, contact them and verify if
they are permitted or not.
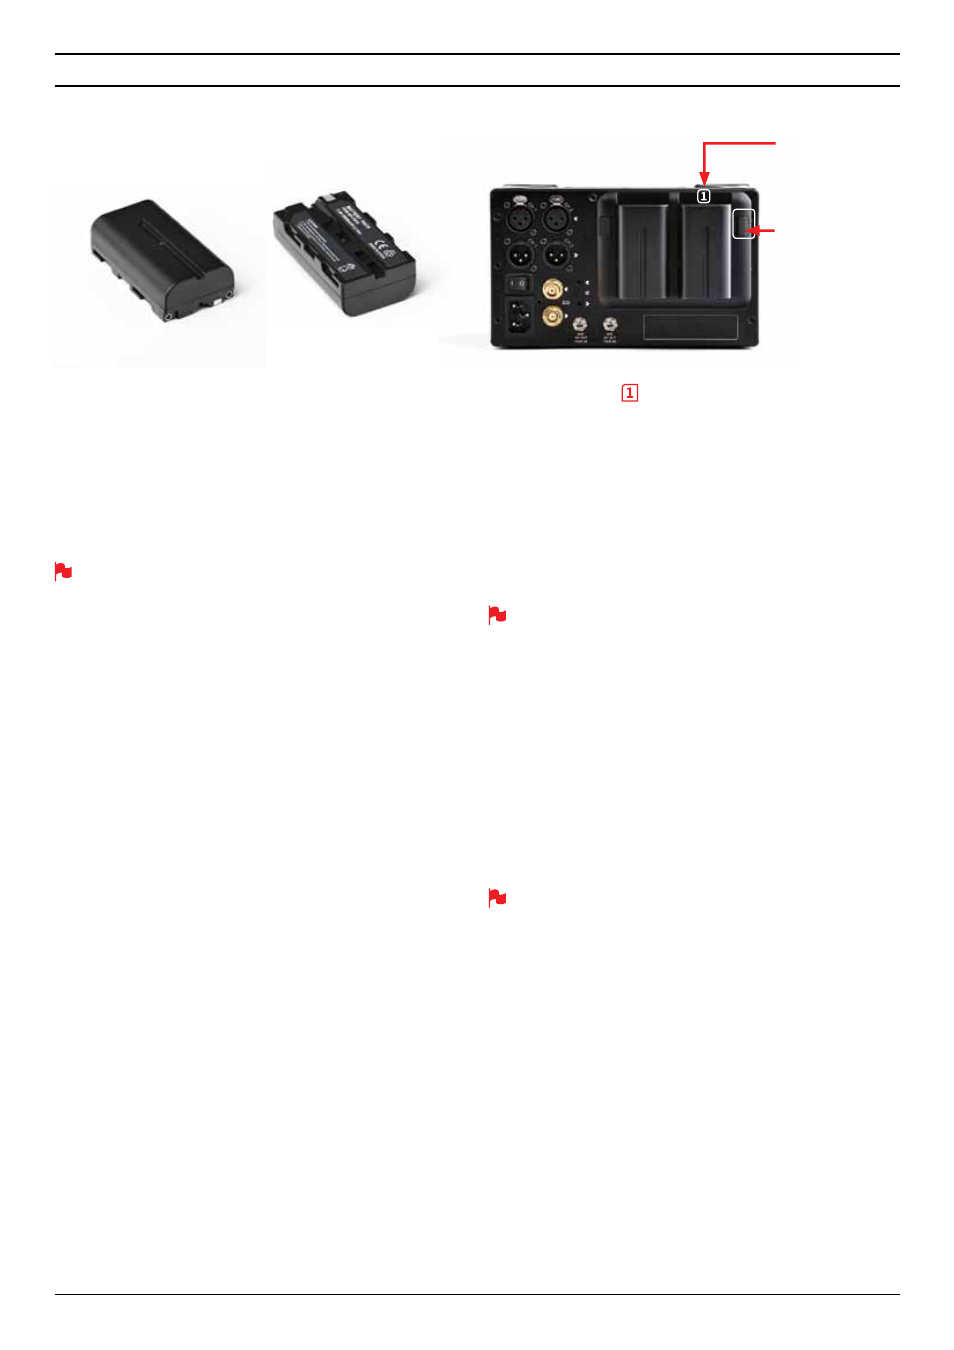
Always use battery slot
for the first battery. This is effectively your
primary battery and the Ronin will, if using batteries alone.
Battery slot No.2 is the secondary or back-up battery and is not marked.
Once the Ronin has been started from battery slot No. 1, it will operate
on battery slot No. 2 alone. No. 1 is only required for start up.
To insert the batteries, gently slide them down into the slot and lock
them into position. To remove a battery, push the latch to release it. Each
battery has its own latch, which is located to the right of batter No. 1 and
to the left of batter No. 2 as you look at the back of the Ronin. Pull the
latches towards the batteries to release them.
Ronin batteries and modular accessories (Connect Converters, etc) are
held in place very tightly because they are on the outside of the device
and there has to be no possibility whatsoever that they could work
loose, so you will have to be quite firm with the battery latches. We
suggest that you familiarise yourself with the force required to remove
the batteries and accessories so that you can do this quickly in the
field. Make sure that you hold the top and the bottom of the battery
or accessory module when sliding it off to avoid dropping it when it is
released from the main unit.
The Ronin introduces an Atomos technology called Battery Looping for
Continuous Power. When power is running low on one battery, the Ronin
will automatically switch to the second battery, you can remove one of
the batteries and replace it with a fully charged one. Ronin will continue
to operate as you do this. You can continue this process indefinitely.
The Ronin may be powered from NiMH & Li Ion 14.4V battery
systems. Battery adaptor required. If a 14.4V battery is connected
the unit will assume it is on AC power and the battery status page will
show the AC power plug icons.
Battery number 1
Slide down into
battery slot/s and
lock into position.
Push latch to
release battery
4. Connecting the Ronin and powering up