Connecting and editing – Atomos Ronin User Manual
Page 30
Atomos Ronin – User Manual Edition 1: June 2013 28
12. Connecting and Editing
Importing
Final Cut Pro (version 7), Final Cut X , Adobe CS5 (with 5.51 update),
EDIUS 6, Sony Vegas 10, Lightworks and AVID Media Composer 6
support imported files from your Ronin disk.
Importing Ronin footage into Final Cut Pro
You can import Ronin footage into Final Cut Pro (FCP) in just a few
simple steps.
First, connect the Ronin Docking Station to your Apple Mac using the
Firewire 800 port (USB 2.0 will also work). Insert the Ronin Master Caddy
containing the disk with your footage into the Docking Station and you
will see the drive appear in your Finder window.
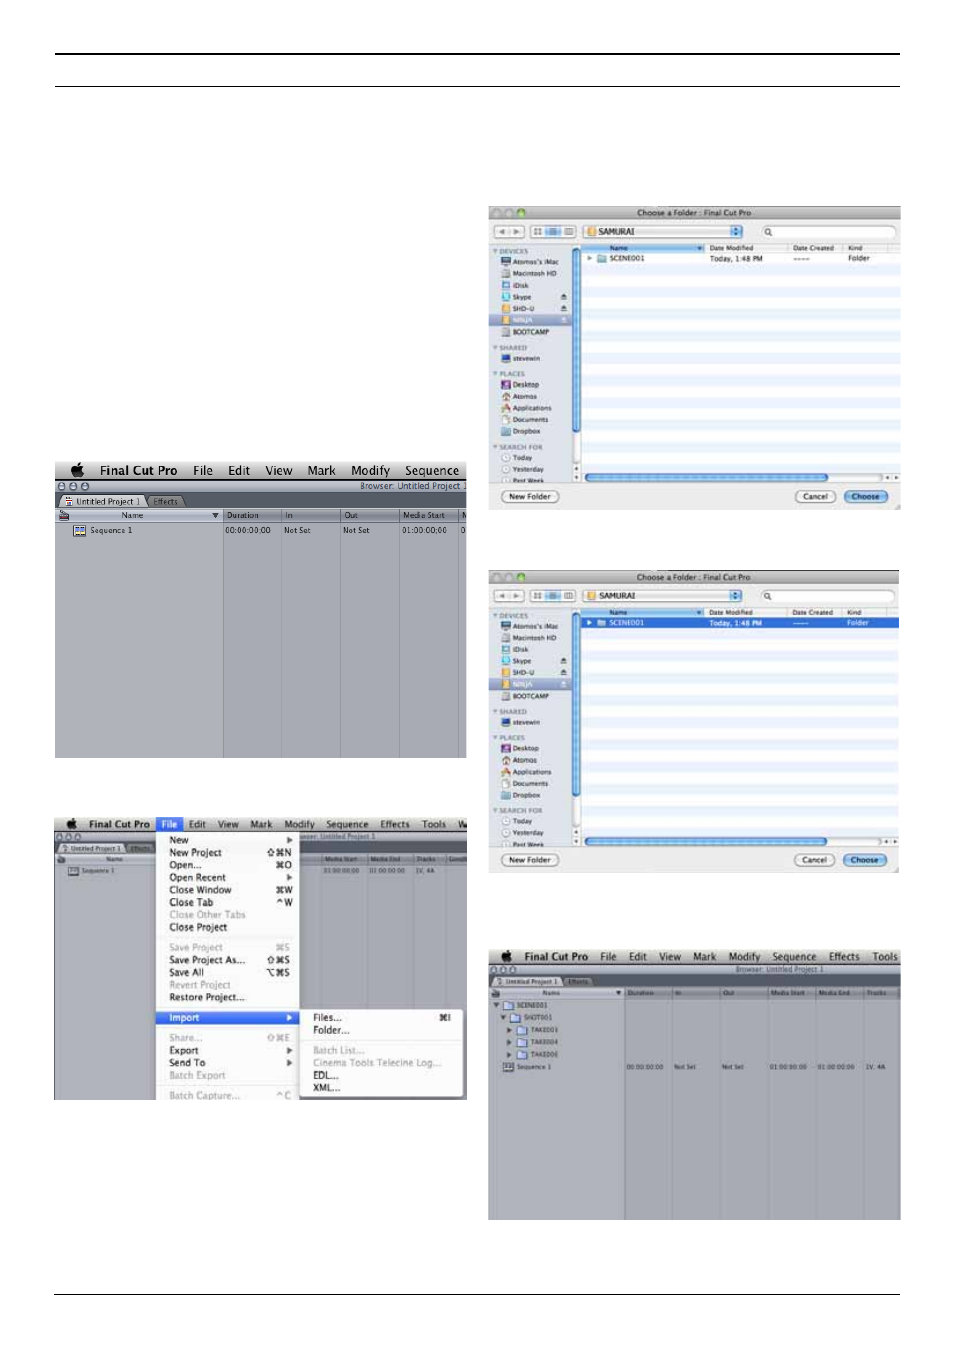
Start FCP and open your project (or start a new one).
The screen will look like this:
Go to the
File
menu and select
Import > folder
:
FCP will show you a “browse” window.
Look for the Ronin drive, and
click on it.
You’ll see the folders in the Ronin drive.
Select the folder containing the
footage you want to import:
Click on Choose and go back to your FCP project window:
Your Scene, Shot and Take folders now appear in the project window,
ready for use in your FCP project.