User controls, Installation, User controls installation – AJA HD10AMA User Manual
Page 6
HD10AMA Mini-Converter v1.0r2
www.aja.com
6
User Controls
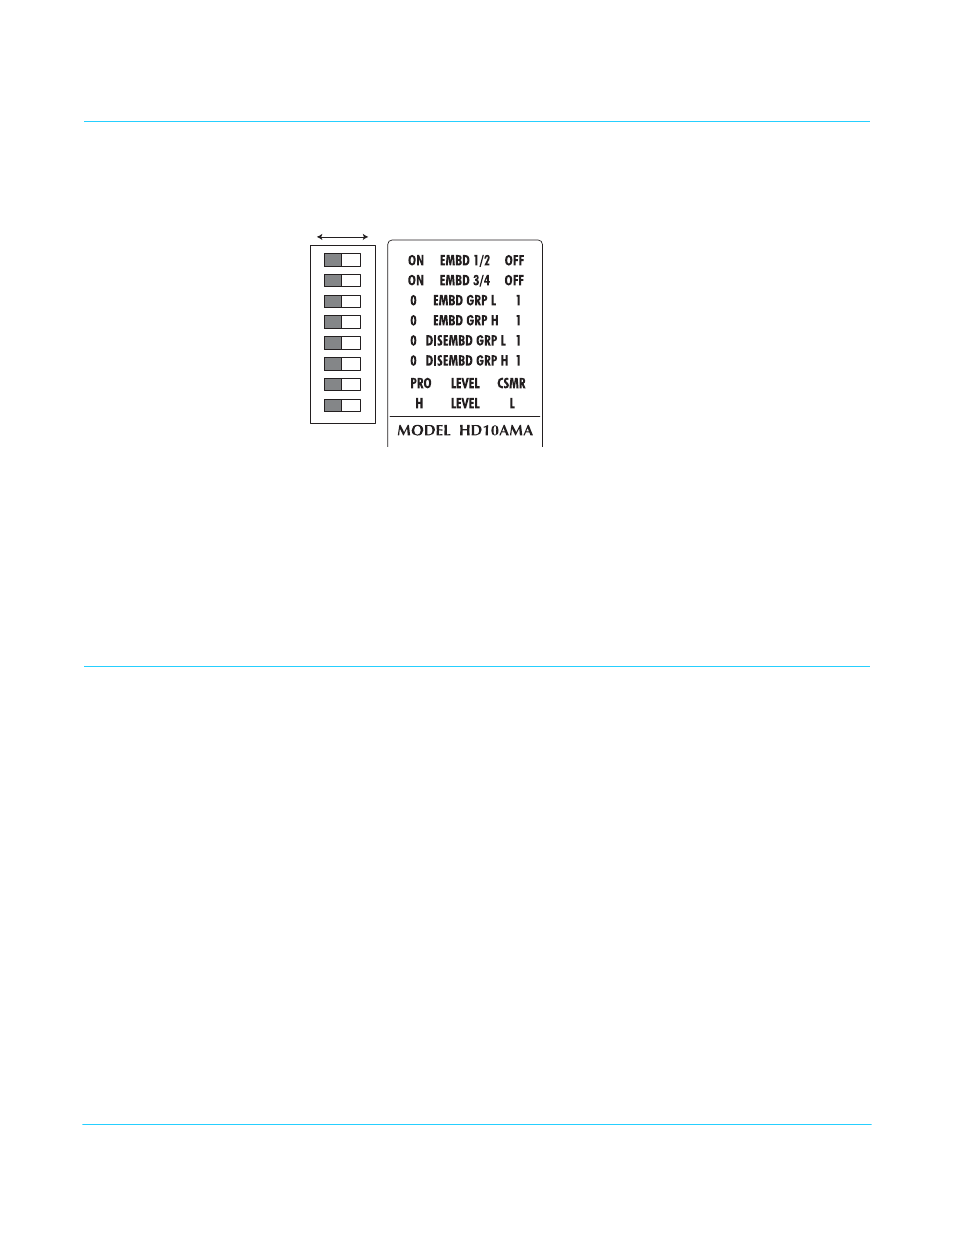
The HD10AMA has an 8-switch DIP accessible through a cut-out in the bottom of the
unit. The DIP switches are used to configure how the unit’s audio embedding and
disembedding functions, and adjust audio levels.
The HD10AMA also has a jumper on the internal circuit board, accessible by removing
the outer shell case of the HD10AMA, used in conjunction with the DIP switches 1 and 2
to select certain functions.
The combination of the AUX jumper setting and the DIP switch settings determines the
overall operation of the HD10AMA.
The exact functions of the DIP switch and the jumper settings are described in
Installation
Typically, HD10AMA installation consists of the following:
1. Disconnect +5VDC from the converter.
2. Set the DIP switches and, if necessary, the internal jumper, for the desired equipment
configuration.
3. Connect video equipment to the converter BNCs.
4. Connect the breakout audio cable to the converter.
5. Connect audio equipment to the breakout cable (see
for pinouts).
6. Apply power to the converter.
1 2 3 4 5 6 7 8
DIP Switch Setting
LEFT RIGHT