Powering the x8 – 3D Robotics X8 Plus User Manual
Page 12
10
Powering the X8
Follow these steps to power the X8.
2
Join the yellow connector on the battery with the yellow connector
on the X8; this will power on the X8. Keep the X8 still and level
while it powers on and initializes the sensors. Check the status
LED; when it displays blinking blue, the sensors have completed
initialization and you can move the X8.
It is important to establish
communication before powering
on the X8. Always turn on the
controller before connecting the
battery. When powering off the
X8, disconnect the battery before
turning off the controller.
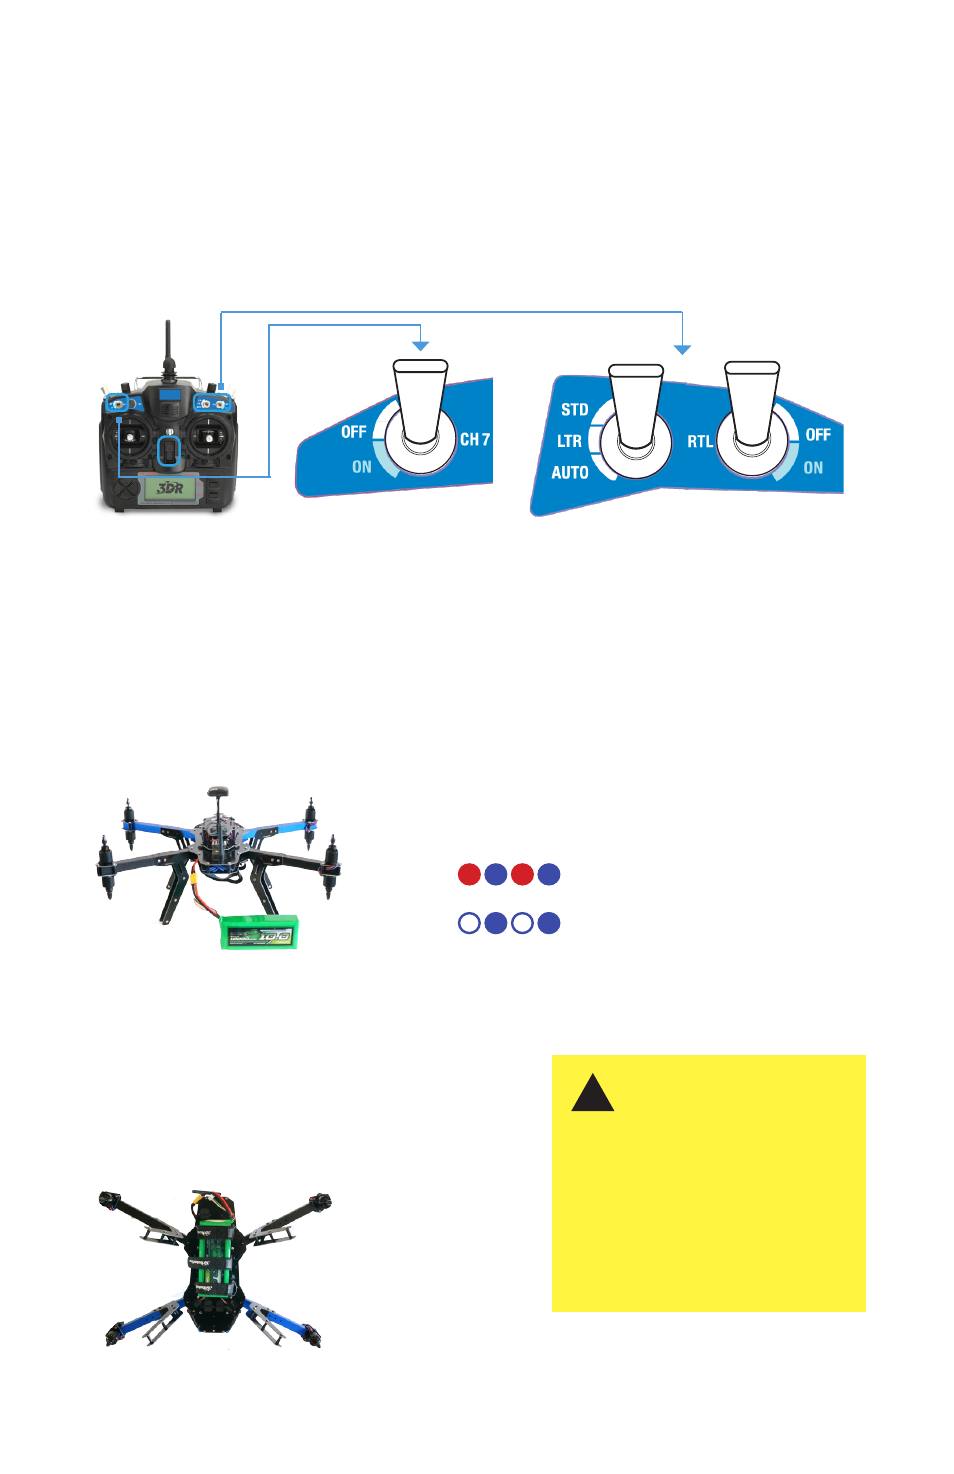
1
Turn on the controller. Ensure that the switches
are set to CH 7 OFF, STD, and RTL OFF.
RC controller
Stabalize
Altitude Hold
Loiter
Full Autonomy
Return to Launch
Stabalize
Altitude Hold
Loiter
Full Autonomy
Return to Launch
X8: Connect battery, keep level while initializing
Stabalize
Altitude Hold
Loiter
Full Autonomy
Return to Launch
CH 7 switch
Mode switch
RTL switch
Initializing, keep still and level
Initializing complete
Status LED indicators:
3
When the initialization process is complete, turn over
the X8 and secure the battery to the underside of the
vehicle using the velcro straps.
X8: Secure battery
!