Stud – Vigo VG06042A User Manual
Page 6
6
MODEL VG06042
INSTALLATION STEPS
USING TYPE A FOR ILLUSTRATION)
A.
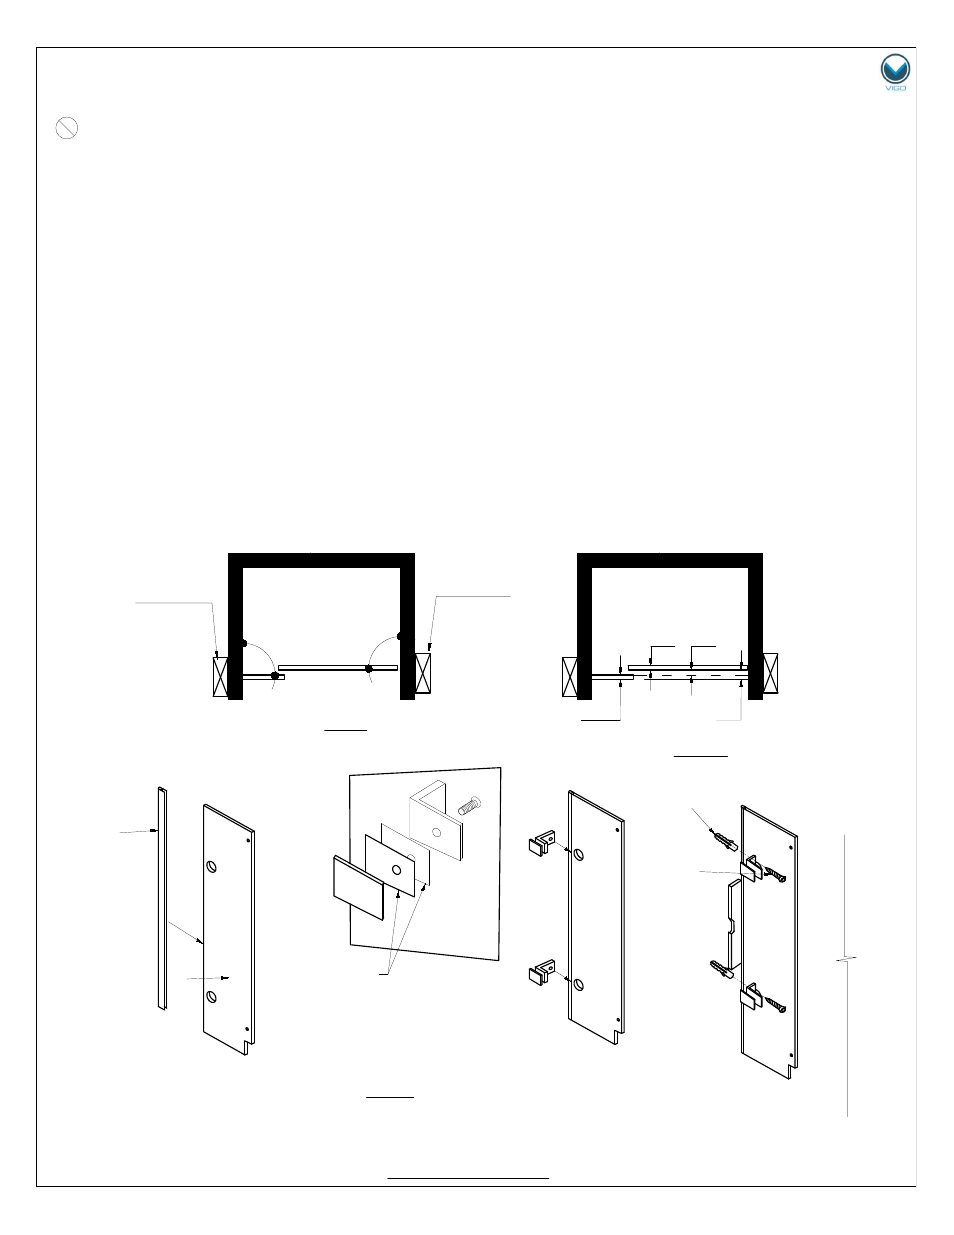
INSTALLING THE FRONT FIXED PANEL
FIG.1
STUD
STUD
FIG.2
THIN
GASKETS
7
17
13
5
1.
Arrange the front fixed panel (#5) to the preferred configuration to determine the orientation of
glass supports (#29).
2.
Install the side seal strip (#7) to the wall side of the front fixed panel [SEE FIG. 2].
3.
Screw in the glass support with the hex key to the front fixed panel. Be sure to use washers on
both sides of the panel.
4.
Mark holes on the wall for the mounting screws after leveling panel.
5.
Remove the front fixed panel and drill holes into the wall. Insert plastic anchors (#17) into the
holes.
6.
Replace the front fixed panel. Screw into the wall with 1
5/8 " hex screws (#13).
FIG.1A
1"
3/8"
3/8" 5/8"
IMPORTANT
Prior to any installation, mark lines on the floor and wall for proper dry fit. Although the panels are
parallel the fixed panel does not sit in alignment with the door panel. Proper planning is
imperative for proper installation. [SEE FIG.1A]