Introduction, Assembling the lcd screen – UVP LCD Screen User Manual
Page 2
Introduction
The LCD screen connects to the UVP PhotoDoc-It digital color camera for live image preview.
These instructions discuss assembly of the LCD to the PhotoDoc-It Imaging System.
Assembling the
LCD Screen
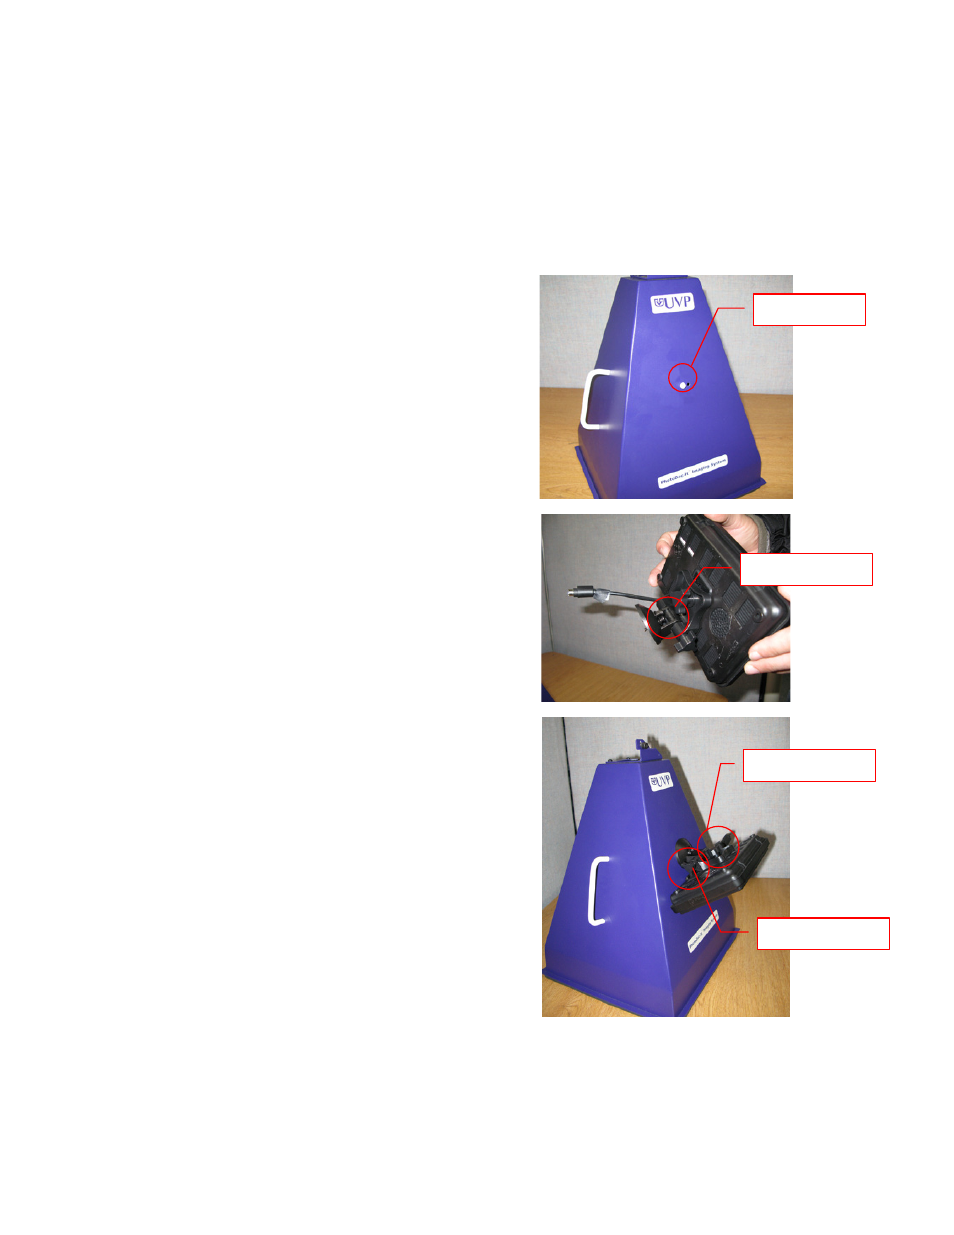
1. Remove the two (2) plugs from the
front of the hood. From inside the
hood, push the plugs out.
NOTE: If the hood does not have the
plugs/holes it is necessary to drill holes
in hood. Refer to Addendum A drawing
for instructions.
2. The LCD mount has two holes.
Insert a screw and washer into
each hole. Slide the screws into the
hood. Tighten screws with nuts
inside the hood (do not over
tighten).
3. Adjust the angle of the screen
using the two knobs:
Outside knob adjusts the screen up
or down.
Center knob adjusts the screen left
or right.
4. Plug in the universal power supply. The plug pops out allowing substitution for other
plug types.
Plugs/Holes
Screw location
Center knob
Outside knob