Installing emission filters, Installing the biolite multispectral light source, Insert the filter cartridge into the filter port – UVP iBox Spectra Small Animal Imaging System User Manual
Page 8
iBox Spectra Imaging System
8
Installing Emission Filters
To install the 50mm emission filter and any other emission filters:
1. Carefully remove the filter from the protective plastic case, holding the filter at the edges to
avoid placing fingerprints on the glass surface.
2. The filter wheel is located on the right side of the darkroom. Press in on the slide-out filter
wheel door and the door will pop out slightly. Pull the filter wheel assembly out until it stops.
3. Manually rotate the filter wheel to the desired position. Place the included filter in Position #1.
NOTE: Before placing the filter in the filter wheel, ensure that the text on the edge of the filter
is positioned so it is right side up when facing the installer.
4. Note the position of all installed filters for entry into the Lighting and Filters menu in the TS2
Software (refer to the TS2 Software User Manual for more information).
5. Once all filters have been loaded, slide the filter wheel assembly back into the system. Press
the filter wheel assembly door until the assembly locks into place.
Additional and replacement emission filters are available through UVP. Refer to the “Replacement
Parts and Accessories” section of this manual for ordering information.
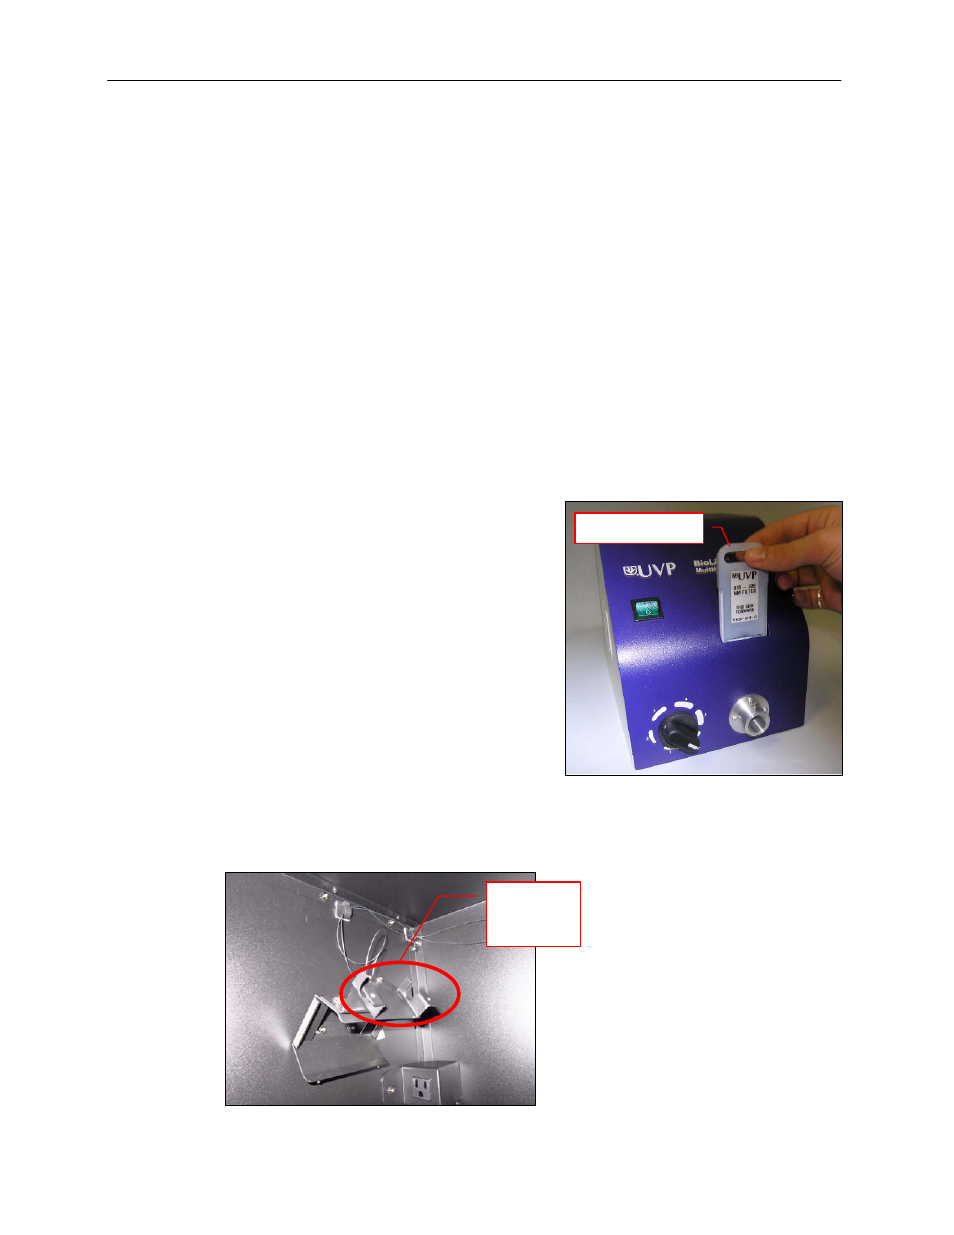
Installing the BioLite MultiSpectral Light Source
1. Plug the power cord into the receptacle on the back
of the BioLite and the other end into a surge-
protected power outlet.
2. Insert the filter cartridge into the filter port.
NOTE: Filters and their cartridges are directional.
Make sure that the label is facing toward the front of
the BioLite. Because of the intense light of the
BioLite, only tempered interference filters should be
used.
3. Remove the plug from the access port at the upper
left side of the darkroom.
4. Insert the knurled side of the fiber optic cable
through the hole in the darkroom, from the inside of
the darkroom out, leaving the two light guides in the
darkroom.
5. Remove any existing plates or screws from the mounting bracket so that the epi light guide bracket
appears as shown below.
Epi Light
Guide
Bracket
Filter Cartridge