Biolite multispectral light source, Manual biolite (manually controlled) – UVP iBox Scientia Small Animal Imaging System User Manual
Page 9
iBox Scientia Small Animal Imaging System
9
BioLite MultiSpectral Light Source
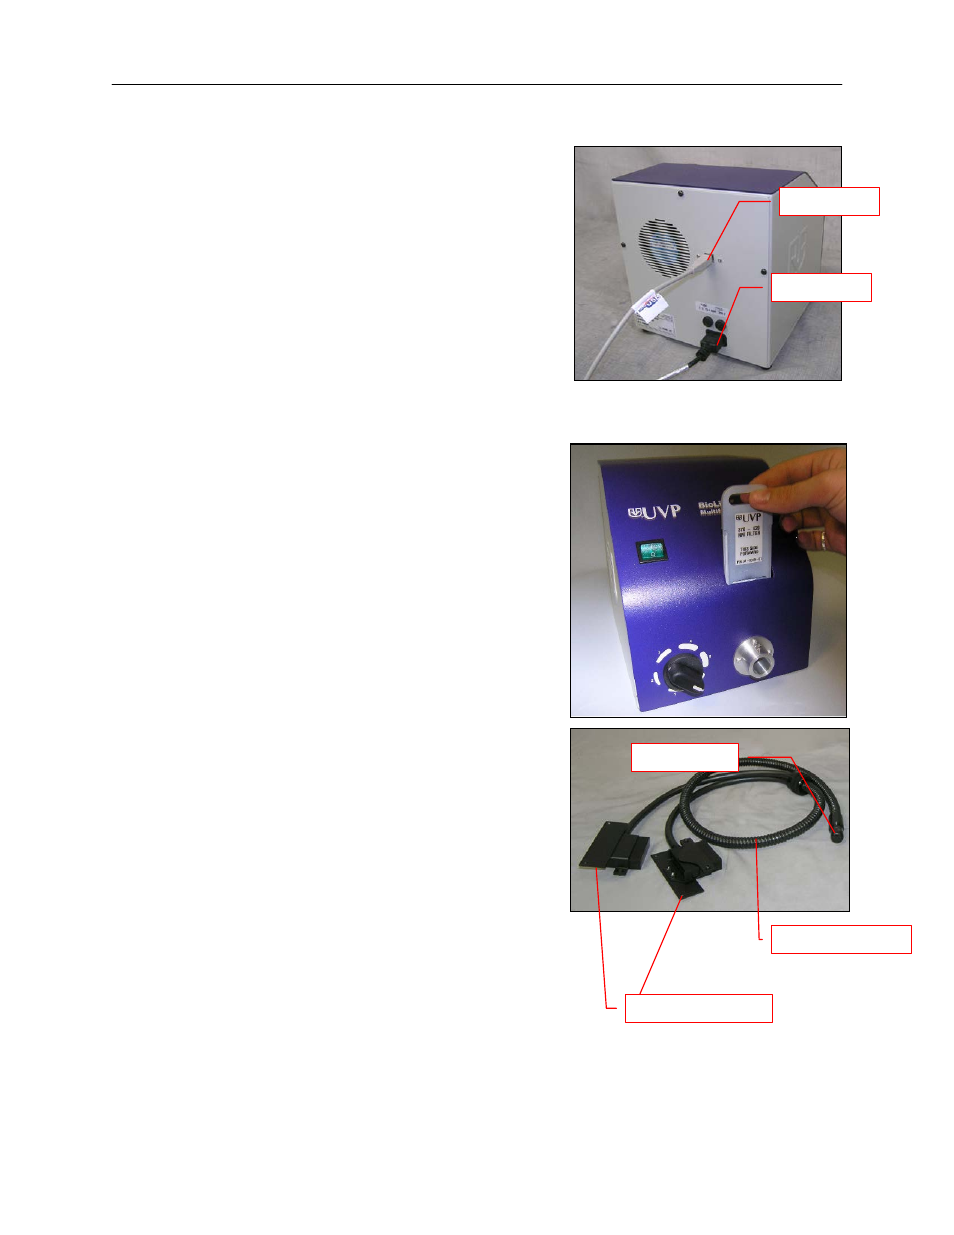
1. Plug the power cord into the receptacle on the
back of the unit and to a power outlet.
2. Connect the USB cable (if applicable) to the unit
and leave the other end unplugged. The manual
BioLite does not have USB connection.
3. Position the power source to the left of the
darkroom.
Manual BioLite (Manually Controlled)
1. Insert the filter cartridge into the filter port.
NOTE: Filters and their cartridges are directional.
Make sure that the label is facing the front.
Because of the intense light of the BioLite, only
tempered interference filters should be used.
2. Remove the epi light covers at the top of the
darkroom. They should be held in place by two
strips of Velcro adhesive. There are two screws
that protrude from the epi light fixtures, which will
be used to secure the BioLite light guides.
3. Remove the top plug from the access port at the
upper left side of the darkroom.
4. Thread the knurled (non-smooth) side of the fiber
optic cable from the inside of the darkroom through
the access port until the large stopper separating
the smooth and rough side of the fiber optic cable
can no longer be pushed through the opening.
5. The light guides should be on the inside of the
darkroom. Make sure that the fiber optic cables
extend from the light guide towards the front of the
darkroom (towards you). Match the drilled holes in
the light guides to the protruding screws in the epi-
light structure. Use the thumbscrews provided to
secure the light guides.
USB Cable
Power Cord
Epi Light Guides
Stopper
Fiber Optic Cable