Maintenance, Fan maintenance, Door glass replacement – Regency Excalibur EX-U31 Medium Gas Insert User Manual
Page 27
Regency U31-3 Gas Fireplace Insert
27
MAINTENANCE
FAN MAINTENANCE
CAUTION:
Label all wires prior to
disconnection when servicing con-
trols. Wiring error can cause improper
and dangerous operation.
Remove the 2 screws holding the
grate in position.
Remove the 2 screws,
push Burner Tray to the left, and lift off.
Aeration Adjustment Rod
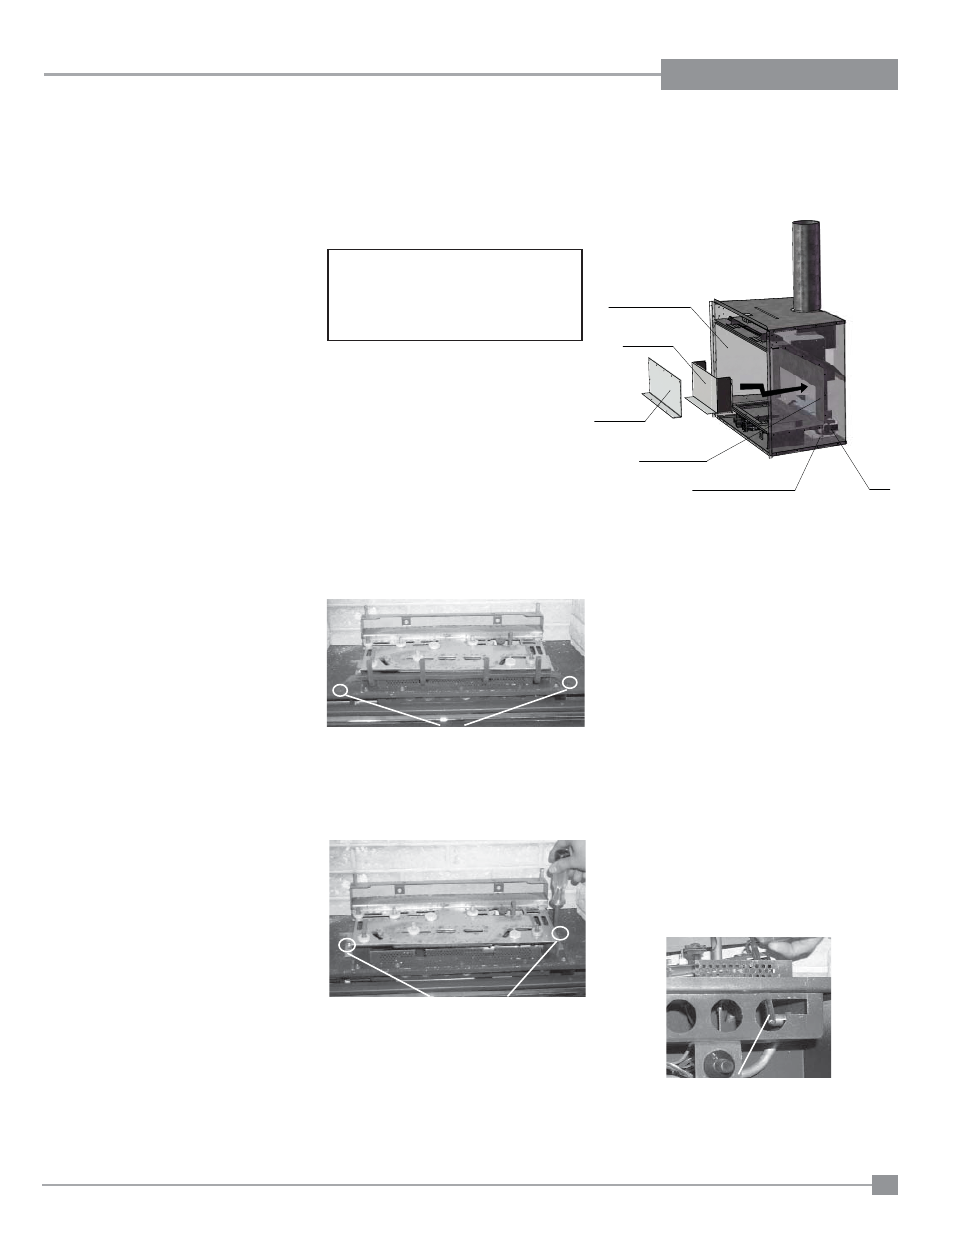
If your fan requires maintenance or replacement,
access to the fan is through the plate on the
rear wall of the fi rebox. NOTE: the unit MUST
NOT be operated without the fan access
panel securely in place.
10) Unplug the black wires from the fan motor (from
inside the stove).
11) Lift Fan Assembly off of the 2 pins, tip forward
and pull through fi rebox opening.
12) Disconnect green wire from power cord.
Replacing fan:
Reverse above steps. Hint for pushing fan down
onto pins - rub a bit of dish soap on the grommet so
it will slide more easily onto the pin. Check to make
sure the fan is seated properly on the pins, this is
very important- try to move the fan back and forth,
there should be no noise, if there is check that the
grommets haven't come loose.
When replacing the Burner Tray, slide the aeration
adjustment rod through the opening in the front of
the Valve Assembly.
To remove fan:
1) Turn the unit off and allow it to cool to room
temperature.
2) Unplug or disconnect power source to
stove.
3) Remove glass front (see page 11).
4) Remove
logs.
5) Remove brick panels.
6) Remove the Grate by removing the screws
on each side of the grate.
7) Remove the Burner Tray by removing the
screws on each side of the tray. Push the
tray to the left and lift up.
8) Remove the 12 screws holding the Access
Panel in place.
9) Remove the Fan Air Duct by removing 4
screws, 2 per side.
DOOR GLASS
REPLACEMENT
Your Regency insert is supplied with high tem-
perature, 5 mm Neoceram ceramic glass that
will withstand the highest heat that your unit
will produce. In the event that you break your
glass by impact, purchase your replacement
from an authorized FPI dealer only, and follow
our step-by-step instructions for replacement.
WARNING: do not operate appli-
ance with the glass front removed,
cracked or broken. Replacement
of the glass should be done by a
licensed or qualifi ed service per-
son.
Flush Glass Replacement
Slide old glass out of the side frames and replace
with new glass.
)DQ'XFW
)DQ
)DQ0RXQWLQJ
6WXGDQG*URPPHW
)DQ&RYHU
3ODWH
)LUHER[5HDU
)LUHER[VKRZ
DVWUDQVSDUHQW