Installation – Regency Excalibur EX-U31 Medium Gas Insert User Manual
Page 10
10
Regency U31-3 Gas Fireplace Insert
INSTALLATION
THIS CONVERSION MUST BE DONE BY A QUALIFIED GAS
FITTER IF IN DOUBT DO NOT DO THIS CONVERSION !!
Conversion Kit from Natural Gas to Propane
Model #404-969 for: U31-NG3 Units
1) Turn the unit off and allow it to cool to room
temperature.
2) Unplug or disconnect power source to stove.
3) Remove glass front (see manual).
4) Remove logs and brick panels (if installed).
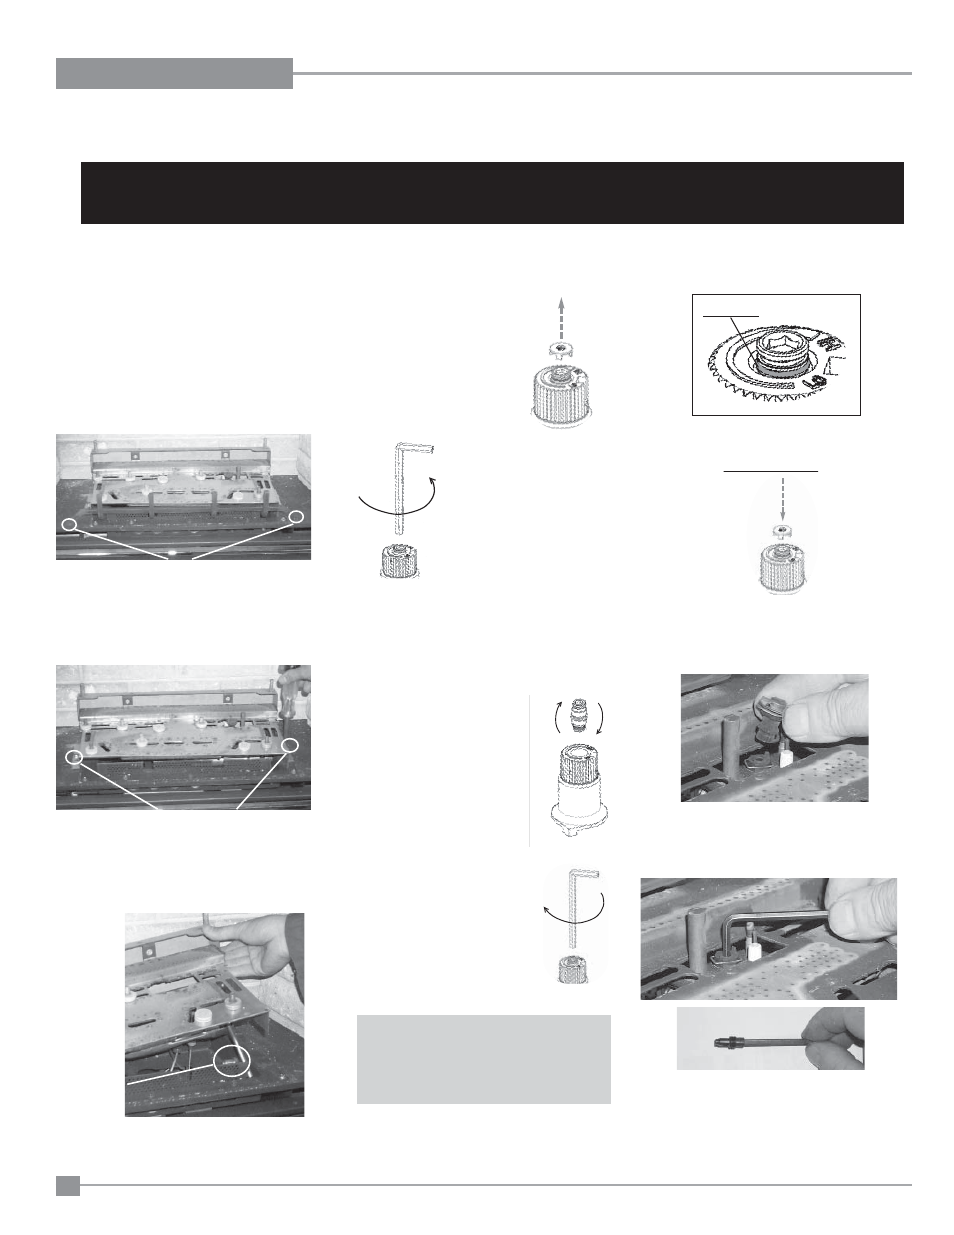
5) Remove the Grate by removing the screws
on each side of the grate.
Remove the 2 screws holding
the grate in position.
Remove the 2 screws,
push Burner Tray to the left, and lift off.
6) Remove the Burner Tray by removing the
screws on each side of the tray. Push the
tray to the left and lift up.
7) Remove burner orifi ce with 1/2" wrench and
replace with the #52 orifi ce in the Kit.
8) Turn control knob to the “OFF” position
Burner
Orifi ce
17) Pull off the pilot cap to expose the pilot orifi ce.
18) Unscrew the pilot orifi ce with the allen key and
replace with the LP pilot orifi ce in the kit.
19) Replace Burner Tray and reverse steps 5) to
1).
20) Adjust the burner aeration setting to 3/8" to
3/8" as required for the best fl ame picture.
Fig. 1
9) R e m o v e t h e b l a c k
protection cap by hand
from the hi-low knob (Fig.1).
Fig.2
12) Flip the screw (Fig. 3).
Fig.4
Fig.3
13) Using the Allen wrench as
shown in Fig.4, rotate the
screw clockwise until snug,
do not overtighten.
10) Insert a 5/32” or 4mm Allen
wrench into the hexagonal
key-way of the screw (Fig. 2),
rotate it counter-clockwise
until it is free and extract it.
11) Check that the screw is clean and if necessary
remove dirt.
WARNING!
Do not over tighten the screw.
Recommended to
grip the wrench by the short side.
14) Verify that if the conversion is from NG to LPG,
the screw must be re-assembled with the red
o-ring visible (Fig. 5).
LPG Configuration
Red o-ring visible
Fig.5
15) Re-assemble the black protection cap
(Fig. 6).
16) Reverse steps 6 - 1.