Summit DW18 Installation Manual User Manual
Page 18
15
USA
A
B
s
t
C
o
A
s
t
C
B
o
p
A
s
t
C
B
o
r
Lock the toe kick brackets as shown with the plastic tab in
the figure C by pushing the plastic tab on the dishwasher
into the teeth of the bracket (
C
).
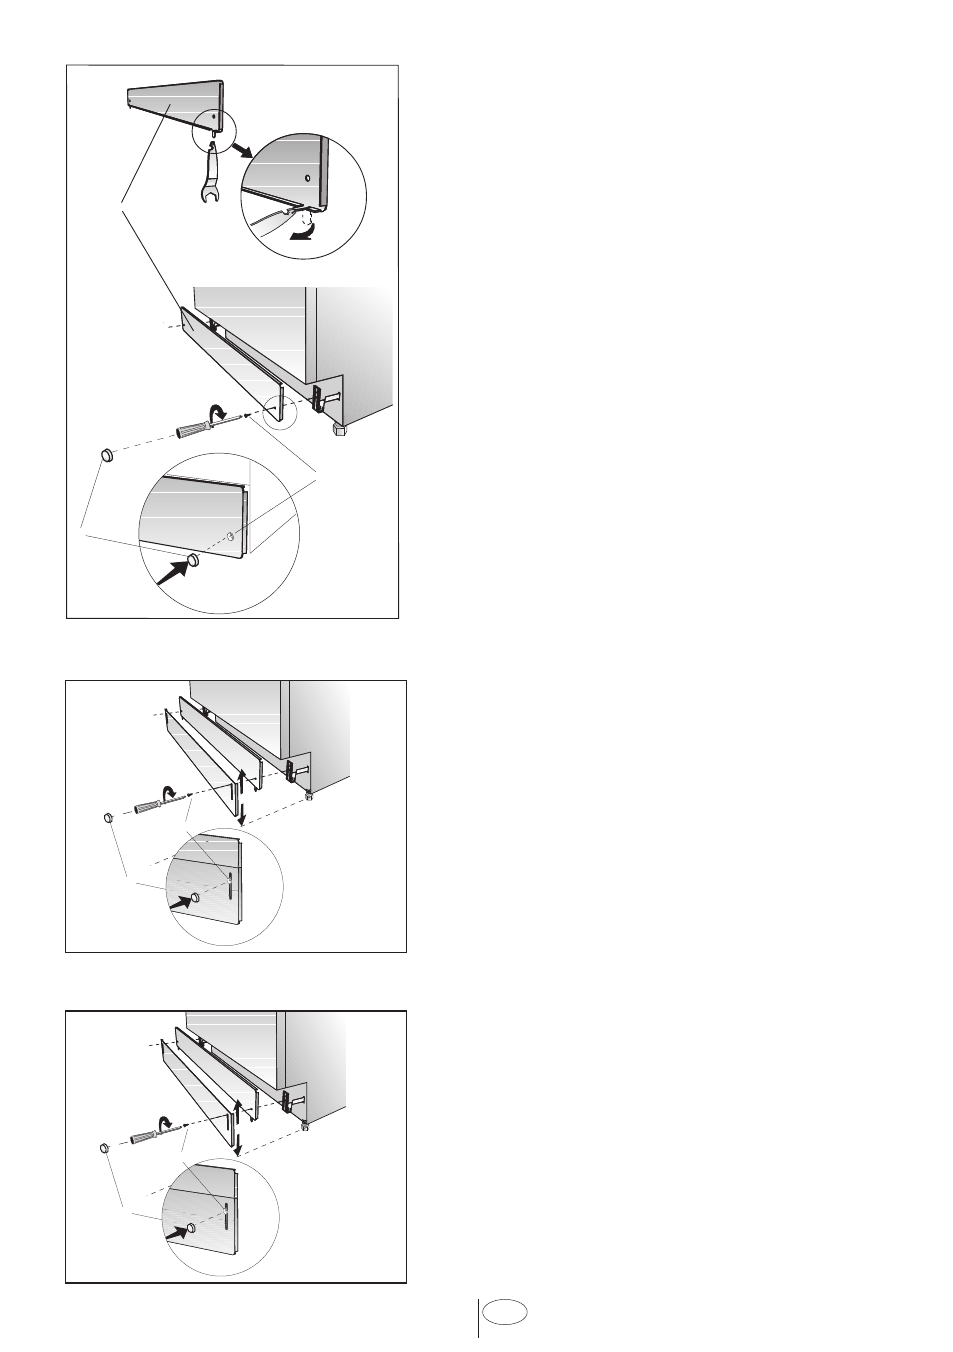
3. Now attach the toe kick to the bracket with the two
(Ø 3/16” x 1/4” - Ø 4mm x 6mm) screws and the caps
provided as follows.
If the enclosure height is below 331/16” (840mm) use only
“o” labelled toe kick (toe kick without slots). Installation
should be done following the steps illustrated in the
Figures A, B and C respectively.
1. Bend tabs on toe kick (o) inwards (
A
).
2. Secure toe kick to brackets with screws (t) as shown in
the supply bags (
B
).
3. Attach caps (s) as shown in the supply bags (
C
).
If the enclosure height is above 331/16” (840mm) use “o”
and “p” labelled toe kicks together. Make sure the slotted
toe kick “p” is on the outside so you can adjust height of
the toe kick. Installation should be done following the steps
illustrated in the figures A, B and C respectively.
1. Align the toe kick (o) and (p) (
A
).
2. Secure toe kicks to brackets with screws (t) after
adjusting the height of the slotted toe kick (p) (
B
).
3. Attach caps (s) as shown in the supply bags (
C
).
If the enclosure height is above 341/4” (870mm) use “o”
and “r” labelled toe kicks together. Make sure the slotted
toe kick “r” is on the outside so you can adjust height of
the toe kick. Installation should be done following the steps
illustrated in the figures A, B and C respectively.
1. Align the toe kick (o) and (r) (
A
).
2. Secure toe kicks to brackets with screws (r) after
adjusting the height of the slotted toe kick (t) (
B
).
3. Attach caps (s) as shown in the supply bags (
C
).