S&S Cycle Big Twin Oil Pump Kits User Manual
Page 15
15
Oil Pump Installation - All Years
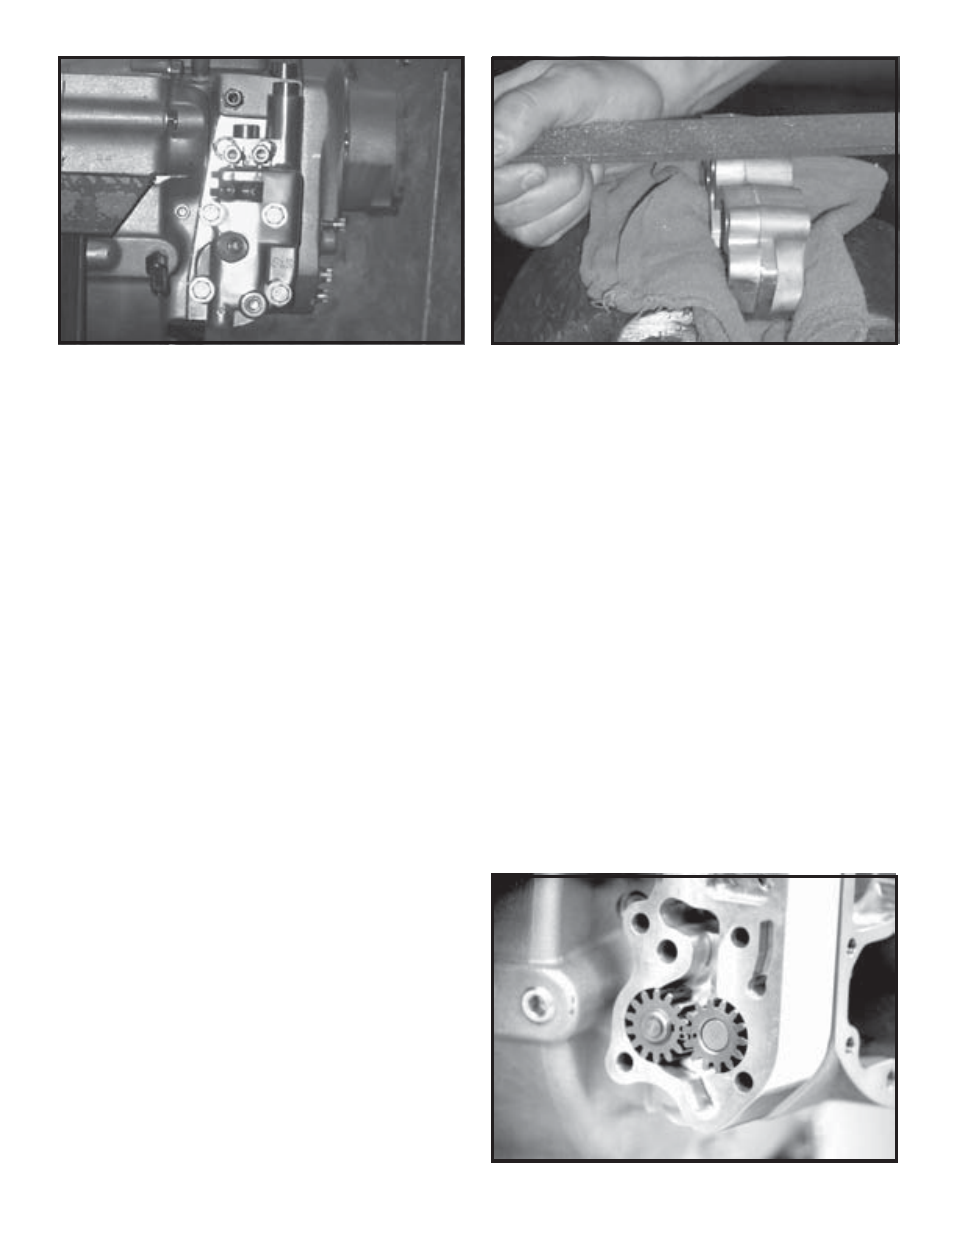
A. Confirm that adequate clearance exists between
oil pump body and crankcase by temporarily
installing pump assembly on crankcase and
inspecting areas indicated in photo. Do not install
oil pump driveshaft gear or snap ring at this time.
See Picture 33. It may prove necessary to
remove a small amount of material from oil pump
body to obtain correct fit. See Picture 34.
NOTES -
●
Remove minimum amount of material required for
proper positioning of oil pump on crankcase. Avoid
damaging gasket surfaces. After modification, clean pump
body thoroughly with suitable parts cleaner solvent and
compressed air to remove metal filings generated during
procedure. Solvent must be of type that will not harm
driveshaft seal in oil pump body. Remove all traces of
solvent prior to installation of pump.
●
1
⁄
4
-24 mounting bolts previously provided with cast oil
pump kits were black. All mounting bolts provided with
current kits are plated. Visually compare threads and
gently screw oil pump mounting bolts into crankcase to
confirm correct thread.
●
S&S oil pump bodies, covers and gaskets may appear
similar to other manifacturerís parts but should not be
interchanged due possible differences in internal
machining, etc.
CAUTIONS -
●
Failure to perform modification described in
Section 8-A correctly may result in oil pump damage
not covered under warranty.
●
Using oil pump components other than those
provided by pump manufacturer may impair overall
function of pump resulting in oil leaks, insufficient
oil pressure and possible engine damage.
WARNINGS -
●
Many solvents are flammable and potentially toxic.
Read solvent manufacturerís instructions prior to use.
●
Compressed air is potentially harmful, especially
to eyes and skin. Wear goggles and other protective
clothing during use, and direct air stream away from
yourself and others nearby.
B. Disassemble, clean, and inspect oil pump, then
reassemble pump dry, without lubrication. (Pump
will be lubricated in final step.)
C. Rotate gears as preliminary check for bind, and
to confirm that drive gear keys are properly
installed.
NOTES -
●
In some instances, oil pump gears have index marks.
To assure proper gear mesh, marks must align when gears
are installed in pump body. See Picture 35.
Marks in photo have been darkened; they normally appear
as light punch marks.
Picture 33
Picture 34
Picture 35