Retsch PM 200 User Manual
Page 17
Retsch GmbH
17
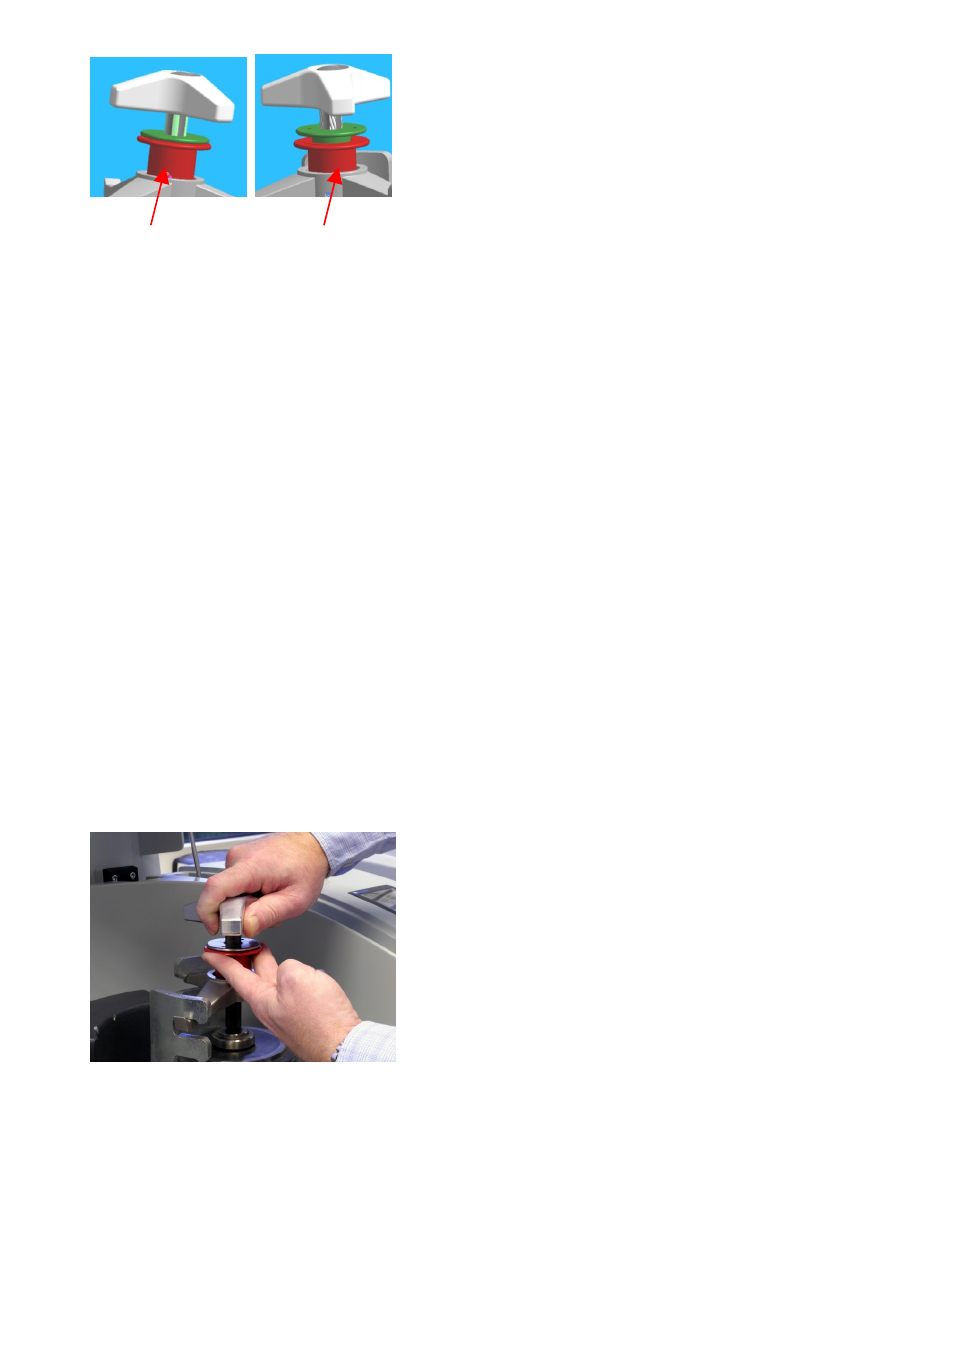
5 Up = free
5 Down = locked
Clean the grinding bowl disk with torsion lock pin 1
Turn the label on the grinding bowl 2 to the same side as
the torsion lock pin, the borehole in the grinding bowl is
located here.
Insert the grinding bowl into the grinding bowl fixture
Pay attention to the torsion lock in 250 and 500 ml grinding
bowls. The borehole in the base of the grinding bowl to take
up the torsion lock pin is located on the side of the marking
areas.
Insert grinding bowl clamping arrangement 3 into latching
brackets 4
Pull red sleeve 5 upwards and clamp the grinding bowl by
turning the three-point grip to the right
Let red sleeve 5 latch audibly downwards, if necessary,
retighten gently from the three-point grip
The three-point grip should now not be able to be turned
Should the red locking sleeve not move completely
downwards when released (audible clacking), briefly retighten
from the three-point grip.
The red locking sleeve, which is now in the locked position,
prevents the threaded spindle from working loose.
Removing the grinding bowl fastening device in the PM100
Pull the red sleeve 5 upwards and unscrew the
grinding bowl by turning the three star grip to the
left.
Continue to turn the three star grip to the left until
the grinding bowl fastening device can be removed.
Tightening and unscrewing the grinding bowl
fastening device using a counter spanner
Using a counter spanner prevents the drive from turning, which can otherwise easily occur when
tightening or loosening the grinding bowl.