Nh-u12f | installation manual, Am2 installation – Noctua NH-U9F User Manual
Page 7
Chapter 4
NH-U12F | Installation Manual
7
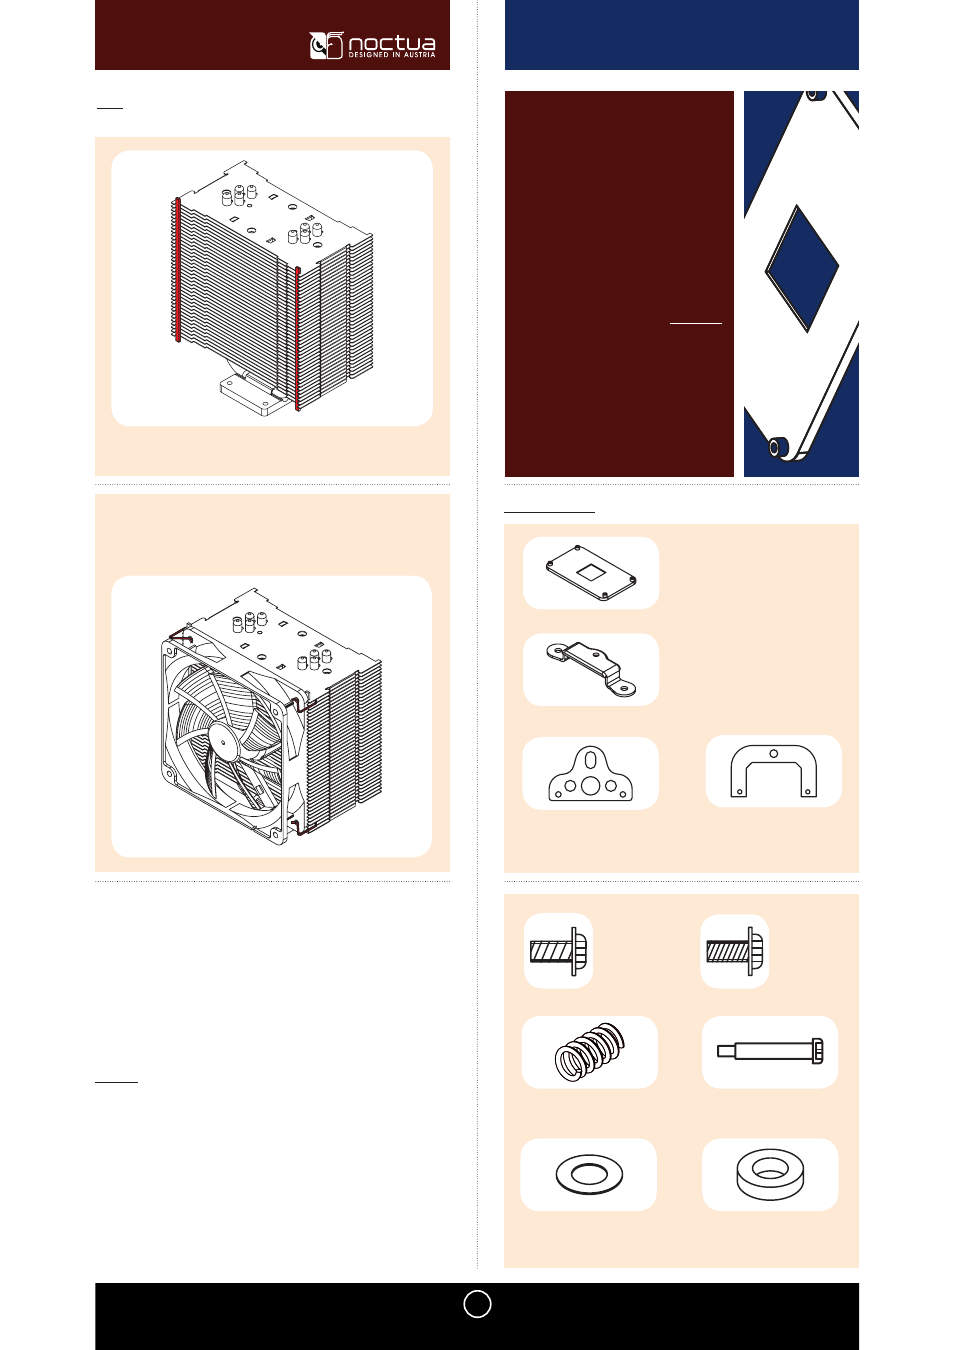
[ AM2 Installation ]
[ Noctua NH-U12F ]
First stick the 2 anti-vibration strips onto the cooling fins in order to
dampen minor vibrations emitted by the fan.
Attaching the fan
Step 6:
Then attach the fan to the heatsink using 2 steel clips, placing it so that
it blows onto the heatsink (You can optionally use the second pair of clips
to install a second fan).
Depending on the orientation of the cooler, the fan should either blow towards
the rear side of the case or the power supply in accordance with the airflow
within the case.
Connect the fan to the mainboard, power supply or fan controller. Depending
on your CPU and the temperature inside the case, you may interconnect the
supplied Ultra-Low-Noise Adapter (U.L.N.A.) in order to further reduce the fan’s
operating noise.
Caution: When using the U.L.N.A., check the temperature of your CPU
using appropriate software (e.g. the respective applications of your mainboard
manufacturer), in order to evade automatic throttling of the CPU due to the
increased temperature. If the cooling performance is insufficient, please increase
case ventilation or remove the U.L.N.A.
AM2
Installation
1x AM2 backplate
2x Short mounting bars (fitting the
backplane)
Mounting hardware:
2x Standard
fastening brackets
2x 90° -
fastening brackets
4x White, thin washers
(from the AM2 bag)
4x Red, thick washers
(from the AM2 bag)
2x Mid-sized, silver
springscrews
4x Short
screws
4xShort screws
with higher
thread pitch
(from the
AM2 bag)
2x
Pressure springs