Nh-u12f | installation manual – Noctua NH-U9F User Manual
Page 4
NH-U12F | Installation Manual
4
[ LGA775 Installation]
[ Noctua NH-U12F ]
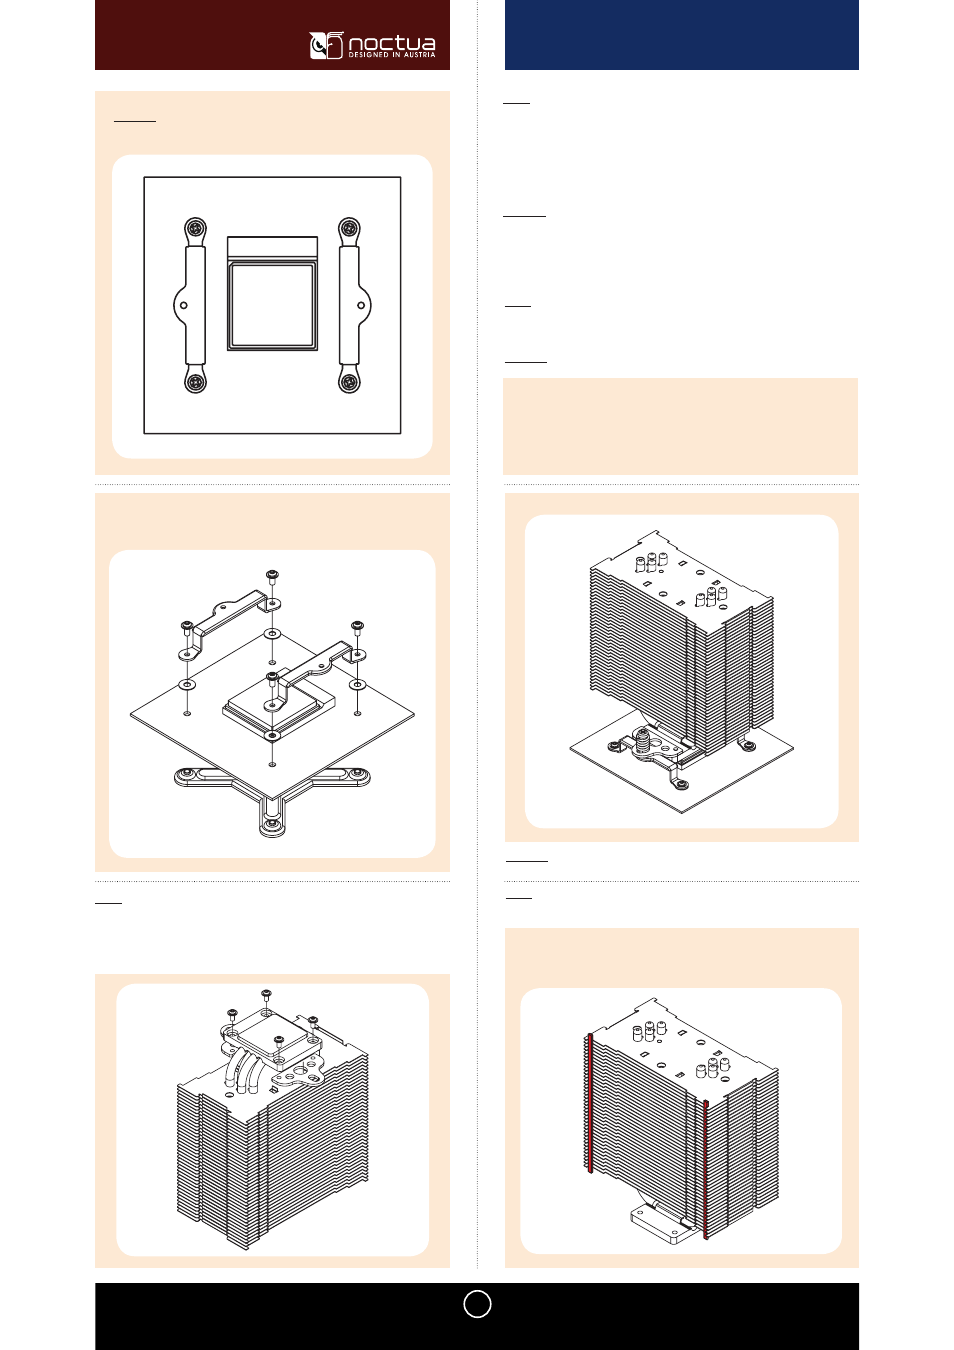
Caution: Make sure that the straight sides of the mounting bars face
the socket and the bulgings are pointing outwards.
Now screw the mounting bars to the backplate using small screws and
washers.
Tightly screw the fastening brackets to the copper base of the heatsink using 4
short screws.
Attaching the fastening brackets to the heatsink
Step 3:
Caution: Peel off the protection film at the bottom side of the heatsink first!
Place the heatsink on the CPU, so that the mounting holes of the fastening
brackets screwed to the base of the cooler align with those of the mounting bars.
Now screw the fastening brackets to the mounting bars employing the pressure
springs and the respective screws
If there are traces of thermal paste or thermal pads on your CPU, please clean
them off first. Spread a thin coating of the supplied thermal paste on the CPU.
Caution: Applying too much thermal paste will lower the heat conductivity and
cooling performance!
Applying thermal paste
Step 4:
Attaching the heatsink to the CPU
Step 5:
Caution: Tighten the screws until they stop.
First stick the 2 anti-vibration strips onto the cooling fins in order to
dampen minor vibrations emitted by the fan.
Attaching the fan
Step 6: