Nh-u12f | installation manual – Noctua NH-U9F User Manual
Page 6
NH-U12F | Installation Manual
6
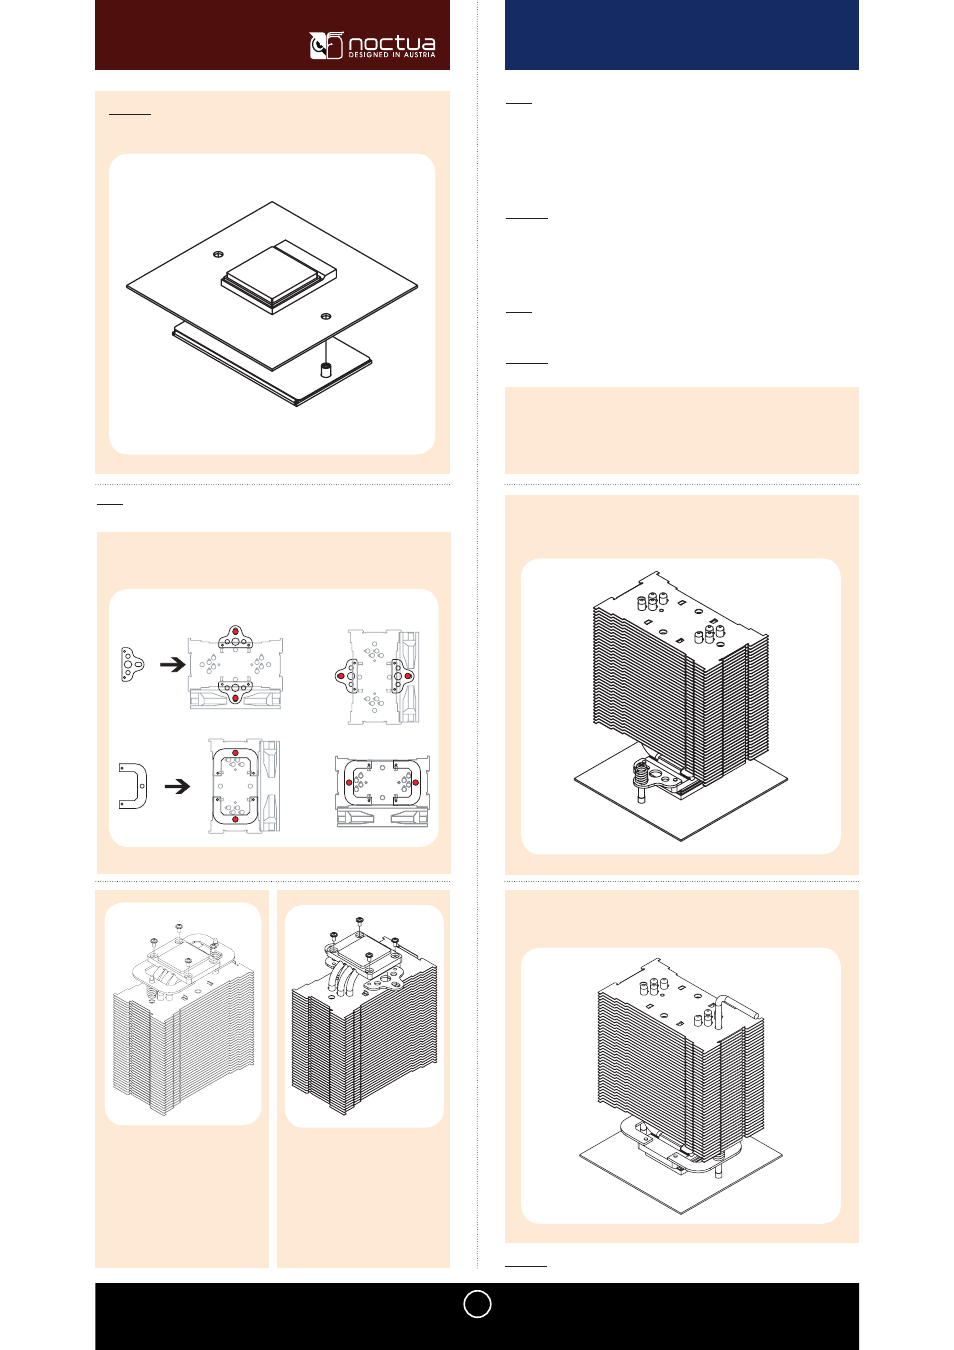
[ K8 (Socket 754, 939, 940) Installation ]
[ Noctua NH-U12F ]
Caution: As the fastening brackets are screwed directly to the backplate
on K8 mainboards, no mounting bars are requiered.
Attaching the fastening brackets to the heatsink
Step 3:
Chose the fastening brackets according to the desired orientation of the
cooler.
Socket-Orientation A
When using the 90° fastening
brackets, first stick the spring screws
and springs into the fastening
brackets. Then screw them to the
copper base of the heatsink tightly
using 4 short screws.
When using the standard fastening
brackets, tightly screw them to the
copper base of the heatsink using 4
short screws.
If there are traces of thermal paste or thermal pads on your CPU, please clean
them off first. Spread a thin coating of the supplied thermal paste on the CPU.
Caution: Applying too much thermal paste will lower the heat conductivity and
cooling performance!
Applying thermal paste
Step 4:
Caution: Peel off the protection film at the bottom side of the heatsink first!
Attaching the heatsink to the CPU
Step 5:
Place the heatsink on the CPU, so that the mounting holes of the fasten-
ing brackets screwed to the base of the cooler align with those of the
mainboard and the backplate.
Now screw the fastening brackets to the backplate employing the pres-
sure springs and the respective screws.
When employing the 90° fastening brackets, please use the supplied
mounting-tool to tighten the springscrews.
Caution: Tighten the screws until they stop.