Lga775 installation, Nh-u12f | installation manual – Noctua NH-U9F User Manual
Page 3
LGA775
Installation
Chapter 2
NH-U12F | Installation Manual
3
[ LGA775 Installation ]
[ Noctua NH-U12F ]
Mounting hardware:
1x LGA-backplate
(black, x-shaped without cut-out)
2x Long mounting bars
(fitting the backplane)
8x Short screws
4x Red, thin
washers
2x Pressure springs
2x
Standard fastening brackets
2x
Short, silver-coloured springscrews
In case you want to use the NH-U on an assembled system, you first have to
remove the mainboard from the case as the cooler has to be screwed together
with the backplate on the back side of the mainboard.
Removing the mainboard and retention module
Step 1:
If your mainboard uses a retention module for CPU cooler installation, you have
to remove it first. Should you experience any difficulties, please consult your
mainboard’s manual. If your previous CPU cooler is attached using a different
mounting mechanism, please remove it according to its manual.
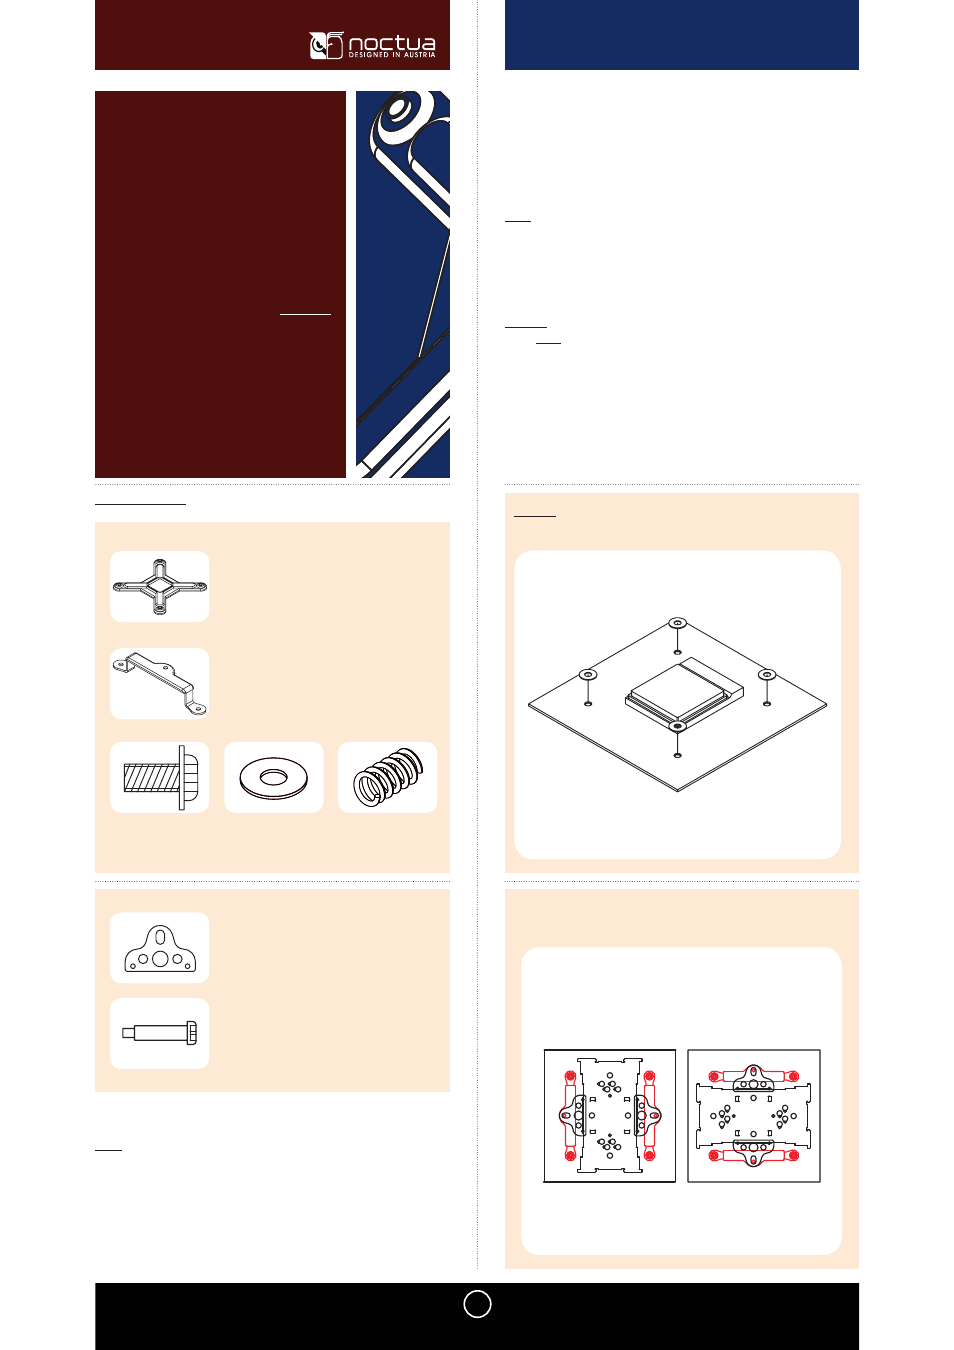
Place the backplate on the back side of the mainboard, aligning the backplate’s
screw sockets with the mainboard’s screwholes.
Caution: The rubber foam square of the LGA backplate has to face the main-
board. Don’t remove the white protection film!
Attaching the backplate on the back side of the mainboard
Step 2:
Caution: Don’t forget to put 4 washers between the mainboard and the
mounting bars to avoid damage to the mainboard.
Orientation A
Orientation B
Choose the alignment of the mounting bars according to the desired final
orientation of the cooler: