Maintenance, Bearing housing removal, Bearing housing installation – Multiquip TP24X User Manual
Page 27
Tp24X TILe SaW • operaTIon and parTS manuaL — rev. #2 (04/12/12) — page 27
BearIng HouSIng removaL
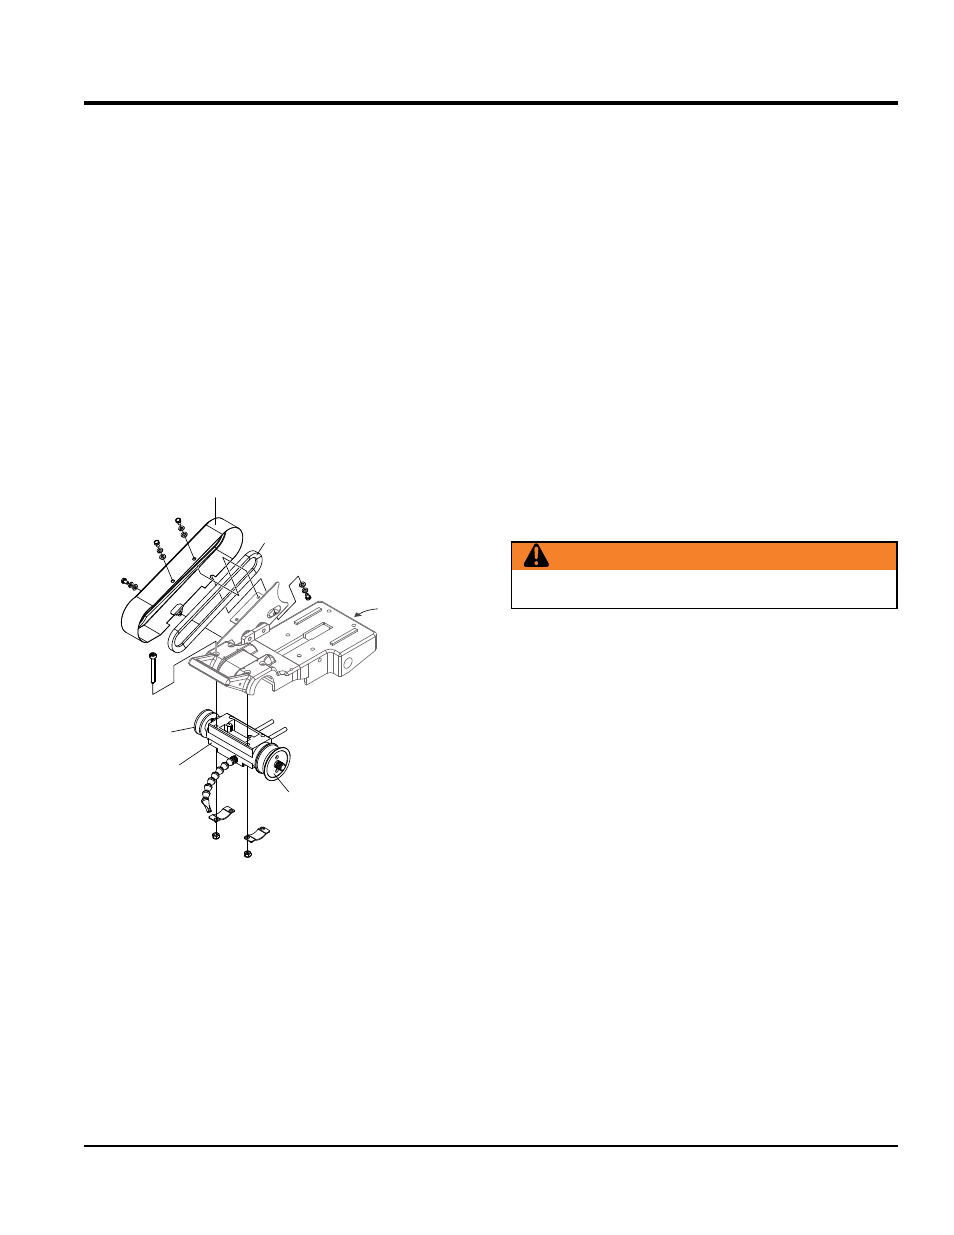
To remove the bearing housing (Figure 21), perform the
following:
1. Remove the 4 screws on the belt guard.
2. Remove the belt guard.
3. Loosen (do not remove) the adjustment screw behind
the mounting plate and the 4 screws on the motor base
to remove the belt.
4. Remove the blade lock nut and remove the blade (if
there is one present.)
5. Remove the 4 screws on the mounting plate closest to
the cutting head handle to remove the bearing housing
(including the attached pulley and inner flange.)
Figure 21. Bearing Housing Removal
ADJUSTMENT
SCREW
BELT
GUARD
BELT
PULLEY
BEARING
HOUSING
INNER
FLANGE
BearIng HouSIng InSTaLLaTIon
To install a new bearing housing, perform the following:
1. Make sure that the old housing has been properly
removed.
2. Unpack the new bearing housing and place the flat
portion face-down on a towel situated on a flat surface.
3. Secure the cutting head in a in a completely horizontal
position.
4. Slide the new bearing housing with the flat portion
facing upwards onto the 4 screws located below the
mounting plate. Take care not to damage the inner
flange. Lock the bearing housing into place by using
the brackets and nuts.
5. Pull the motor towards you, place the belt on the
pulleys, and tighten the motor position adjustment
screw. Be sure to leave some slack on the belt.
6. Align the belt by adjusting the motor pulley after
loosening the hex screw.
7. After aligning the belt, tighten the hex screw.
8. Replace the belt guard and lock into place using 4 screws.
WarnIng
Do not adjust the bearing housing pulley.
Maintenance