Hpha36c5h trowel — maintenance, Warning – Multiquip HPHA36C5H User Manual
Page 34
PAGE 34 — HPHA36C5H WALK-BEHIND TROWEL— OPERATION AND PARTS MANUAL — REV. #3 (07/06/10
)
HPHA36C5H TROWEL — MAINTENANCE
Changing The V- Belt
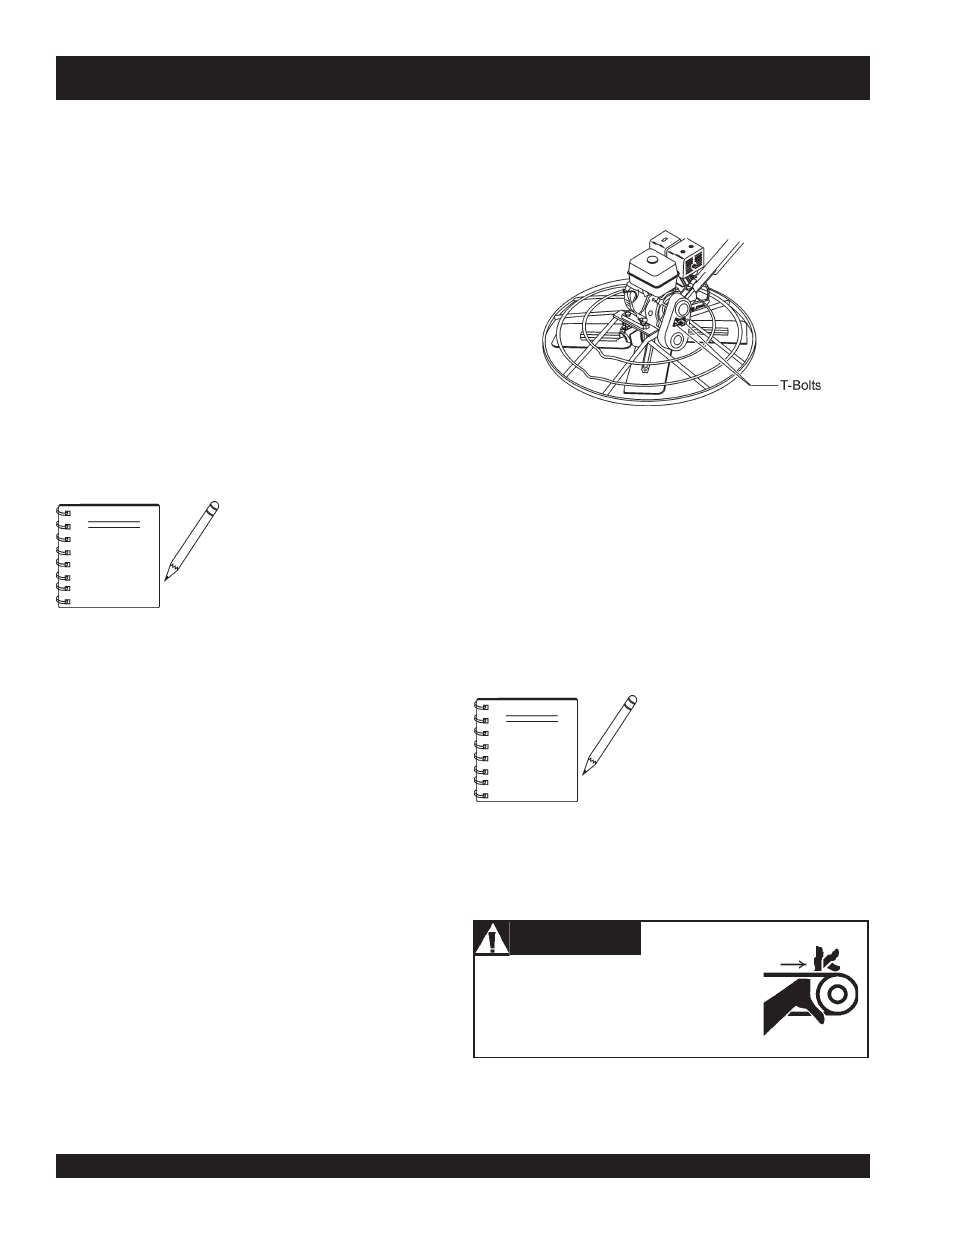
1. Unscrew the two (2) t-bolts from the belt guard and remove
the lockwashers.(Figure 46).
2. Work belt around and off the bottom pulley and remove belt.
3. Replace with the appropriate belt for your machine:
HPHA36C5H uses p/n 1390 (A-26)
4. Place the belt in the groove of the upper pulley then work the
belt over the bottom pulley into place.
Figure 48. Removing The Belt Guard
NOTE
The V-Belt will tension itself
automatically during operation. NO
FURTHER ADJUSTMENT OR
TENSIONING IS NECESSARY.
5. Replace the belt guard, lockwashers, and secure with the T-
bolts.
NEVER operate equipment with covers,
or guards removed. Keep
fingers, hands,
hair and clothing away from all moving
parts to prevent injury.
Testing
1. Place trowel in test area, start engine and test trowel for
smoothness.
2. If trowel bounces has excessive vibration or does not run
smoothly repeat alignment procedure.
NOTE
Before removing the blades,
please note the orientation of the
blade on the trowel arm.
2. Remove the three bolts and lock washers that secure the
blade to the trowel arm. Remove the blade.
3. Using a wire brush, scrape all concrete particles and foreign
debris from the trowel arm.
4. Install the new trowel blade onto the trowel arm. Make sure
blade is installed correctly, maintaining the proper orienta-
tion for direction of rotation.
5.
Reinstall
the three bolts and lock washers that secure the
blade to the trowel arm. Tighten all three bolts securely.
6. Repeat steps 2-5 for all remaining blades.
Changing a Blade
Whiteman recommends that
all the blades be changed at the
same time
. The machine may wobble or bounce if only some of
the blades are changed at one time.
1. Place the machine on a flat, level surface. Adjust the blade
pitch control to make the blades as flat as possible. Note the
blade orientation on the trowel arm.
WARNING
WARNING
WARNING
WARNING
WARNING