Maintenance, Daily service, Engine oil – Multiquip MVC82VH/VHW User Manual
Page 21: Air filter
MVC-82VH/VHW • OPERATION AND PARTS MANUAL — REV. #1 (04/25/08) — PAGE 21
MAINTENANCE
DAILY SERVICE
Check for leakage of fuel or oil.
Check engine oil.
Check for loose screws including tightness. See Table 7
below (tightening torque ) for retightening.
ENGINE OIL
1. Replace the engine oil in first 20 hours of operation
and every 100 hours afterwards.
2. Drain the engine oil when the oil is
warm after
operation. Remove the oil filler cap then unscrew the
engine oil drain plug located at the base of the engine.
Drain the old oil into a pan (Figure 14).
n
o
i
t
c
e
p
s
n
I
e
n
i
h
c
a
M
.
6
e
l
b
a
T
m
e
t
I
n
o
i
t
a
r
e
p
O
f
o
s
r
u
o
H
)
k
c
e
h
c
g
n
it
r
a
t
S
(
)
y
a
d
y
r
e
v
e
(
s
r
u
o
h
8
y
r
e
v
E
s
w
e
r
c
s
t
s
o
l
r
o
e
s
o
o
L
)
y
a
d
y
r
e
v
e
(
s
r
u
o
h
8
y
r
e
v
E
t
r
a
p
y
n
a
f
o
e
g
a
m
a
D
)
y
a
d
y
r
e
v
e
(
s
r
u
o
h
8
y
r
e
v
E
g
n
il
l
o
r
t
n
o
c
f
o
n
o
it
c
n
u
F
t
r
a
p
m
e
t
s
y
s
)
y
a
d
y
r
e
v
e
(
s
r
u
o
h
8
y
r
e
v
E
k
c
e
h
c
li
o
r
o
t
a
r
b
i
V
s
r
u
o
h
0
0
1
y
r
e
v
E
li
o
r
o
t
a
r
b
i
V
t
n
e
m
e
c
a
l
p
e
r
s
r
u
o
h
0
0
3
y
r
e
v
E
k
c
e
h
c
)
h
c
t
u
l
c
(
tl
e
b
-
V
r
u
o
h
0
0
2
y
r
e
v
E
r
e
t
e
m
a
i
D
)
m
c
/
g
k
.
n
i
(
e
u
q
r
o
T
g
n
i
n
e
t
h
g
i
T
.
7
e
l
b
a
T
l
a
i
r
e
t
a
M
m
m
6
m
m
8
m
m
0
1
m
m
2
1
m
m
4
1
m
m
6
1
m
m
8
1
m
m
0
2
T
4
0
7
0
5
1
0
0
3
0
0
5
0
5
7
0
0
1
,
1
0
0
4
,
1
0
0
0
,
2
T
8
-
6
0
0
1
0
5
2
0
0
5
0
0
8
0
0
3
,
1
0
0
0
,
2
0
0
7
,
2
0
0
8
,
3
T
1
1
0
5
1
0
0
4
0
0
8
0
0
2
,
1
0
0
0
,
2
0
0
9
,
2
0
0
2
,
4
0
0
6
,
5
*
)
m
m
0
1
(
0
0
7
~
0
5
6
)
m
m
8
(
0
5
3
~
0
0
3
)
m
m
6
(
0
0
1
)
m
u
n
i
m
u
l
a
f
o
s
i
t
r
a
p
-
r
e
t
n
u
o
c
e
s
a
c
n
I
(
*
)
.
d
e
d
n
a
h
t
h
g
i
r
ll
a
e
r
a
e
n
i
h
c
a
m
s
i
h
t
h
ti
w
e
s
u
n
i
s
d
a
e
r
h
T
(
.
)
w
e
r
c
s
d
n
a
,
tl
o
b
h
c
a
e
n
o
d
e
k
r
a
m
s
i
l
a
i
r
e
t
a
m
f
o
y
ti
l
a
u
q
d
n
a
l
a
i
r
e
t
a
M
(
3. Replace engine oil with recommended type oil as listed
in Table 4. For engine oil capacity, see Table 2 (engine
specifications). DO NOT overfill.
4. Reinstall drain bolt with sealing washer and tighten
securely.
Figure 14. Engine Oil (Draining)
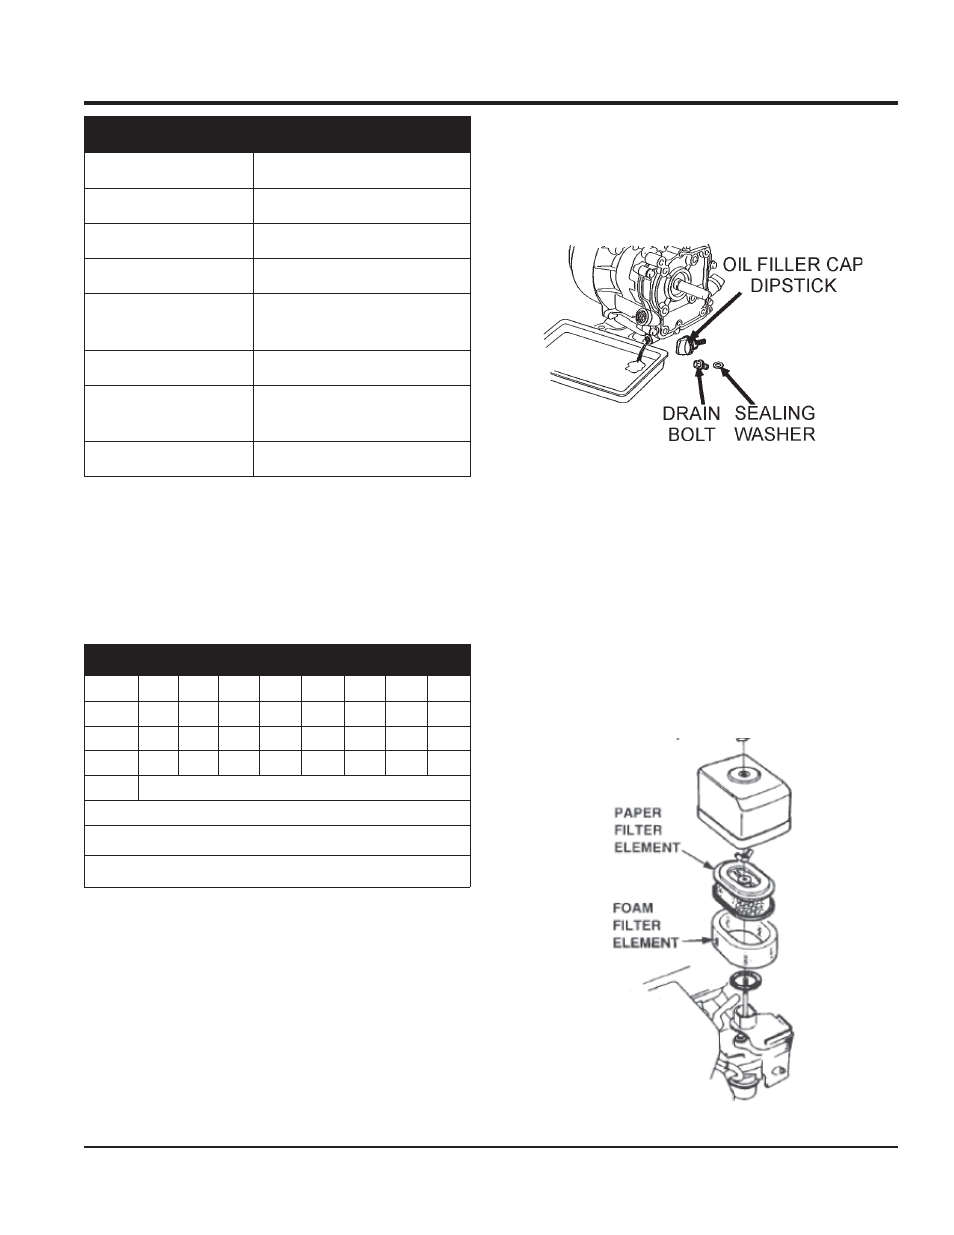
Figure 15. Air Cleaner
AIR FILTER
1. The air filter element should be cleaned because a
clogged air cleaner can cause poor engine starting,
lack of power and shorten engine life substantially.
2. To clean or replace air filter loosen the wing nut on the
air filter housing (Figure 15), remove the cover and
take out air filter cartridge. If only cleaning of the air
filter is desired blow through the air filter cartridge from
the inside, moving a jet of dry compressed air up and
down until all dust is removed.