Notice – MK Diamond PX-3 User Manual
Page 17
17
ASSEMBLY
Follow the assembly instructions to prepare your PX-3 for operation.
Fig. 8 Identify Blade parts
DUST NOZZLE
The PX-3 Dust Nozzle (Figure 12) assists on the removal of dust and debris from the cutting area. Its shape is
designed so it directs the flow of these particles to the shop vac hose (not included). The hose required is a 2-
1/2” in diameter. Connect the hose from your shop vac (not included) to the Dust Collector Outlet located at
the rear of the PX-3 Cutting Area (Figure 13).
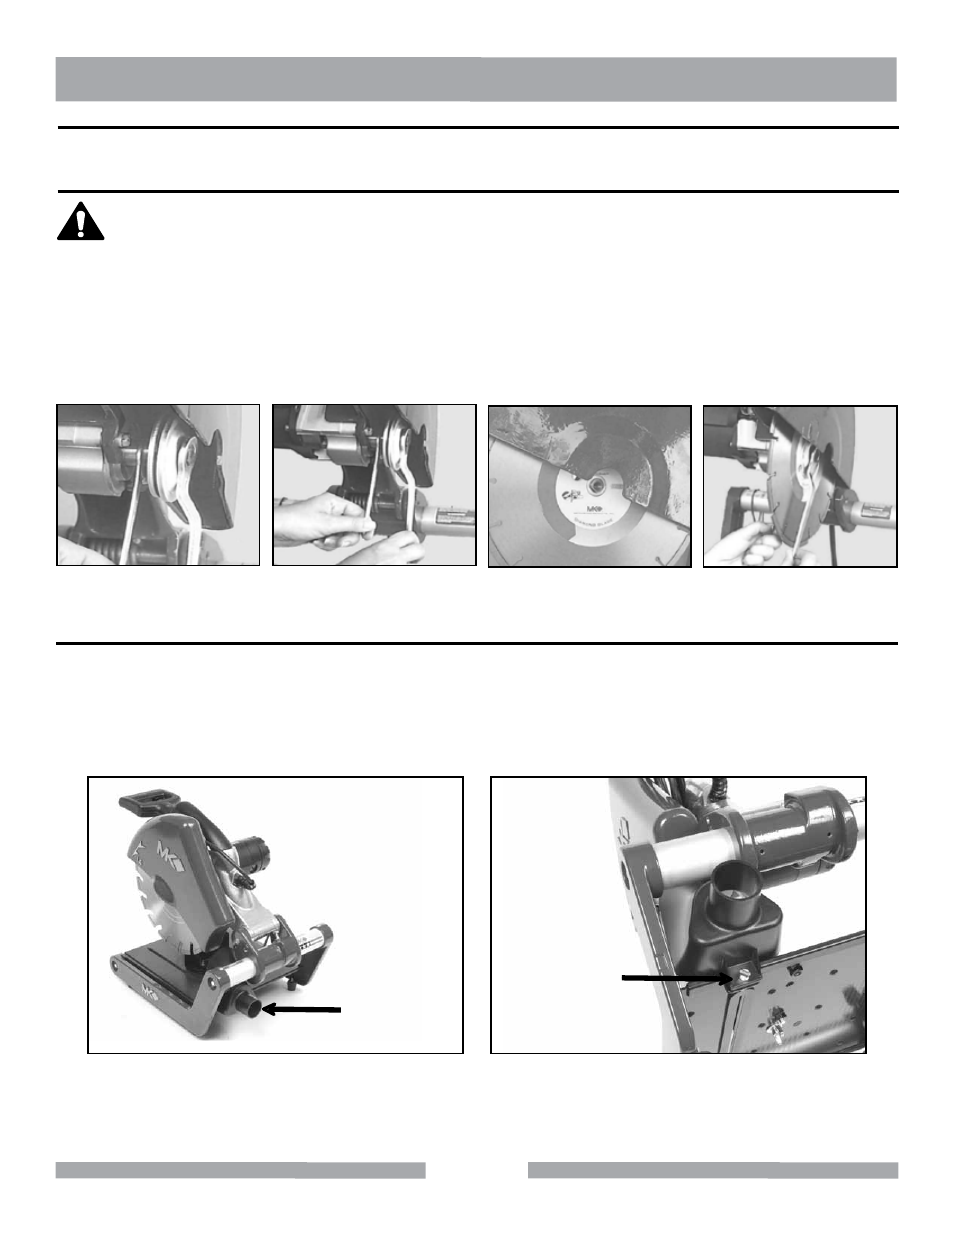
DIAMOND BLADE INSTALLATION
When installing the Retaining Screw, do not “cross-thread” and DO NOT overtighten the screw.
1.
2.
3.
4.
NOTICE
Identify Blade Retaining Screw and Outer Flange (Figure 8).
Remove Blade Retaining Screw and Outer Flange (Figure 9).
Install and seat Blade. Verify Rotation (Figure 10).
Install Blade Retaining Screw and Outer Flange then tighten (Figure 11).
Fig. 9 Remove parts
Fig. 10 Install Blade
Fig. 11 Install parts
Dust Nozzle
Attach Dust
Nozzle with
Shoulder
Thumb Screw
and Washer
Nut
Fig. 12 Dust Nozzle location
Fig. 13 Dust Collector Outlet location
PX-3 PAVER EXTREME
INSPECTION & SET-UP