Sceneprogramming – MBT Lighting CA1612 User Manual
Page 5
Dip Switch no.1 0 is not used with DMX but normally to select some
functions,i.e. Master/Slave,Sound activation, etc.
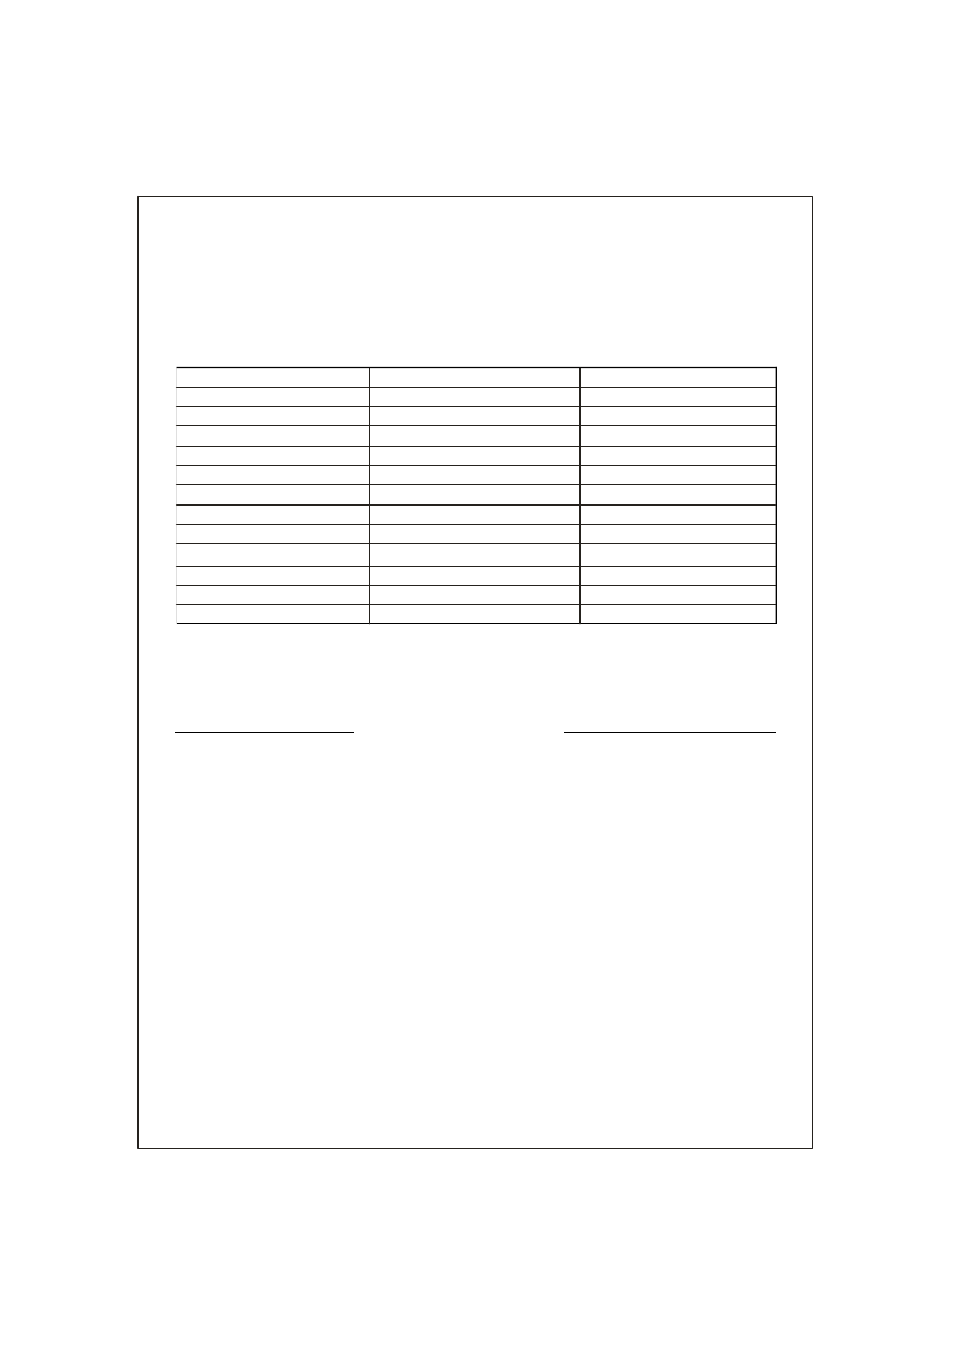
Each of the 12 fixtures is assigned 16 channels.The Dip switches are set
as per the chart below:
Scanners
Channels
Dip switches on
1
1~16
0 or 1 based on scanner
2
17~32
1,5
3
33~48
1,6
4
49~64
1,5,6
5
65~80
1,7
6
81~96
1,5,7
7
97~112
1,6,7
8
113~128
1,5,6,7
9
129~144
1,8
10
145~160
1,5,8
11
161~176
1,6,8
12
177~192
1,5,6,8
Note:
When addressing your fixtures,follow the starting address in this
instruction not the addressing found in your fixture user manual.
1.)Pressand hold
button for three seconds to activate program
Program
mode . The LCD next to''Program''blinks,indicating the program has
been started.
2.)Select a fixture to program,by pressing any or all
buttons 1 to 12.
Scanner
3.)Adjust the faders to the desired output level for all channels(i.e.Color,
Gobo,Pan,Tilt, etc.) of selected fixture or fixtures.Press Page Select
A/B if the fixture has more than 8channels.When selecting from PageA
to B,you have to move sliders to activate channels.
4.)If you have set the fixture to your liking and wish to program another
fixture,press the
button you have finished adjusting.
Scanner
This will hold the fixture in its final configuration.Select another fixture/s
by pressing the target
button and proceed to adjust the faders
Scanner
to achieve the settings you desire.
5.)Repeat steps2 and 3 until you have set the fixtures the way you like.
6.)When entire scene is set to your liking,press and release the MIDI/Add
button.
7.)Select the desired bank to store scene using the Up and Down Bank
select button.There are 30 banks you can store up to 8scenes per bank
for a total of 240 scenes.
SceneProgramming