Mayline Pie Connectors User Manual
Page 2
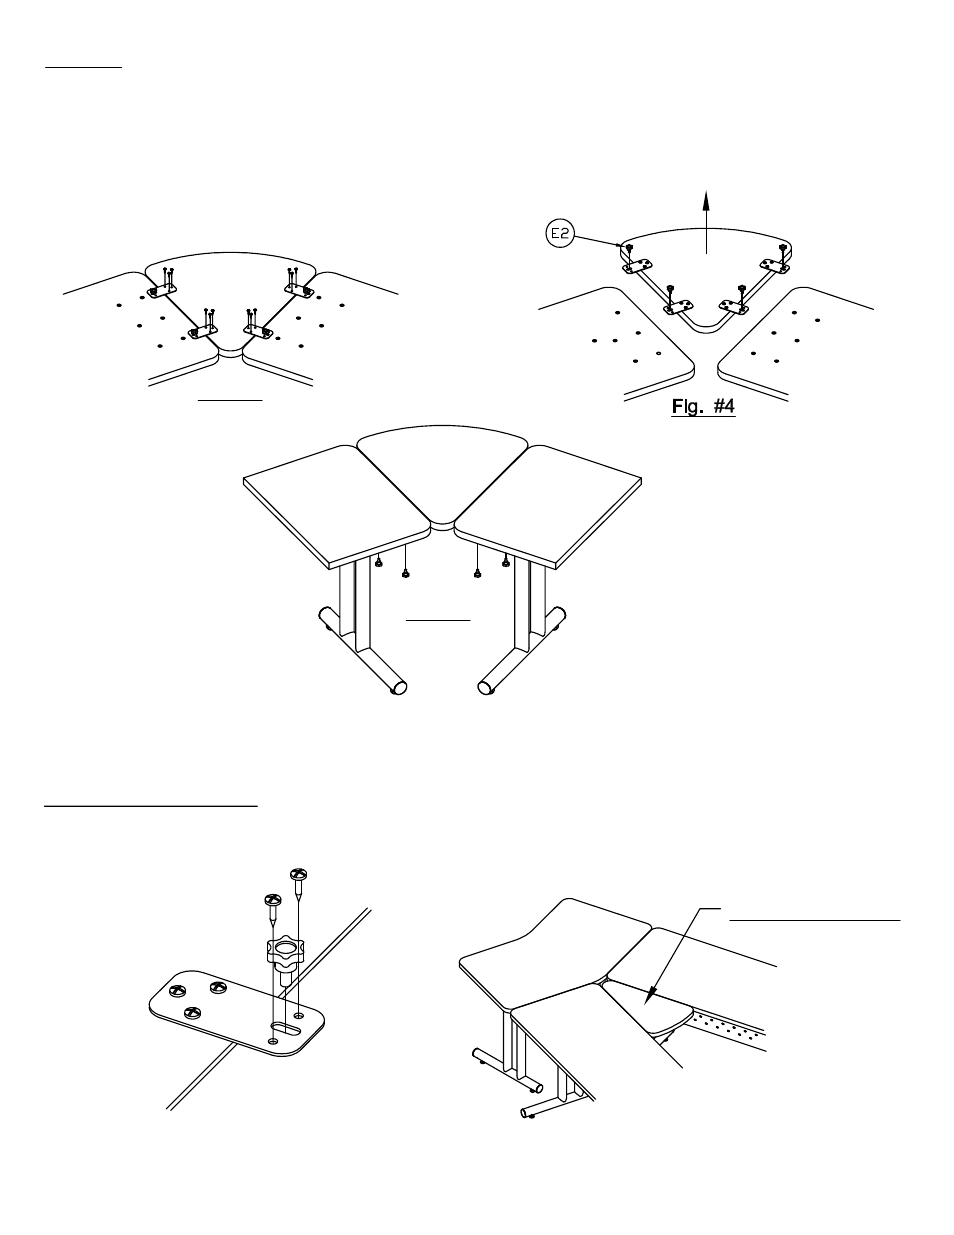
Assembly
3. Attach Pie Top (1) to Brackets (E1) using three Screws (E3) per bracket. See Fig. #3 No pilot hole necessary.
4. Remove Knobs (E1) & slide the Pie Table outward. See Fig. #4
5. Rotate Tables Right side up. Attach Knobs (E2) to Tables. See Fig. #5
Fig. #3
Fig. #5
Permanent Ganging Option
1. Extra Screws (E3) are provided for a permanent ganging solution or in a permanent conference table setting.
Conference Setting
(2)