Mayline CSII Privacy Panels User Manual
Page 4
(4)
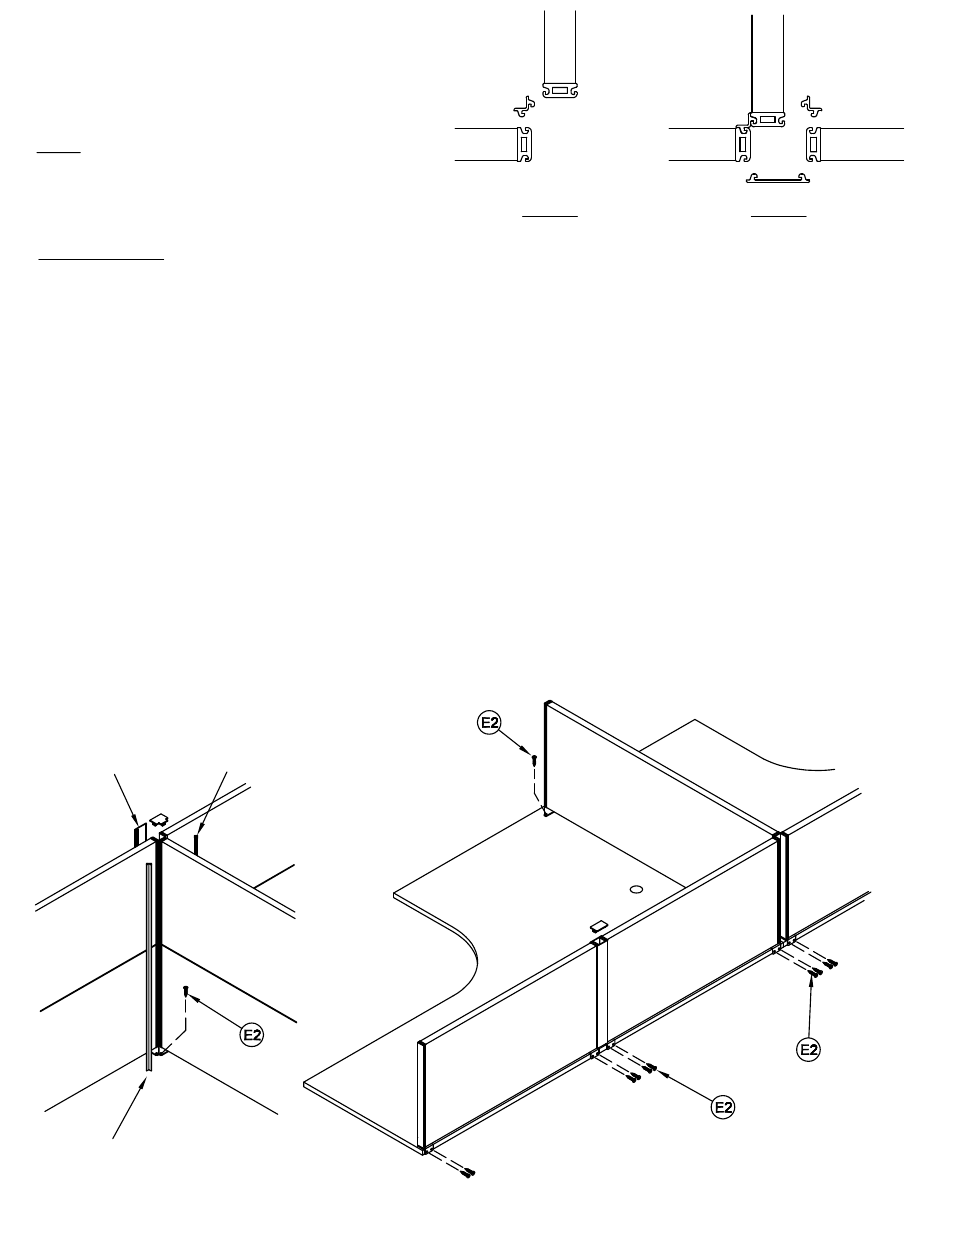
'T' Connection
:
1. REFER TO BASIC PANEL ASSEMBLY INSTRUCTIONS ON PAGE 1.
2. Place one assembled Panel with Base Posts - Single or Stacked - along the edge of ONE Work Surface at the
desired corner. Place the second assembled Panel at 90° to the first panel and insert the Inner Corne r filler strip from
the 'T' Connection Finishing Kit to maintain configuration. Attach these assembled Panels to the Work Surface edge
using two Screws (E2) per Base Post by driving screws through edge banding. Attach each Base Post to the Work
Surface face with one Screw (E2) per Post. Use 'CAUTION' when installing screw into the Work Surface laminate to
prevent marring the finish.
3. Using the appropriate Finishing Kit Components, extend the Panels to the desired length in each direction at this
time attaching each additional panel to the Work Surface as described in Step 1. Insert Caps to complete each
connection.
4. Move the Adjacent Work Surface into position.
5. Connect the third panel assembly to the existing 90° corner assembly from Step 2 using the other I nner Corner
filler strip and the outer Flush Strip. Attach this Panel to the Adjacent Work Surface as described in Step 1.
6. Using the appropriate Finishing Kit Components, extend the Panels to the desired length. Attach these additional
Panels to the Work Surface as described in Step 1. Insert Caps to complete each connection.
'INNER'
Corner Strip
'OUTER'
Flush Strip
'INNER'
Corner Strip
NOTE:
When ordering components, specific color and/or size
information is required. Contact a Mayline Customer
Service Representative. 1-800-822-8037
CATALOG No:
C9311
C9312
C9313
Step 2
Step 5