Operation, care, and cleaning of your ice machine – MARVEL Scientific 6ADi User Manual
Page 14
OPERATION, CARE, AND CLEANING OF YOUR ICE MACHINE
Operation (Turning on the ice machine)
Once the drain and water supply are hooked up, and the ice
machine is in place and leveled plug in the service cord. The ice
machine is shipped with the selector switch in the “OFF” posi-
tion. Place the switch to the “ON” position to turn on the ice
machine. The switch is located in the front grille, see 14 Figure
15 for location.
Your ice machine is unique in how it forms ice with fractional
freezing to form a slab of ice that is clear and has less mineral
content than the water it is produced from. This is accomplished
by running water over the cold evaporator plate which gradually
freezes the water to produce the ice slab. Mineral deposits are
left in the reservoir.
When the ice slab reaches the correct thickness determined by
the temperature of the evaporator plate, the electronic control
switches to the harvest cycle to harvest the ice. During the
harvest cycle, the ice slab falls from the evaporator to the ice
grid cutter. Here, the ice slab is cut into 3/4” squares by the grid
cutter’s heated wires. During the harvest cycle, the drain valve
will remain open for 45 seconds to drain the reservoir of remain-
ing deposits. After that, the water valve will open for two (2)
minutes providing two (2) quarts of water to the reservoir for the
next production cycle.
The ice machine will keep producing ice until the ice machine’s
bin is full and will restart automatically when ice needs to be
replenished in the bin.
Care of the Ice Machine
1. Avoid leaning on the cabinet door. You may bend the door
hinge or tip the unit.
2. Exercise caution when sweeping, vacuuming or mopping
near the front of the unit. Damage to the grille and/or
switch can occur.
3. Periodically clean the inside of the ice machine components
and inside of the unit.
4. Periodically check and/or clean the front grille and condens-
er coils as needed.
5. If your ice machine has either a stainless steel door and/or
cabinet, to keep it looking its best, we recommend periodi-
cally applying a stainless steel cleaner and a non-abrasive
stainless steel polish. This is especially important for
outdoor applications and locations near salt-water environ-
ments.
Cleaning the Ice Machine
Some impurities will remain and build up in the ice machine and
stick to the ice machine’s parts over time. This build-up must be
removed for proper ice production, ice quality, and ice machine
life. Your ice machine is equipped with a cleaning mode that will
help in cleaning out these impurities.
The impurities will need to be cleaned of this build-up regularly
(at the very least, annually), depending on use and water hard-
ness. Use a nickel safe ice machine cleaner, including but not lim-
ited to the following brands. Ice machine cleaners are available
at most appliance retailers or through the cleaner manufacturers
website.
Kirby’s Certified ice machine cleaner, 100% nickel safe.
Nu-Calgon nickel safe ice machine cleaner.
Franklin Machine Products nickel safe ice machine cleaner.
To clean the ice machine:
1. Switch the selector switch to the “OFF” position.
2. Remove the drain plug at the bottom of the reservoir to
drain any remaining water and then reinstall.
3. Access to the reservoir can be obtained by removing the
front panel screws and the front panel. Determine the
proper amount of cleaner from the ice machine cleaner
manufacturer’s mixture ratio based on three (3) quarts
of water (refer to the manufacturer’s directions). Add the
recommended cleaning solution to the reservoir of the ice
machine.
4. Replace the front cover panel and close the door.
5. Switch the selector switch on the grille of the ice machine to
the “CLEAN” position. Three (3) quarts of water will auto-
matically be added to the cleaning solution.
6. The total cleaning time will end in 49 minutes. The clean-
ing cycle will automatically rinse the evaporator plate and
also drain the cleaning solution and rinse the reservoir with
water.
7. After the cleaning cycle has ended, remove the front panel
again and check that the build-up has been removed. The
evaporator plate should be clean, shiny, and smooth to the
touch. If build-up is still visible, repeat the cleaning cycle
above. If build-up is removed, continue below.
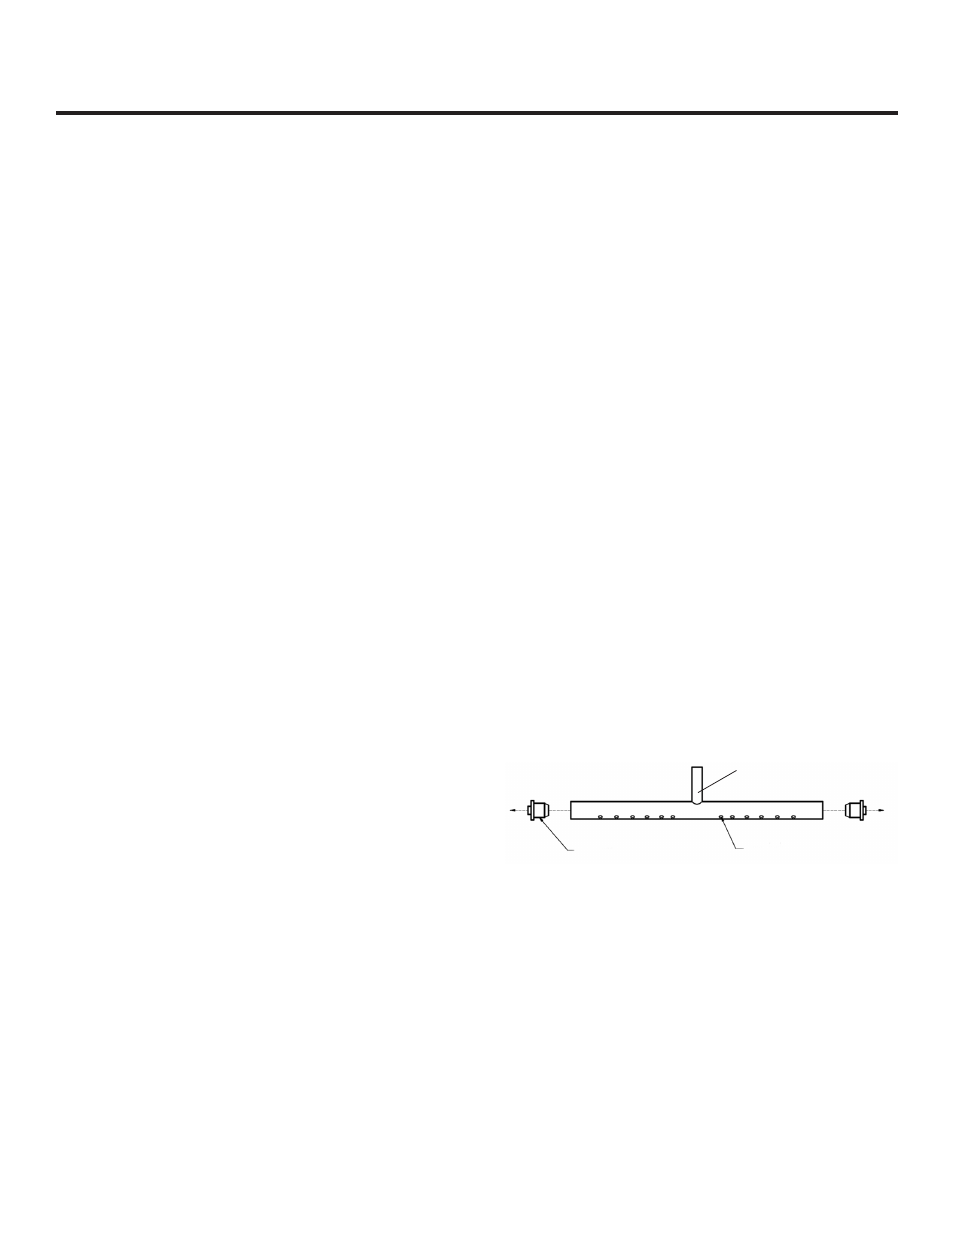
8. Remove the distributor tube, hose clamp, hose and its rubber
ends.
9. Thoroughly clean the inside of the distributor tube and the
spray holes. You can use the same cleaning solution as
before and an old toothbrush to reach the inside of the
distributor tube.
10. Reinstall the rubber ends, hose, and hose clamp to the
distributor and then reinstall the distributor tube to the
evaporator with the spray holes pointed to the bottom of the
evaporator plate. Reinstall the front cover panel with the
two (2) front panel screws.
Rubber ends
Spray Holes
Figure 14
Distributor tube
14