Lgt 1’ extension – Let's Go Aero LGT 1 Extension ACC 3075 User Manual
Page 4
LGT 1’ Extension
4
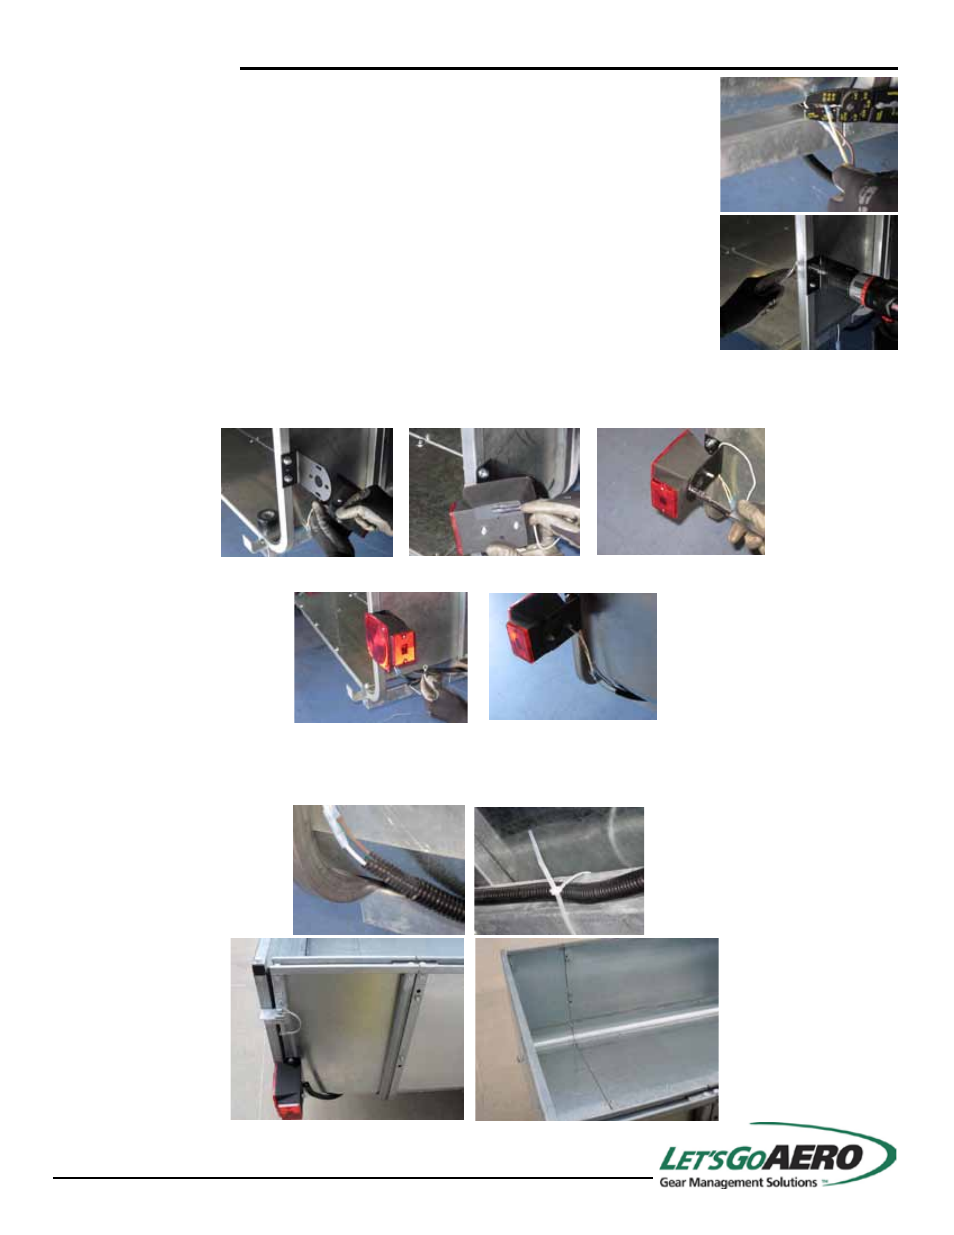
Step 11 Take the Wire Harness Extension and crimp each butt connector to its
counterpart on the trailer’s wire harness. The yellow wire will connect to the green trailer wire
when working on the passenger side.
Step 12 Reattach the two tail light brackets. Determine how much of the extended wire
harness to remove and make the necessary cuts. Again, strip about ½” insulation from
each wire, and thread into the corresponding holes on the rear of the tail light.
Step 13 Cut two 2” lengths of electrical tape (not supplied) and apply over the wiring and against the back of each tail light
to secure the wiring in the groove. Insert tail light studs through their respective brackets, place a lock washer and nut on
outside studs and tighten.
Step 14 Crimp a Ring Terminal on each white wire and place over inside studs followed by lock washers and the remain-
ing nuts. Tighten the nuts.
Step 15 Slip the two Ribbed Cable Protector Splices onto the wiring and halfway into the existing cable protector as
shown. Slip the 1’ lengths of ribbed cable protector onto the wiring and over the splices. Cut to length. Secure the wiring to
inside of LGT frame with zip ties.
Replace the end gate
.
For assistance, contact Let’s Go Aero at 877-464-2376 or 719-630-3800, or
[email protected]. Visit our website at www.LetsGoAero.com