Lgt 1’ extension, Assembly – Let's Go Aero LGT 1 Extension ACC 3075 User Manual
Page 2
LGT 1’ Extension
2
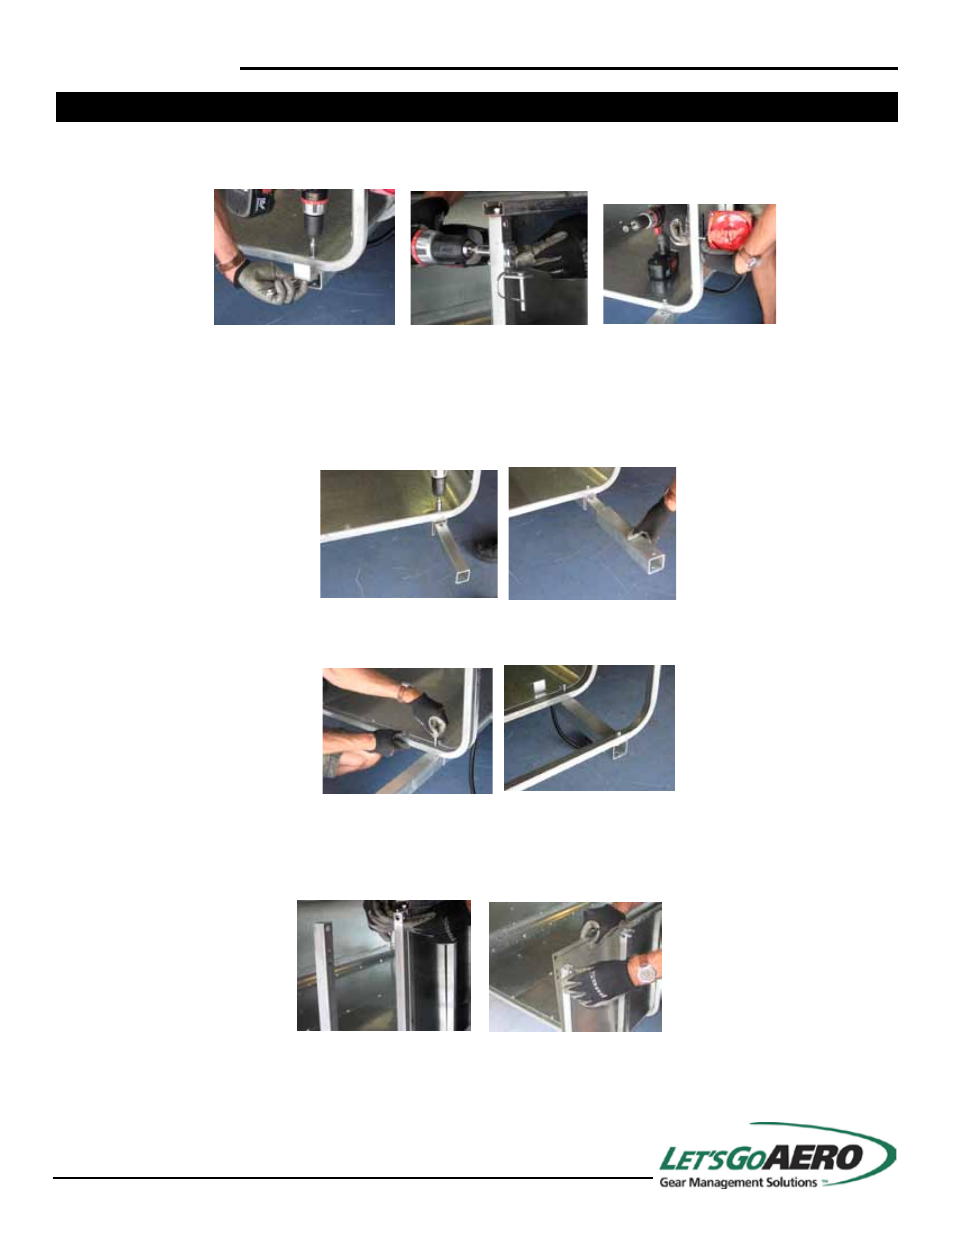
Step 1: Remove Hardwares
Remove rear end gate supports and hardware from rear of trailer body to include latches, brackets, and tail light assem-
blies. Set aside.
Assembly
Step 2: Install Extension Tubes
Locate the two Inside Frame Tubes (IFT) and the four 5/16” Spring Nuts. Using the 7/16” wrench (or a stick of wood) push
a spring nut into one of the tubes so that it aligns with one of the holes in the tube. Repeat this process for the other three
spring nuts and the second IFT.
Locate two 5/16 x 2” bolts, two flat washers, and two lock washers. Install the IFTs and slip the Outside Frame Telescope
Tubes over them, but do not secure.
Step 3: Install U-Tubes
Place the Body Style U-Tube on the Frame Tubes and keep in place using two 5/16” X 2” bolts. Place the End Gate Style
U-Tube on the Frame Tubes as shown. Keep it in place using the two End Gate Support Bracket bolts removed earlier.
Step 4: Attach Side Panels with Corner Coves and Insert Pin Nuts
Slip the four Pin Nuts into the holes near the tops of the Frame Tubes. Hang the two Side Panels with corner coves on the
U-Tubes. You will want the Pin Nuts to protrude slightly through the Side Panels.
Step 5: Attach C-Channel Extensions
Attach the two C-Channel Extensions to the rear (#10 U-Tube) Pin Nuts using two 5/16” X 1” bolts, two 5/16” lock wash-
ers, and two 5/16” flat washers. Leave the front end of the C-Channel Extension unsecured.